Ingredients
Equipment
Method
- Preheat your oven to 350°F (175°C) and line a baking sheet with parchment paper to prevent sticking.
- In a mixing bowl, combine the almond flour, all-purpose flour, baking powder, and salt. Whisk together until well blended.
- Add the softened butter, granulated sugar, vanilla extract, and egg to the dry ingredients. Mix with a spatula or hand mixer until the dough comes together and is smooth, about 2-3 minutes.
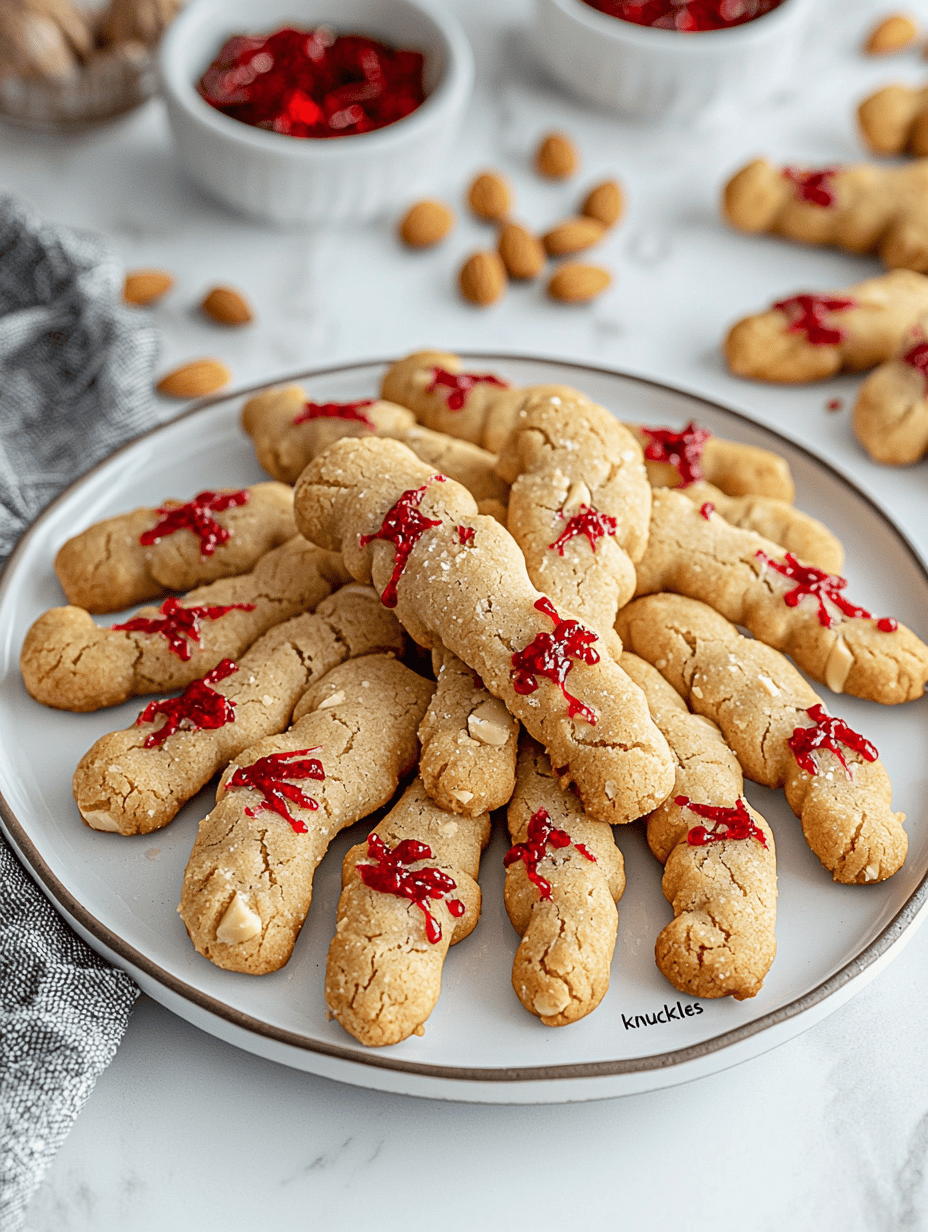
- Divide the dough into 24 equal portions. Roll each portion into a thin, elongated finger shape, tapering slightly at one end to resemble a knobby finger.
- Place the shaped cookies onto the prepared baking sheet, leaving space between each. Use a skewer or knife to create small knobby bumps along the length of each finger for a realistic effect.
- Gently press an almond sliver into the wide end of each finger to resemble a fingernail.
- Bake in the preheated oven for 12-15 minutes, or until the edges are golden brown and the shapes are firm.
- Allow the cookies to cool slightly on the baking sheet for a few minutes before transferring to a wire rack to cool completely.
- Once cooled, use a toothpick or small brush to gently dab the edible blood along the knobby sections for a bloody effect. Let it set for a few minutes.
- The finished cookies should have a brittle, crisp exterior with a slightly tender interior, resembling creepy fingers ready for a Halloween feast.
Notes
You can prepare the dough ahead of time and refrigerate it for up to a day before shaping and baking. For extra creepiness, dust with powdered sugar for a ghostly look before decorating.