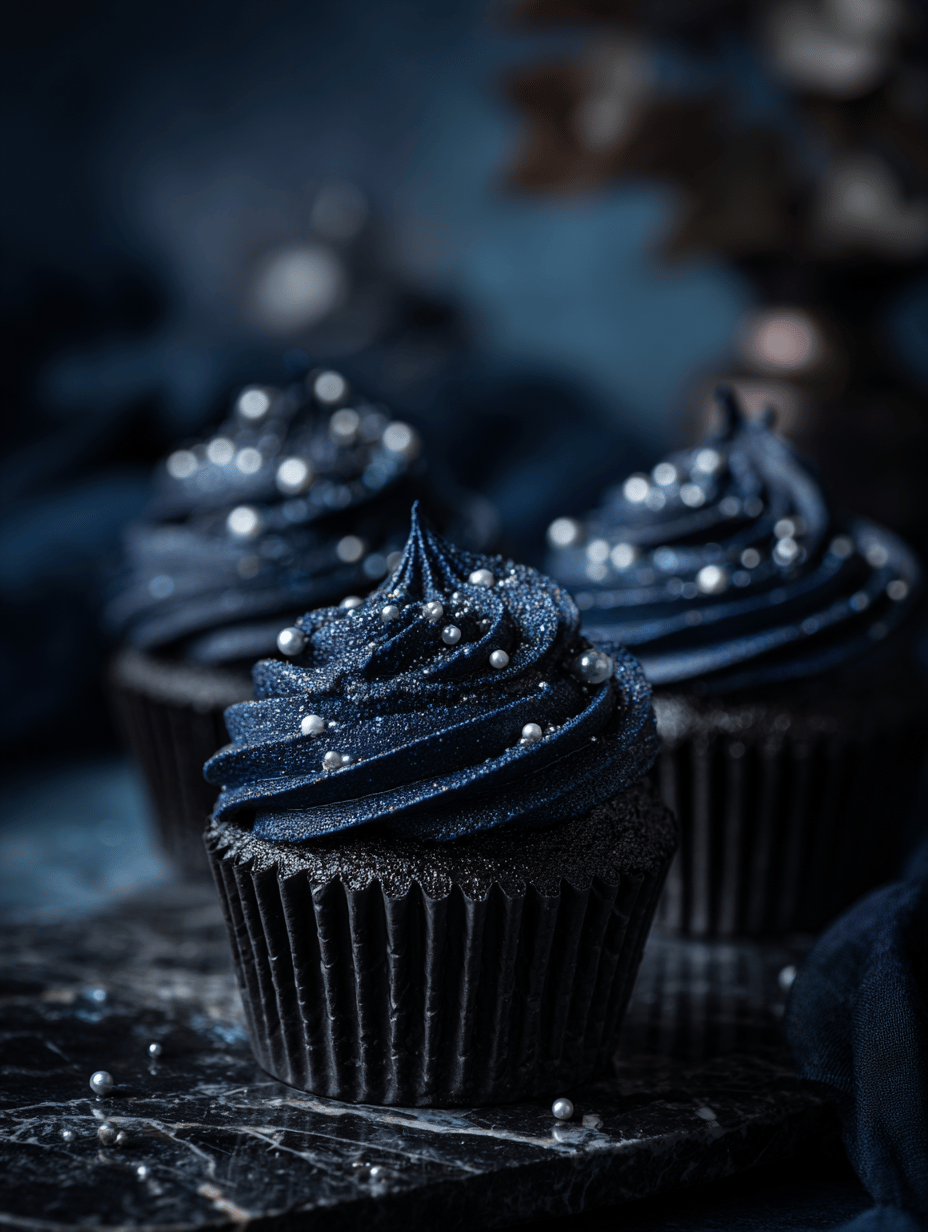
Category: Desserts

  • Spiced Pumpkin Cookies: A Cozy Fall Twist

    As autumn leaves crunch beneath your feet, the scent of pumpkin spices floats through the air, inspiring even the most hesitant bakers. These pumpkin cookies introduce a refreshingly unexpected twist to classic fall treats, combining rich pumpkin puree with aromatic spices and a tender crumb. It9s a perfect way to embrace the season while satisfying that craving for something warm and sweet.

    What sets this recipe apart is its versatility—gluten-free, vegan, or traditional, you can customize it to your taste or dietary needs. Baking these cookies feels like a tiny celebration of autumn, each warm bite evoking memories of crisp mornings and pumpkin patches. It9s a comforting project that turns simple ingredients into a heartfelt indulgence.

    Gather your spices, preheat your oven, and prepare yourself for a baking session that fills your home with a cozy aroma. These cookies are tender, with a slight chew from the oats and a burst of spice that hints at pumpkin pie. Perfect for sharing or sneaking a few for yourself as a quiet moment of seasonal joy.

    Pumpkin Spice Cookies

    These pumpkin spice cookies are soft and tender with a slightly chewy texture, featuring a warm blend of aromatic spices and a moist crumb. They are made by mixing pumpkin puree into a dough that includes oats and spices, then shaping and baking until lightly golden. The final cookies showcase a rustic appearance with a cozy, seasonal flavor profile.
    Prep Time 15 minutes
    Cook Time 12 minutes
    Total Time 27 minutes
    Servings: 12
    Course: Main Course
    Cuisine: American
    Calories: 150

    Ingredients
      

    • 1 1/2 cups rolled oats gluten-free, if needed
    • 1/2 cup brown sugar
    • 1/4 cup maple syrup or agave nectar
    • 3/4 cup pumpkin puree unsweetened
    • 1/4 cup coconut oil or vegan butter
    • 1 1/2 cups all-purpose flour
    • 2 teaspoons pumpkin pie spice
    • 1/2 teaspoon baking soda
    • 1/4 teaspoon salt

    Equipment

    • Mixing bowls
    • Measuring cups and spoons
    • Silicone spatula or wooden spoon
    • Baking sheet
    • Parchment paper
    • Cookie scoop or spoon

    Method
     

    1. Preheat your oven to 350°F (175°C) and line a baking sheet with parchment paper to prevent sticking.
    2. In a large mixing bowl, combine the rolled oats, brown sugar, pumpkin pie spice, baking soda, and salt. Stir until evenly mixed to create a dry base for the cookies.
    3. In a separate small bowl, melt the coconut oil or vegan butter if solid, then whisk in the maple syrup and pumpkin puree until smooth and well combined. The mixture should be fragrant and slightly viscous.
    4. Pour the wet mixture into the dry ingredients, then fold together with a spatula until the dough is uniformly combined and has a slightly sticky, dough-like consistency.
    5. Using a cookie scoop or spoon, portion out the dough into balls and place them evenly spaced on the prepared baking sheet. Gently flatten each ball slightly with your fingers or the back of a spoon.
    6. Bake the cookies in the preheated oven for about 10-12 minutes, or until the edges are golden brown and the centers look set.
    7. Remove the baking sheet from the oven and let the cookies cool on the sheet for 5 minutes to firm up, then transfer them to a wire rack to cool completely.
    8. Once cooled, these cookies develop a tender, chewy texture with a rustic appearance and a warm, spiced aroma—ready to be enjoyed as a cozy seasonal treat.

    Notes

    Optional: Add chopped nuts or vegan chocolate chips to the dough for added texture and flavor.

    Whenever I bake these pumpkin cookies, I feel a touch of seasonal magic in the air. The aroma alone can turn any dreary day into a celebration of fall9s bounty. They9re a reminder that sometimes, the simplest ingredients — pumpkin, spice, and a little love — create the most memorable treats.

    Make them your own with a drizzle of icing or a sprinkle of toasted pecans. No matter how you enjoy them, these cookies bring a little warmth and seasonal charm to any table. As the leaves fall outside, the comforting smell and taste inside make every moment feel just right.

  • Spooky Sweetness: Hidden Spice Pumpkin Cheesecake Bars

    Spooky Sweetness: Hidden Spice Pumpkin Cheesecake Bars

    Halloween is the perfect moment to elevate your dessert game with something unexpected. These Pumpkin Cheesecake Bars are a veiled treasure, blending the cozy warmth of pumpkin with a whisper of spice and a crunchy graham cracker crust. The secret ingredient? A subtle hint of smoked paprika that adds depth without overwhelming the sweet.

    Imagine slicing into a bars that smell like autumn harvest—warm pumpkin, cinnamon, and just a touch of smokiness. It’s not just about the taste but the layered aroma that will have guests guessing what makes these so addictive. These bars turn the typical pumpkin treat into a mischievous twist everyone will remember.

    Pumpkin Cheesecake Bars with Smoked Paprika

    Pumpkin Cheesecake Bars are layered desserts with a spiced pumpkin filling set atop a crunchy graham cracker crust. The filling is baked until smooth and slightly puffed, then cooled to develop a creamy, firm texture with a hint of smoky paprika that adds depth to the autumnal flavors.
    Prep Time 20 minutes
    Cook Time 40 minutes
    Total Time 1 hour
    Servings: 12
    Course: Main Course
    Cuisine: American
    Calories: 340

    Ingredients
      

    • 1 1/2 cups graham cracker crumbs
    • 1/4 cup granulated sugar
    • 1/2 cup unsalted butter melted
    • 16 oz cream cheese softened
    • 1 cup granulated sugar
    • 1/2 cup sour cream
    • 3 large eggs
    • 1 1/2 cups pure pumpkin puree
    • 1 1/2 teaspoons ground cinnamon
    • 1/4 teaspoon ground nutmeg
    • 1/4 teaspoon smoked paprika adds depth

    Equipment

    • 9×13 inch baking dish
    • Mixing bowls

    Method
     

    1. Combine graham cracker crumbs and sugar in a bowl, then stir in melted butter until the mixture resembles wet sand. Press this mixture evenly into the bottom of a prepared baking dish to create a firm crust. Bake at 350°F (175°C) for 8-10 minutes until lightly golden, then let cool slightly.
    2. In a large mixing bowl, beat the softened cream cheese with a hand or stand mixer until smooth and creamy. Add sugar and continue to blend until well combined and fluffy.
    3. Add the sour cream and mix just until incorporated, then beat in the eggs one at a time, blending well after each addition.
    4. Fold in the pumpkin puree, cinnamon, nutmeg, and smoked paprika, mixing gently until the filling is smooth and uniform in color and aroma. The mixture should be thick but pourable.
    5. Pour the pumpkin cheesecake filling over the cooled crust, spreading it out evenly with a spatula. Tap the dish gently on the counter to settle the filling and remove air bubbles.
    6. Bake at 350°F (175°C) for 35-40 minutes, or until the edges are set and the center slightly jiggles when shaken gently. The top may turn a light golden hue.
    7. Allow the bars to cool completely in the baking dish on a wire rack, then refrigerate for at least 2 hours or until thoroughly chilled and firm.
    8. Slice into squares using a sharp knife, wiping the blade clean after each cut for clean edges. Serve chilled for the best texture and flavor.

    Notes

    For an extra smoky flavor, lightly sprinkle smoked paprika on top before serving. These bars can be stored in the refrigerator for up to 3 days.
    As the season changes and the nights grow longer, these Pumpkin Cheesecake Bars offer a comforting yet playful ending to any Halloween gathering. Their rich creaminess paired with a hint of spice captures the spirit of fall perfectly.

    Enjoy the burst of flavors and the delightful crunch each bite offers. Whether you’re baking with kids or spice-testing with friends, this recipe will surely spark joy and a few surprised looks. Keep a few extras in the fridge—these bars are just waiting for their moment to shine on a chilly evening.

  • Spooky Glam: Halloween Pumpkin Rice Krispie Treats That Charm and Delight

    Spooky Glam: Halloween Pumpkin Rice Krispie Treats That Charm and Delight

    Halloween is the perfect time to play with food—turning simple ingredients into magical creations. This year, I decided to craft Pumpkin Rice Krispie Treats with a twist that’s both charming and a little chaotic. The aroma of toasted marshmallows mingling with spicy pumpkin spices instantly sparks festive memories.

    These treats are more than just sweet snacks; they’re a nod to nostalgic childhood flavors, dressed up for spooky fun. Bright orange pumpkins with fun faces and gooey centers make them irresistible for kids and adults alike. Plus, the process is a delightful holiday mess you won’t mind cleaning up.

    Pumpkin Rice Krispie Treats

    This recipe combines toasted marshmallows and pumpkin spices with crispy rice cereal to create festive, orange-hued treats. The mixture is melted and stirred until smooth and sticky, then shaped into fun pumpkin forms with facial features for a playful, textured final appearance.
    Prep Time 15 minutes
    Cook Time 10 minutes
    Total Time 25 minutes
    Servings: 12
    Course: Main Course
    Cuisine: festive
    Calories: 150

    Ingredients
      

    • 4 cups marshmallows preferably large white marshmallows
    • 6 cups rice cereal such as Rice Krispies
    • 1/2 cup unsalted butter
    • 1 teaspoon cinnamon optional pumpkin spice
    • 1/2 teaspoon ground nutmeg optional pumpkin spice
    • 2 cups orange candy melts or tinted white chocolate for coating and decorations
    • Black icing or chocolate for faces optional for decorating

    Equipment

    • Large saucepan
    • Wooden spoon or heatproof spatula
    • Wax paper or silicone mat
    • Pumpkin-shaped cookie cutters or freehand carving tools

    Method
     

    1. Grease a large saucepan and melt the butter over low heat, releasing a rich, buttery aroma.
    2. Add the marshmallows to the melted butter, stirring constantly until completely melted and smooth. The mixture will bubble gently and become glossy.
    3. Sprinkle in cinnamon and nutmeg, stirring to evenly distribute the warm spice aroma throughout the glossy mixture.
    4. Remove the saucepan from heat and immediately pour in the rice cereal, folding gently with a spatula until the cereal is fully coated with the marshmallow mixture.
    5. Transfer the mixture onto a prepared surface lined with wax paper or a silicone mat. Press it into an even layer with your hands or spatula. Let it cool slightly until just firm enough to handle.
    6. While still warm, carefully shape the mixture into pumpkin shapes or use a pumpkin-shaped cookie cutter to cut out rounds. Gently press facial features into the figures to create fun faces.
    7. Melt orange candy melts or tinted white chocolate according to package instructions until smooth and fluid.
    8. Dip the cooled pumpkin treats into the melted candy, coating them completely, or drizzle the melted chocolate over the shapes for a vibrant orange finish.
    9. Place the coated treats on the same wax paper or silicone mat and let the coating set until firm and shiny. Use icing or chocolate to add eyes, noses, and mouths for character faces.
    10. Allow the decorated treats to sit at room temperature until the coating is completely hardened and glossy.
    11. Enjoy these sweet, crispy pumpkin treats as a festive and fun Halloween snack!
    As the last of the treats set and your home fills with the smell of sugar and spice, it’s clear these treats are more than just a dessert—they’re a Halloween tradition in the making. The little faces and playful shapes add a touch of joy to the spooky season. Every bite offers a nostalgic punch, paired with the cozy feeling of autumn.

    This recipe reminds us that sometimes, the simplest ingredients can create the most memorable holiday moments. Whether sharing with friends or enjoying in quiet moments, these Pumpkin Rice Krispie Treats bring a festive sparkle. Now, with a batch ready to impress, you’re all set for a sweet, spooky celebration.

  • Hidden Secrets of the Perfect Apple Cake

    Hidden Secrets of the Perfect Apple Cake

    Many apple cakes fall flat because they miss that surprising twist—something unexpected in the flavor or texture. Today, I want to share an apple cake that’s not just sweet but layered with a hint of spice and a dash of crunch from toasted nuts. It’s all about elevating a classic with little secrets that make every bite memorable.

    As the seasons turn, apples become a comforting constant in my kitchen, and this recipe is a testament to that cozy familiarity. Beware: once you try this, it will become your go-to for everything from lazy afternoons to festive gatherings. The aroma alone is enough to make anyone gather in anticipation.

    Spiced Apple Cake with Toasted Nuts

    This apple cake features tender, moist layers infused with subtle spices, layered with chopped apples for natural sweetness. The batter is baked until golden, with a crunchy topping from toasted nuts that adds texture and flavor to each bite.
    Prep Time 20 minutes
    Cook Time 45 minutes
    Total Time 1 hour 5 minutes
    Servings: 8
    Course: Main Course
    Cuisine: American
    Calories: 350

    Ingredients
      

    • 2 cups all-purpose flour sifted
    • 1 1/2 cups granulated sugar
    • 1/2 cup unsalted butter melted and cooled
    • 3 large eggs room temperature
    • 1/2 cup milk
    • 2 tsp vanilla extract
    • 1 1/2 tsp baking powder
    • 1/2 tsp ground cinnamon
    • 1/4 tsp ground nutmeg
    • 3 medium apples peeled, cored, and chopped
    • 1/2 cup chopped nuts toasted
    • 2 tbsp brown sugar for topping

    Equipment

    • Mixing bowls
    • Whisk
    • Loaf pan or round cake pan
    • Toaster oven or oven
    • Knife
    • Cutting board
    • Spatula

    Method
     

    1. Preheat your oven to 350°F (175°C) and grease your baking pan.
    2. In a large mixing bowl, whisk together the sifted flour, sugar, baking powder, cinnamon, and nutmeg until evenly combined. This creates a flavorful dry base for the batter.
    3. In a separate bowl, beat the eggs until slightly frothy, then add the melted butter, milk, and vanilla extract. Whisk until smooth and well blended.
    4. Pour the wet mixture into the dry ingredients and gently fold with a spatula until just combined. Be careful not to overmix; the batter should be a bit lumpy.
    5. Fold in the chopped apples, distributing them evenly throughout the batter. This gives the cake with bursts of apple flavor and moisture.
    6. Pour the batter into your prepared pan, smoothing the top with a spatula for an even layer.
    7. Place the pan in the oven and bake for about 45 minutes, or until a toothpick inserted into the center comes out clean and the top is golden brown.
    8. While the cake bakes, toast the chopped nuts in a dry skillet over medium heat until fragrant and golden, about 3-5 minutes. Toss frequently to prevent burning.
    9. Remove the cake from the oven and let it cool slightly in the pan for 10 minutes, then transfer to a wire rack to cool completely.
    10. Sprinkle the toasted nuts and brown sugar evenly over the cooled cake, adding a tasty crunch and sweet finish.
    11. Slice and enjoy this moist, spiced apple cake with crunchy nut topping—perfect for cozy afternoons or festive gatherings.

    This apple cake is a slice of my seasonal memories, a warm hug of baked cinnamon and tender fruit. It embodies the moment when simple ingredients turn into something extraordinary, connecting past and present in every forkful. No matter the occasion, it’s a dessert that invites smiles and shared stories.

    Enjoying this cake feels like a small celebration—an ode to homespun comfort and autumn’s bounty. Sometimes, the most ordinary ingredients create the most extraordinary moments around the table. And that’s what makes baking so beautifully unpredictable and endlessly rewarding.

  • Vivid Halloween Candy Corn Parfaits: A Nostalgic Twist with a Chewy Surprise

    Vivid Halloween Candy Corn Parfaits: A Nostalgic Twist with a Chewy Surprise

    Halloween baking often sticks to familiar themes, but I wanted to flip the script with something unexpectedly delicious. These Candy Corn Parfaits mix the classic seasonal colors with a surprise chewy layer that sparks childhood memories. The result is a playful, festive dessert that’s as eye-catching as it is deeply satisfying.

    What makes this recipe stand out is the textural contrast—the fluffy cream, crunchy cookies, and that unexpected chewiness. It’s perfect for those who crave a bit of chaos in their dessert table, while still feeling comforted by familiar flavors. Plus, it’s surprisingly easy to assemble, making it an irresistible project for busy spooky nights.

    Candy Corn Parfaits

    Candy Corn Parfaits are layered desserts that combine fluffy whipped cream, crunchy cookies, and chewy candy corn in vibrant, festive colors. The dessert features distinct textural contrasts and a visual appeal reminiscent of Halloween candy, finished with a playful stacking of ingredients. It is assembled in individual glasses, creating a colorful and satisfying treat.
    Prep Time 15 minutes
    Total Time 15 minutes
    Servings: 4
    Course: Main Course
    Cuisine: American
    Calories: 150

    Ingredients
      

    • 1 cup whipped cream preferably chilled
    • 1/2 cup crushed sugar cookies for crunch and flavor
    • 1 cup candy corn for color and chewiness

    Equipment

    • Mixing bowls
    • Whisk or hand mixer
    • Serving glasses or jars
    • Spatula

    Method
     

    1. Begin by gently folding the crushed sugar cookies into the whipped cream until just combined, maintaining its fluffy texture.
    2. Spoon a layer of the whipped cream mixture into the bottom of each glass, filling about one-third of the space and creating a smooth, even surface.
    3. Add a generous handful of candy corn on top of the first layer, spreading them out evenly for a colorful, chewy layer.
    4. Repeat the process: add another layer of whipped cream over the candy corn, smoothing the surface with the spatula.
    5. Top the parfaits with a final scattering of candy corn, making sure they are visually vibrant and inviting.
    6. Place the parfaits in the refrigerator for about 10 minutes to set slightly, then serve immediately for the best texture and visual appeal.

    Notes

    For added flair, briefly chill the whipped cream before folding in the cookies to enhance its fluffiness. Feel free to add a sprig of mint or extra candy corn on top before serving for a festive touch.

    These parfaits are a fun way to indulge your sweet tooth without feeling overwhelmed. Their layered colors and textures make them a real showstopper, perfect for Halloween parties or a cozy night in. The best part? You can customize the ingredients to make each spoonful uniquely yours.

    As the season shifts, these desserts serve as a delightful reminder of childhood innocence mixed with festive fun. They bring a burst of joy to the table, enlivening even the simplest gatherings. In the end, it’s all about adding a touch of playful nostalgia to your fall celebrations.

  • Spooky Sweetness: Halloween Graveyard Pudding Cups

    Spooky Sweetness: Halloween Graveyard Pudding Cups

    As October’s chill settles in, I love how desserts can transform into mini spooky landscapes. These Halloween Graveyard Pudding Cups do just that, turning a simple treat into a tiny eerie scene. The smell of rich chocolate mingling with the crunch of crushed cookies makes my kitchen feel alive with festive chaos.

    Crafting these requires just a few ingredients, but the visual impact is fantastic. Kids and adults alike are drawn to the eerie tombstones and the pretend dirt, making them perfect for any Halloween gathering. Let’s dive into creating a spooky, delicious centerpiece that’s as fun to make as it is to eat.

    Halloween Graveyard Pudding Cups

    These Halloween Graveyard Pudding Cups are layered desserts featuring rich chocolate pudding topped with crushed cookies to resemble dirt. Decorated with tombstone-shaped cookies and candy cobwebs, they create a spooky miniature landscape with a creamy, crunchy texture. The assembled cups resemble a disturbed graveyard, perfect for festive Halloween celebrations.
    Prep Time 15 minutes
    Cook Time 10 minutes
    Total Time 25 minutes
    Servings: 4
    Course: Main Course
    Cuisine: Halloween
    Calories: 250

    Ingredients
      

    • 2 cups milk for pudding
    • 1/4 cup unsweetened cocoa powder to add chocolate flavor
    • 1/2 cup powdered sugar for sweetness
    • 1 teaspoon vanilla extract
    • 1 package instant chocolate pudding mix prepared according to package instructions
    • 1 1/2 cups crushed chocolate cookies for dirt and texture
    • 4 large cookie tombstones store-bought or homemade, cut into tombstone shapes
    • Optional candy cobwebs or spider decorations for extra spooky effect

    Equipment

    • Mixing bowls
    • Whisk
    • Measuring cups and spoons
    • Serving cups or jars
    • Spoon or spatula
    • Baking sheet
    • Parchment paper

    Method
     

    1. Whisk together the milk, cocoa powder, powdered sugar, and vanilla in a large bowl until smooth and slightly thickened.
    2. Add the instant chocolate pudding mix to the mixture and whisk vigorously for about 2 minutes until well combined and beginning to thicken.
    3. Spoon or pipe the chocolate pudding into individual cups or jars, filling each about two-thirds full.
    4. Gently top the pudding layers with crushed cookies to resemble loose dirt and create a rough, uneven surface for the graveyard scene.
    5. Place cookie tombstones into the crushed cookie surface, sticking them upright to resemble gravestones.
    6. Decorate the scene by adding candy cobwebs or small spider decorations on and around the tombstones for a spooky effect.
    7. Repeat layering and decorating in remaining cups for a full set of spooky graveyard scenes, then chill in the refrigerator for at least 15 minutes before serving.

    Notes

    For easier assembly, prepare the pudding in advance and have everything set up before layering. Using store-bought tombstone cookies simplifies the process, but you can also cut out shapes from sturdy cookies or graham crackers. Chill the assembled cups to help set the decorations and improve flavor.

    These graveyard pudding cups are a perfect way to bring a touch of spooky fun to your dessert table. Their quirky, chaotic look is matched by the irresistible taste of chocolate and vanilla layers.

    Enjoy the process of decorating and the delight on everyone’s faces as they discover the little edible graveyard. With minimal effort and maximum spookiness, these cups will become a highlight of your Halloween festivities.

  • Spice Up Your Fall with These Unconventional Pumpkin Cookies!

    Spice Up Your Fall with These Unconventional Pumpkin Cookies!

    As the leaves turn vibrant shades of orange and gold, I find myself craving a treat that captures the essence of autumn. But this time, I wanted to go beyond the usual pumpkin pie or muffins. That’s when I decided to craft a batch of pumpkin cookies with a twist—flavored with unexpected spices and a hint of savory magic.

    These cookies are not just sweet bites; they are a scent-memory in the making. Crisp edges, chewy centers, and a complex blend of spices make each bite an adventure. Perfect for those who love to surprise their palate with something both familiar and entirely new.

    Spiced Pumpkin Cookies with Savory Touches

    These pumpkin cookies are baked treats featuring a moist, chewy center and crisp edges, infused with warm spices and subtle savory elements. They are prepared by mixing wet and dry ingredients, shaping the dough, and baking until golden, resulting in aromatic cookies with a slightly spiced and complex flavor profile.
    Prep Time 20 minutes
    Cook Time 12 minutes
    Total Time 32 minutes
    Servings: 12
    Course: Main Course
    Cuisine: American
    Calories: 150

    Ingredients
      

    • 1 cup canned pumpkin pureed pumpkin, preferably unsweetened
    • 1/2 cup granulated sugar
    • 1/4 cup brown sugar light or dark
    • 1/4 cup olive oil or melted coconut oil
    • 1 large egg
    • 1 1/2 cups all-purpose flour
    • 1 teaspoon baking soda
    • 1/2 teaspoon ground cinnamon warm spiced aroma
    • 1/4 teaspoon ground ginger adds a spicy heat
    • 1/4 teaspoon ground cloves intensifies warm spice
    • 1/2 teaspoon vanilla extract enhances flavor
    • 1/4 teaspoon sea salt balances sweetness
    • 2 tablespoons herbs or spices such as sage or rosemary, optional

    Equipment

    • Mixing bowls
    • Whisk
    • Spatula
    • Baking sheet
    • Parchment paper
    • Cooling rack

    Method
     

    1. Preheat your oven to 350°F (175°C) and line a baking sheet with parchment paper to prevent sticking.
    2. In a large mixing bowl, whisk together the pumpkin, granulated sugar, brown sugar, and oil until smooth and well combined. You should see a slightly thick, cohesive mixture with a light orange hue.
    3. Add the egg and vanilla extract to the wet mixture, whisking again until the mixture is even and slightly fluffy.
    4. In a separate bowl, sift together the flour, baking soda, cinnamon, ginger, cloves, and salt to distribute the spices evenly. This helps prevent clumping and guarantees all cookies are flavorful.
    5. Gradually fold the dry ingredients into the wet mixture using a spatula, mixing until just combined. The dough will be slightly thick but still scoopable.
    6. Using a cookie scoop or tablespoon, portion out the dough onto the prepared baking sheet, spacing them about 2 inches apart to give room for spreading.
    7. Lightly flatten each cookie slightly with the back of a spatula or your fingers for even baking and attractive shape.
    8. Bake in the preheated oven for 12-15 minutes, or until the edges turn golden brown and the centers look set but still soft.
    9. Remove the cookies from the oven and allow them to cool on the baking sheet for 5 minutes before transferring to a wire rack to cool completely. This resting ensures they set properly and develop the perfect chewy-center, crispy-edge texture.
    10. Once cooled, enjoy these aromatic cookies as a delightful autumn treat, appreciating their complex spice blend and inviting scent.

    Notes

    For added flavor, mix in chopped nuts or dried cranberries before baking. Store cookies in an airtight container at room temperature for up to 3 days.
    Baking these pumpkin cookies is a delightful reminder that seasonal treats can be built on bold ideas. They pair beautifully with a cup of chai or a dollop of whipped cream, making any afternoon a little more special.

    As the season shifts, these cookies will fill your kitchen with warm aromas that linger long after baking. They’re a testament to how a small change—like adding a pinch of smoked paprika—can transform a simple cookie into something memorable. Enjoy these morsels as a cozy end to your busy day or a sweet surprise for someone you love.

  • Spooky Stitches: Halloween Spider Web Cake

    Spooky Stitches: Halloween Spider Web Cake

    Every October, I find myself chasing a different kind of adrenaline—crafting a Halloween dessert that doubles as art. The Spider Web Cake is no ordinary treat; it’s a chaotic, joyful experiment with texture and design, inspired by childhood days of trick-or-treating and spooky stories. The aroma of vanilla and cocoa swirling together is a cozy yet eerie invitation.

    This year, I decided to elevate the concept by weaving edible webbing over a dark, moist chocolate sponge. The process involves a little mess, a lot of laughter, and a pinch of bravery—an adventure for any baking enthusiast craving something both fun and sinister. The moment you pull back the plastic wrap to reveal the web, it feels like unveiling a tiny haunted house of confectionery dreams.

    Spider Web Cake

    The Spider Web Cake consists of a moist chocolate sponge topped with intricate edible webbing made from sugary icing. The cake features a dark, rich surface with a detailed web pattern that sits visually striking and slightly textured. It combines a smooth, fudgy base with delicate, web-like decorations for a festive Halloween presentation.
    Prep Time 30 minutes
    Cook Time 35 minutes
    Total Time 1 hour 5 minutes
    Servings: 8
    Course: Main Course
    Cuisine: American
    Calories: 420

    Ingredients
      

    • 1 3/4 cups all-purpose flour sifted
    • 2 cups granulated sugar
    • 3/4 cup unsweetened cocoa powder preferably Dutch-processed
    • 1 1/2 teaspoons baking powder
    • 1/2 teaspoon baking soda
    • 1/2 teaspoon salt
    • 2 large eggs at room temperature
    • 1 cup whole milk room temperature
    • 1/2 cup vegetable oil
    • 2 teaspoons vanilla extract
    • 1 cup boiling water hot, for thinning batter
    • 2 cups powdered sugar for web icing
    • 2 tablespoons corn syrup helps with stretchiness
    • 1 teaspoon vanilla extract for icing
    • few drops food coloring black gel food coloring to color web icing

    Equipment

    • Mixing bowls
    • Hand mixer or whisk

    Method
     

    1. Preheat your oven to 350°F (175°C). Grease and flour two 8-inch round cake pans to prepare for baking.
    2. In a large bowl, whisk together the sifted flour, cocoa powder, baking powder, baking soda, salt, and sugar for an even dry mixture.
    3. Add eggs, milk, vegetable oil, and vanilla extract to the dry ingredients. Use a hand mixer or whisk to blend until smooth and combined, about 2-3 minutes.
    4. Slowly pour in the boiling water while mixing on low speed. Continue mixing until the batter is thin and has a glossy appearance, about 1 minute.
    5. Divide the batter evenly between the prepared pans and smooth the tops with a spatula.
    6. Bake in the preheated oven for 30-35 minutes, or until a toothpick inserted into the center comes out clean. Let the cakes cool in pans for 10 minutes, then transfer to a wire rack to cool completely.
    7. While the cakes cool, prepare the web icing by mixing powdered sugar, corn syrup, vanilla extract, and a few drops of black food coloring in a bowl. Stir until smooth and thick enough to pipe but still pliable.
    8. Once the cakes are completely cooled, place one layer on your serving plate. Spread a thin, even layer of frosting or buttercream over the top, then gently place the second cake layer on top.
    9. Using a piping bag fitted with a small round tip, pipe concentric circles of black web icing over the top of the cake to create the spider web pattern.
    10. Starting from the center, draw lines outward from the middle to mimic the spokes of a spider web, using a toothpick or skewer to drag the icing into the web design for a more authentic look.
    11. Finish by adding some decorative spiders or additional web details if desired. Chill the cake for at least 30 minutes to let the web set.

    This Spider Web Cake makes a haunting centerpiece that’s sure to spark conversations and nostalgic giggles at any Halloween gathering. Its spooky charm isn’t just in looks—it’s in the rich cocoa flavor and the crisp web contrast that shatters with each bite. The best part? It’s a celebration of chaos, creativity, and sweet tradition all rolled into one.

    As the candles flicker and costumes swirl, this cake reminds me that baking is just as much about storytelling as it is about flavors. Every spider’s web and midnight hue captures a moment of seasonal magic and childhood wonder. No matter how you decorate yours, it’ll always be a delicious reminder to embrace the spooky and the silly.

  • Spooky Fun: Halloween Dirt Cake with Gummy Worms

    Spooky Fun: Halloween Dirt Cake with Gummy Worms

    Every Halloween, I hunt for a dessert that combines creepy charm with childhood nostalgia. This year, I found the perfect twist—a dirt cake that’s both haunting and irresistibly fun. It’s not just about the sweet treat, but about recreating those sticky, giggle-filled kitchen moments with my kids.

    Imagine layers of chocolatey richness topped with squirming gummy worms peeking out. The smell of fresh chocolate cookies mixed with vanilla pudding creates an intoxicating aroma of mischief and comfort. It’s the chaos of Halloween, captured in a single delicious bite.

    Halloween Dirt Cake

    A layered chocolate dessert made with crushed cookies, creamy pudding, and topped with gummy worms, resembling a spooky, muddy landscape. The dish combines crunchy, creamy, and chewy textures, with a dark, chocolatey appearance accented by colorful candy decorations.
    Prep Time 20 minutes
    Cook Time 10 minutes
    Total Time 30 minutes
    Servings: 8
    Course: Main Course
    Cuisine: Halloween
    Calories: 350

    Ingredients
      

    • 24 cookies chocolate sandwich cookies crushed into fine crumbs
    • 3 cups milk for pudding
    • 1 package vanilla instant pudding mix
    • 2 cups heavy cream for whipped topping
    • 1/2 cup granulated sugar to sweeten the whipped cream
    • Gummy worms gummy worms for decoration and fun poking out of the dirt

    Equipment

    • Mixing bowls
    • Electric mixer or whisk
    • 9×13 inch serving dish
    • Spatula
    • Serving spoon

    Method
     

    1. Place the chocolate cookies in a zip-top bag and crush them into fine crumbs using a rolling pin or the bottom of a glass.
      24 cookies chocolate sandwich cookies
    2. In a large mixing bowl, whisk together the vanilla pudding mix and milk until smooth and slightly thickened, about 2 minutes.
      3 cups milk, 1 package vanilla instant pudding mix
    3. In a separate bowl, whip the heavy cream with sugar until soft peaks form and the mixture is fluffy.
      2 cups heavy cream, 1/2 cup granulated sugar
    4. Gently fold the whipped cream into the pudding mixture until well combined, creating a creamy filling.
      1 package vanilla instant pudding mix, 2 cups heavy cream
    5. Spread a layer of crushed cookies evenly across the bottom of your serving dish to resemble dirt.
      24 cookies chocolate sandwich cookies
    6. Pour half of the creamy pudding mixture over the cookie layer, spreading smoothly with a spatula.
      1 package vanilla instant pudding mix
    7. Add another layer of crushed cookies on top of the pudding layer for added texture.
      24 cookies chocolate sandwich cookies
    8. Top with the remaining pudding mixture, smoothing the surface for a uniform appearance.
      1 package vanilla instant pudding mix
    9. Decorate the top with gummy worms, poking them into the pudding so they appear to be wriggling through the dirt.
      Gummy worms gummy worms
    10. Chill the dirt cake in the refrigerator for at least 2 hours before serving, allowing flavors to meld and the pudding to set.
    11. Serve cold, scooping out portions that reveal the layers of cookie crumbs, pudding, and playful gummy worms.

    This dirt cake is more than just a dessert; it’s a mini celebration of childhood wonder. Each spoonful brings a flash of those spooky season memories we secretly cherish. And as the kids eagerly hunt for their hidden gummy worms, I’m reminded how simple joy can be so effective.

    Making this creepy-crawly treat is quick, fun, and perfect for any Halloween gathering. It adds a splash of ghoulish delight to the table without demanding hours in the kitchen. Watching everyone’s eyes light up when they see the squiggly worms creeping out makes all the effort worthwhile.

  • Pumpkin Bread with a Twist: A Cozy Fall Favorite

    Pumpkin Bread with a Twist: A Cozy Fall Favorite

    Whether you’re making this for brunch, a cozy afternoon snack, or to gift to friends, it’s sure to spark joy. Every slice offers a tender crumb deeply infused with pumpkin’s earthiness and the lively zest—an irresistible combo. Baking this bread feels like a seasonal ritual that reminds me why I cherish fall.

    Pumpkin Zest Bread

    This bread features a tender, moist crumb infused with the earthy flavor of pumpkin and accented by lively citrus zest. The dough is mixed and kneaded until soft and elastic, then baked until golden and fragrant, resulting in a visually appealing loaf with a slightly dense but airy texture. It showcases a rustic appearance with a warm, inviting color and a cracked, golden crust.
    Prep Time 20 minutes
    Cook Time 40 minutes
    Total Time 1 hour
    Servings: 8
    Course: Main Course
    Cuisine: American
    Calories: 210

    Ingredients
      

    • 1 cup pumpkin puree unsweetened
    • 4 cups all-purpose flour
    • 1 packet active dry yeast about 2 1/4 teaspoons
    • 1 cup warm water around 110°F/45°C
    • 1/4 cup granulated sugar
    • 1/4 cup unsalted butter melted
    • 2 teaspoons salt
    • 1 tablespoon orange zest from about 1 orange

    Equipment

    • Mixing bowls
    • Loaf pan
    • Wooden spoon or dough scraper
    • Kitchen towel or plastic wrap
    • Oven

    Method
     

    1. In a small bowl, combine warm water, sugar, and yeast. Stir gently and let sit until foamy, about 5 minutes, to activate the yeast.
    2. In a large mixing bowl, whisk together the flour and salt to evenly distribute.
    3. Add the pumpkin puree, melted butter, activated yeast mixture, and orange zest to the dry ingredients.
    4. Mix everything together with a wooden spoon or dough scraper until a shaggy dough forms.
    5. Transfer the dough onto a lightly floured surface and knead for about 8-10 minutes until smooth, elastic, and slightly tacky.
    6. Shape the dough into a ball and place it in a greased bowl. Cover it with a kitchen towel or plastic wrap and let rise in a warm spot until doubled in size, approximately 1 to 1.5 hours.
    7. Once doubled, punch down the dough gently to release excess gas, then transfer it onto a floured surface and shape it into a loaf.
    8. Place the shaped dough into a greased loaf pan. Cover again and let it rise for another 30-45 minutes until puffed and nearly doubled.
    9. Preheat your oven to 350°F (175°C).
    10. Bake the bread for about 40 minutes, until the crust is golden brown and the loaf sounds hollow when tapped.
    11. Remove the bread from the oven, transfer to a wire rack, and let cool for at least 15 minutes before slicing to allow the crumb to set.
    12. Slice and enjoy this warm, moist pumpkin citrus bread with butter or your favorite spread.
    Baking pumpkin bread with a citrus twist turns a simple loaf into a seasonal treasure. The combination of earthiness and bright citrus resonates with everything fall embodies — warmth, nostalgia, and a touch of unexpected sparkle. It’s a humble pleasure that feels just right for the season’s fleeting moments.

    In a world rushing toward the holidays, this bread offers a moment of calm and simple joy. The act of baking, smelling, and sharing it anchors the season in warmth and familiarity. Truly, it’s the kind of treat that makes you look forward to crisp mornings and cozy get-togethers.