Category: Desserts

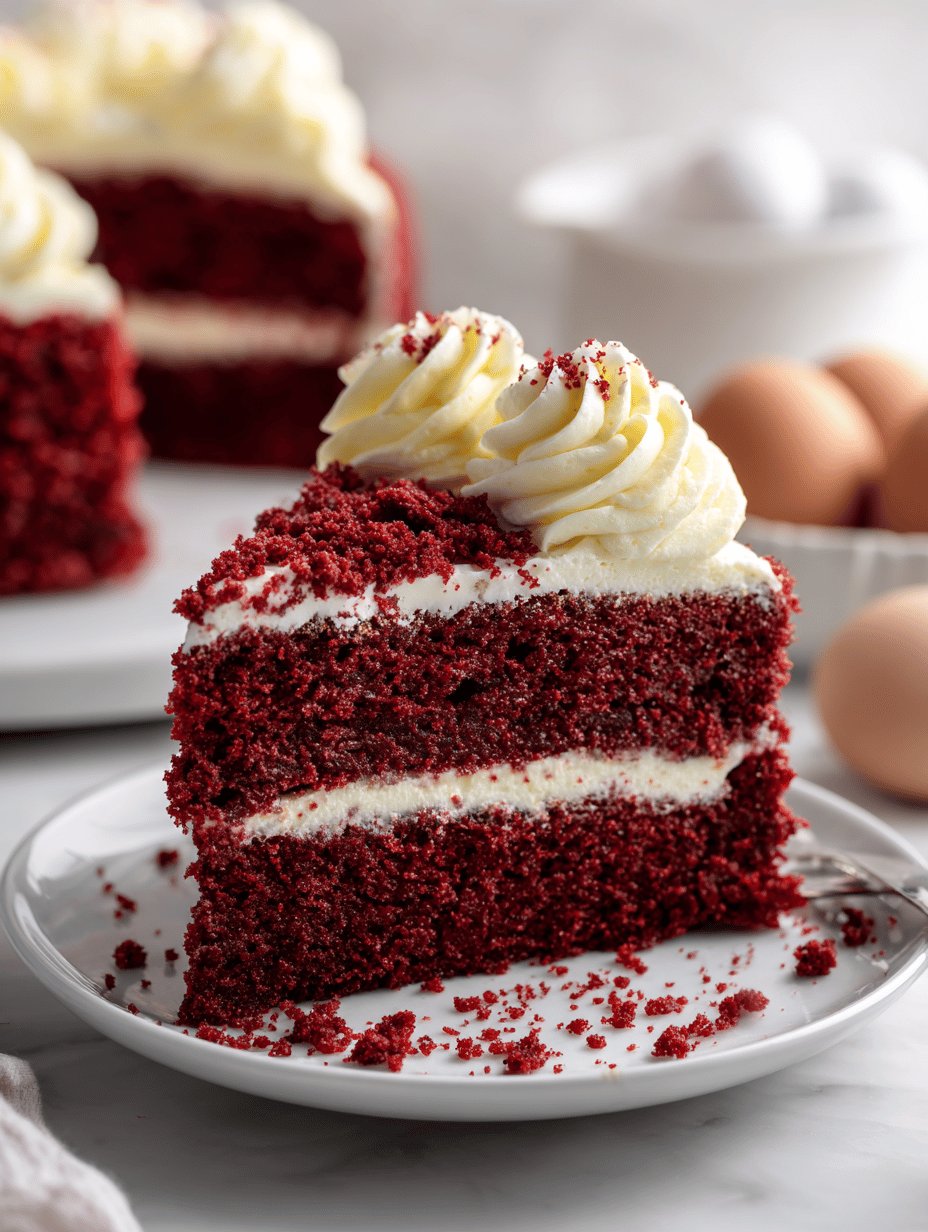
  • Bloody Red Velvet Cake: A Dark, Rich Spin on a Classic

    Bloody Red Velvet Cake: A Dark, Rich Spin on a Classic

    Red velvet cake often feels like a nostalgic throwback, but I love to twist it into something darker and more dramatic. The deep crimson hue isn’t just for show; it’s a canvas for bold flavors and a touch of mystery. Baking this cake is about embracing the chaos of mixing rich cocoa, tangy buttermilk, and a splash of vinegar — a combination that somehow makes everything more alive.

    Why This Cake Never Gets Old

    Every time I bake this, it’s like revisiting a secret recipe I’ve refined over years. The rich, velvety crumb, paired with a tangy cream cheese frosting, always takes me back to childhood celebrations and quiet moments of self-indulgence. It’s a cake that’s as much about the process as it is about the final bite, with the deep red hue reminding me of passion and a little bit of chaos.

    Inside the Red Velvet Realm

    • All-purpose flour: The backbone of the cake, providing structure; I like to sift it for a light crumb.
    • Unsweetened cocoa powder: Adds depth and that signature chocolate hint—go for natural, not Dutch-processed.
    • Buttermilk: Gives moisture and tang, balancing the sweetness—swap with sour milk if needed.
    • Vinegar: Activates baking soda with a zing of acidity—don’t skip this.
    • Vegetable oil: Keeps the cake moist and tender—can substitute with melted coconut oil for extra flavor.
    • Red food coloring: The showstopper—use gel for vibrant color without watering down the batter.
    • Eggs: Bind the batter and aerate—large, fresh eggs work best.

    Tools of the Crimson Trade

    • Mixing bowls: To combine wet and dry ingredients separately.
    • Electric mixer or whisk: To beat the eggs and blend the batter smoothly.
    • Cake pan (20cm round): Shape your cake evenly.
    • Parchment paper: Prevent sticking and easy removal.
    • Cooling rack: Cool the cake evenly and prevent sogginess.

    Step-by-Step to a Deep Crimson Delight

    Step 1: Preheat your oven to 180°C (350°F). Grease a 20cm (8-inch) round cake pan and line the bottom with parchment.

    Step 2: In a large bowl, sift together 250g all-purpose flour, 30g unsweetened cocoa powder, 1 tsp baking soda, and ½ tsp salt.

    Step 3: In another bowl, whisk 2 large eggs, 250ml buttermilk, 100ml vegetable oil, 1 tbsp white vinegar, and 2 tsp vanilla extract until well combined.

    Step 4: Gradually add the wet ingredients to the dry, mixing just until the batter is smooth and velvety, no lumps.

    Cooking Cues & Common Pitfalls

    • The batter should be glossy and smooth, not thick or lumpy.
    • The cake’s edges should just start to pull away from the pan when baked.
    • When poked gently, the center should bounce back, not stay wet or sink.
    • Use a toothpick or cake tester; it should come out clean when the cake is done.

    Troubleshooting the Crimson Path

    • Cake rises then collapses.? If the cake sinks in the middle, check oven temperature—may be too hot. Lower slightly and bake longer.
    • Over-torched edges.? If the edges burn, reduce oven heat or cover edges with foil halfway through baking.
    • Lumpy or dense texture.? For uneven crumb, mix batter just until combined—don’t overmix.
    • Frosting sliding or melting.? If frosting slides off, chill the cake for 30 minutes before frosting.

    Dark Red Velvet Cake

    This dark red velvet cake features a rich, velvety crumb with a deep crimson hue, achieved through a combination of cocoa, buttermilk, and food coloring. The process involves mixing wet and dry ingredients separately, then folding them together before baking to create a moist, tender texture. Topped with tangy cream cheese frosting, it’s a dramatic and indulgent dessert perfect for celebrations or quiet indulgence.
    Prep Time 20 minutes
    Cook Time 30 minutes
    Total Time 50 minutes
    Servings: 8
    Course: Main Course
    Cuisine: American
    Calories: 350

    Ingredients
      

    • 250 g all-purpose flour sifted
    • 30 g unsweetened cocoa powder natural, not Dutch-processed
    • 1 tsp baking soda
    • ½ tsp salt
    • 2 large eggs large, fresh
    • 250 ml buttermilk or sour milk
    • 100 ml vegetable oil can substitute with melted coconut oil
    • 1 tbsp white vinegar
    • 2 tsp vanilla extract
    • 2 tsp red food coloring gel preferred for vibrant color

    Equipment

    • Mixing bowls
    • Electric mixer or whisk
    • Cake pan (20cm round)
    • Parchment paper
    • Cooling rack

    Method
     

    1. Preheat your oven to 180°C (350°F). Grease a 20cm round cake pan and line the bottom with parchment paper to prevent sticking.
    2. Sift together the flour, cocoa powder, baking soda, and salt into a large mixing bowl. This ensures a light, airy crumb.
    3. In a separate bowl, whisk the eggs, buttermilk, vegetable oil, vinegar, and vanilla extract until the mixture is smooth and fragrant, about 1-2 minutes.
    4. Add the red food coloring to the wet mixture and stir until fully incorporated, achieving a vibrant crimson hue.
    5. Gradually pour the wet ingredients into the dry ingredients, folding gently with a spatula or using a mixer on low speed. Mix just until the batter is smooth and no lumps remain, being careful not to overmix.
    6. Pour the batter into your prepared cake pan, smoothing the top with a spatula to ensure even baking.
    7. Bake in the preheated oven for about 30 minutes, or until the edges are just starting to pull away from the pan and a toothpick inserted into the center comes out clean.
    8. Remove the cake from the oven and let it cool in the pan for 10 minutes, then transfer to a cooling rack and cool completely before frosting.
    9. Once cooled, slice the cake horizontally if layering, or serve directly. Top with tangy cream cheese frosting for a classic finish.

    Notes

    Ensure not to overmix the batter to keep the cake light. Use gel food coloring for vibrant, non-watered-down color. Chilling the cake before frosting helps prevent sliding or melting of the frosting.
    This cake isn’t just a dessert; it’s a statement. Its moist crumb and vibrant hue make it a showstopper at any gathering. Keep it simple, let the colors and flavors speak for themselves, and don’t shy away from experimenting with different frostings or toppings. Every bite should feel like a small rebellion—rich, bold, and unforgettable.

  • Bloody Red Velvet Cake: A Dark, Rich Spin on a Classic

    Bloody Red Velvet Cake: A Dark, Rich Spin on a Classic

    Red velvet cake often feels like a nostalgic throwback, but I love to twist it into something darker and more dramatic. The deep crimson hue isn’t just for show; it’s a canvas for bold flavors and a touch of mystery. Baking this cake is about embracing the chaos of mixing rich cocoa, tangy buttermilk, and a splash of vinegar — a combination that somehow makes everything more alive.

    Why This Cake Never Gets Old

    Every time I bake this, it’s like revisiting a secret recipe I’ve refined over years. The rich, velvety crumb, paired with a tangy cream cheese frosting, always takes me back to childhood celebrations and quiet moments of self-indulgence. It’s a cake that’s as much about the process as it is about the final bite, with the deep red hue reminding me of passion and a little bit of chaos.

    Inside the Red Velvet Realm

    • All-purpose flour: The backbone of the cake, providing structure; I like to sift it for a light crumb.
    • Unsweetened cocoa powder: Adds depth and that signature chocolate hint—go for natural, not Dutch-processed.
    • Buttermilk: Gives moisture and tang, balancing the sweetness—swap with sour milk if needed.
    • Vinegar: Activates baking soda with a zing of acidity—don’t skip this.
    • Vegetable oil: Keeps the cake moist and tender—can substitute with melted coconut oil for extra flavor.
    • Red food coloring: The showstopper—use gel for vibrant color without watering down the batter.
    • Eggs: Bind the batter and aerate—large, fresh eggs work best.

    Tools of the Crimson Trade

    • Mixing bowls: To combine wet and dry ingredients separately.
    • Electric mixer or whisk: To beat the eggs and blend the batter smoothly.
    • Cake pan (20cm round): Shape your cake evenly.
    • Parchment paper: Prevent sticking and easy removal.
    • Cooling rack: Cool the cake evenly and prevent sogginess.

    Step-by-Step to a Deep Crimson Delight

    Step 1: Preheat your oven to 180°C (350°F). Grease a 20cm (8-inch) round cake pan and line the bottom with parchment.

    Step 2: In a large bowl, sift together 250g all-purpose flour, 30g unsweetened cocoa powder, 1 tsp baking soda, and ½ tsp salt.

    Step 3: In another bowl, whisk 2 large eggs, 250ml buttermilk, 100ml vegetable oil, 1 tbsp white vinegar, and 2 tsp vanilla extract until well combined.

    Step 4: Gradually add the wet ingredients to the dry, mixing just until the batter is smooth and velvety, no lumps.

    Cooking Cues & Common Pitfalls

    • The batter should be glossy and smooth, not thick or lumpy.
    • The cake’s edges should just start to pull away from the pan when baked.
    • When poked gently, the center should bounce back, not stay wet or sink.
    • Use a toothpick or cake tester; it should come out clean when the cake is done.

    Troubleshooting the Crimson Path

    • Cake rises then collapses.? If the cake sinks in the middle, check oven temperature—may be too hot. Lower slightly and bake longer.
    • Over-torched edges.? If the edges burn, reduce oven heat or cover edges with foil halfway through baking.
    • Lumpy or dense texture.? For uneven crumb, mix batter just until combined—don’t overmix.
    • Frosting sliding or melting.? If frosting slides off, chill the cake for 30 minutes before frosting.

    Deep Crimson Red Velvet Cake

    This red velvet cake features a rich, velvety crumb with a dramatic deep crimson hue, achieved through the perfect blend of cocoa, buttermilk, and food coloring. The cake is baked until tender and moist, then layered with tangy cream cheese frosting for a luscious finish. Its striking appearance and luxurious texture make it a memorable centerpiece for any celebration.
    Prep Time 20 minutes
    Cook Time 30 minutes
    Total Time 50 minutes
    Servings: 8
    Course: Main Course
    Cuisine: American
    Calories: 350

    Ingredients
      

    • 250 g all-purpose flour sifted
    • 30 g unsweetened cocoa powder natural, not Dutch-processed
    • 1 tsp baking soda
    • 0.5 tsp salt
    • 2 large eggs large, fresh
    • 250 ml buttermilk or sour milk
    • 100 ml vegetable oil or melted coconut oil
    • 1 tbsp white vinegar
    • 2 tsp vanilla extract
    • 2 tsp red food coloring gel preferred for vibrant color

    Equipment

    • Mixing bowls
    • Electric mixer or whisk
    • Cake pan (20cm round)
    • Parchment paper
    • Cooling rack

    Method
     

    1. Preheat your oven to 180°C (350°F). Grease your 20cm round cake pan and line the bottom with parchment paper to prevent sticking.
    2. Sift together the flour, cocoa powder, baking soda, and salt into a large mixing bowl. This ensures a light, airy crumb.
    3. In a separate bowl, whisk the eggs, buttermilk, vegetable oil, vinegar, and vanilla extract until the mixture is smooth and slightly frothy, filling your kitchen with a warm aroma.
    4. Add the red food coloring to the wet mixture and stir until the color is evenly distributed, turning a vibrant crimson hue.
    5. Gradually pour the wet ingredients into the dry ingredients, gently folding with a spatula or mixing on low speed until just combined and the batter is silky and smooth, with no lumps.
    6. Pour the batter into your prepared cake pan, smoothing the top with the back of a spatula for an even surface.
    7. Bake in the preheated oven for approximately 30 minutes, or until a toothpick inserted into the center comes out clean and the edges start to pull away from the pan.
    8. Remove the cake from the oven and let it cool in the pan for 10 minutes. Then, transfer it to a cooling rack to cool completely, which helps set the texture and prevents sogginess.
    9. Once cooled, slice the cake horizontally if layering, or serve as is. Decorate with cream cheese frosting for a classic look, but enjoy its deep crimson color and velvety crumb as is.

    Notes

    For an extra vibrant color, use gel food coloring and add a few drops more if needed. Avoid overmixing after adding wet ingredients to keep the cake light and tender.
    This cake isn’t just a dessert; it’s a statement. Its moist crumb and vibrant hue make it a showstopper at any gathering. Keep it simple, let the colors and flavors speak for themselves, and don’t shy away from experimenting with different frostings or toppings. Every bite should feel like a small rebellion—rich, bold, and unforgettable.

  • Bloody Red Velvet Cake: A Dark, Rich Spin on a Classic

    Bloody Red Velvet Cake: A Dark, Rich Spin on a Classic

    Red velvet cake often feels like a nostalgic throwback, but I love to twist it into something darker and more dramatic. The deep crimson hue isn’t just for show; it’s a canvas for bold flavors and a touch of mystery. Baking this cake is about embracing the chaos of mixing rich cocoa, tangy buttermilk, and a splash of vinegar — a combination that somehow makes everything more alive.

    Why This Cake Never Gets Old

    Every time I bake this, it’s like revisiting a secret recipe I’ve refined over years. The rich, velvety crumb, paired with a tangy cream cheese frosting, always takes me back to childhood celebrations and quiet moments of self-indulgence. It’s a cake that’s as much about the process as it is about the final bite, with the deep red hue reminding me of passion and a little bit of chaos.

    Inside the Red Velvet Realm

    • All-purpose flour: The backbone of the cake, providing structure; I like to sift it for a light crumb.
    • Unsweetened cocoa powder: Adds depth and that signature chocolate hint—go for natural, not Dutch-processed.
    • Buttermilk: Gives moisture and tang, balancing the sweetness—swap with sour milk if needed.
    • Vinegar: Activates baking soda with a zing of acidity—don’t skip this.
    • Vegetable oil: Keeps the cake moist and tender—can substitute with melted coconut oil for extra flavor.
    • Red food coloring: The showstopper—use gel for vibrant color without watering down the batter.
    • Eggs: Bind the batter and aerate—large, fresh eggs work best.

    Tools of the Crimson Trade

    • Mixing bowls: To combine wet and dry ingredients separately.
    • Electric mixer or whisk: To beat the eggs and blend the batter smoothly.
    • Cake pan (20cm round): Shape your cake evenly.
    • Parchment paper: Prevent sticking and easy removal.
    • Cooling rack: Cool the cake evenly and prevent sogginess.

    Step-by-Step to a Deep Crimson Delight

    Step 1: Preheat your oven to 180°C (350°F). Grease a 20cm (8-inch) round cake pan and line the bottom with parchment.

    Step 2: In a large bowl, sift together 250g all-purpose flour, 30g unsweetened cocoa powder, 1 tsp baking soda, and ½ tsp salt.

    Step 3: In another bowl, whisk 2 large eggs, 250ml buttermilk, 100ml vegetable oil, 1 tbsp white vinegar, and 2 tsp vanilla extract until well combined.

    Step 4: Gradually add the wet ingredients to the dry, mixing just until the batter is smooth and velvety, no lumps.

    Cooking Cues & Common Pitfalls

    • The batter should be glossy and smooth, not thick or lumpy.
    • The cake’s edges should just start to pull away from the pan when baked.
    • When poked gently, the center should bounce back, not stay wet or sink.
    • Use a toothpick or cake tester; it should come out clean when the cake is done.

    Troubleshooting the Crimson Path

    • Cake rises then collapses.? If the cake sinks in the middle, check oven temperature—may be too hot. Lower slightly and bake longer.
    • Over-torched edges.? If the edges burn, reduce oven heat or cover edges with foil halfway through baking.
    • Lumpy or dense texture.? For uneven crumb, mix batter just until combined—don’t overmix.
    • Frosting sliding or melting.? If frosting slides off, chill the cake for 30 minutes before frosting.

    Dark Red Velvet Cake

    This dark red velvet cake features a rich, velvety crumb with a deep crimson hue that’s both visually striking and delicious. The process involves mixing cocoa, buttermilk, and vinegar to create a moist, tender cake with a hint of tang, finished with a tangy cream cheese frosting. The final appearance is a dramatic, vibrant cake with a soft, crumbly texture that’s perfect for celebrations or indulgent moments.
    Prep Time 20 minutes
    Cook Time 30 minutes
    Total Time 50 minutes
    Servings: 8
    Course: Main Course
    Cuisine: American
    Calories: 420

    Ingredients
      

    • 250 g all-purpose flour sifted for lightness
    • 30 g unsweetened cocoa powder natural preferred
    • 1 tsp baking soda
    • 0.5 tsp salt
    • 2 large eggs fresh, large
    • 250 ml buttermilk for moisture and tang
    • 100 ml vegetable oil keeps cake moist
    • 1 tbsp white vinegar activates baking soda
    • 2 tsp vanilla extract
    • 2 tsp red food coloring gel preferred for vibrant color

    Equipment

    • Mixing bowls
    • Electric mixer or whisk
    • Cake pan (20cm round)
    • Parchment paper
    • Cooling rack

    Method
     

    1. Preheat your oven to 180°C (350°F). Grease a 20cm round cake pan and line the bottom with parchment paper to prevent sticking.
    2. Sift together the flour, cocoa powder, baking soda, and salt into a large mixing bowl. This creates a light, airy dry mixture that ensures a tender crumb.
    3. In a separate bowl, whisk the eggs until they are well combined and slightly frothy. Add the buttermilk, vegetable oil, white vinegar, vanilla extract, and red food coloring. Whisk until the mixture is smooth and vibrant red.
    4. Gradually pour the wet mixture into the dry ingredients, folding gently with a spatula or mixing on low speed. Mix just until the batter is glossy, smooth, and free of lumps—avoid overmixing to keep the cake light.
    5. Pour the batter into the prepared cake pan, spreading it evenly with a spatula. Tap the pan lightly on the counter to release any air bubbles and ensure an even surface.
    6. Bake in the preheated oven for about 30 minutes, or until the edges just start to pull away from the pan and a toothpick inserted into the center comes out clean. The cake will be firm but tender.
    7. Remove the cake from the oven and let it cool in the pan for 10 minutes. Then, transfer it to a cooling rack and cool completely before frosting to prevent melting.
    8. Once cooled, the cake’s deep crimson color and velvety texture are ready for frosting. Slice and serve to enjoy its rich, tender crumb with bold visual impact.

    Notes

    For best results, use gel food coloring to achieve a vibrant red hue without thinning the batter. Ensure the cake is fully cooled before frosting to prevent sliding or melting of the cream cheese topping.
    This cake isn’t just a dessert; it’s a statement. Its moist crumb and vibrant hue make it a showstopper at any gathering. Keep it simple, let the colors and flavors speak for themselves, and don’t shy away from experimenting with different frostings or toppings. Every bite should feel like a small rebellion—rich, bold, and unforgettable.

  • Bloody Red Velvet Cake: A Dark, Rich Spin on a Classic

    Bloody Red Velvet Cake: A Dark, Rich Spin on a Classic

    Red velvet cake often feels like a nostalgic throwback, but I love to twist it into something darker and more dramatic. The deep crimson hue isn’t just for show; it’s a canvas for bold flavors and a touch of mystery. Baking this cake is about embracing the chaos of mixing rich cocoa, tangy buttermilk, and a splash of vinegar — a combination that somehow makes everything more alive.

    Why This Cake Never Gets Old

    Every time I bake this, it’s like revisiting a secret recipe I’ve refined over years. The rich, velvety crumb, paired with a tangy cream cheese frosting, always takes me back to childhood celebrations and quiet moments of self-indulgence. It’s a cake that’s as much about the process as it is about the final bite, with the deep red hue reminding me of passion and a little bit of chaos.

    Inside the Red Velvet Realm

    • All-purpose flour: The backbone of the cake, providing structure; I like to sift it for a light crumb.
    • Unsweetened cocoa powder: Adds depth and that signature chocolate hint—go for natural, not Dutch-processed.
    • Buttermilk: Gives moisture and tang, balancing the sweetness—swap with sour milk if needed.
    • Vinegar: Activates baking soda with a zing of acidity—don’t skip this.
    • Vegetable oil: Keeps the cake moist and tender—can substitute with melted coconut oil for extra flavor.
    • Red food coloring: The showstopper—use gel for vibrant color without watering down the batter.
    • Eggs: Bind the batter and aerate—large, fresh eggs work best.

    Tools of the Crimson Trade

    • Mixing bowls: To combine wet and dry ingredients separately.
    • Electric mixer or whisk: To beat the eggs and blend the batter smoothly.
    • Cake pan (20cm round): Shape your cake evenly.
    • Parchment paper: Prevent sticking and easy removal.
    • Cooling rack: Cool the cake evenly and prevent sogginess.

    Step-by-Step to a Deep Crimson Delight

    Step 1: Preheat your oven to 180°C (350°F). Grease a 20cm (8-inch) round cake pan and line the bottom with parchment.

    Step 2: In a large bowl, sift together 250g all-purpose flour, 30g unsweetened cocoa powder, 1 tsp baking soda, and ½ tsp salt.

    Step 3: In another bowl, whisk 2 large eggs, 250ml buttermilk, 100ml vegetable oil, 1 tbsp white vinegar, and 2 tsp vanilla extract until well combined.

    Step 4: Gradually add the wet ingredients to the dry, mixing just until the batter is smooth and velvety, no lumps.

    Cooking Cues & Common Pitfalls

    • The batter should be glossy and smooth, not thick or lumpy.
    • The cake’s edges should just start to pull away from the pan when baked.
    • When poked gently, the center should bounce back, not stay wet or sink.
    • Use a toothpick or cake tester; it should come out clean when the cake is done.

    Troubleshooting the Crimson Path

    • Cake rises then collapses.? If the cake sinks in the middle, check oven temperature—may be too hot. Lower slightly and bake longer.
    • Over-torched edges.? If the edges burn, reduce oven heat or cover edges with foil halfway through baking.
    • Lumpy or dense texture.? For uneven crumb, mix batter just until combined—don’t overmix.
    • Frosting sliding or melting.? If frosting slides off, chill the cake for 30 minutes before frosting.

    Dark Red Velvet Cake

    This dark red velvet cake features a velvety crumb with a deep crimson hue, achieved through a blend of cocoa, buttermilk, and vibrant food coloring. The process involves mixing rich ingredients to create a smooth batter, which is baked to perfection and finished with a tangy cream cheese frosting. The final cake boasts a moist, tender texture with a striking appearance, perfect for dramatic celebrations or indulgent treats.
    Prep Time 20 minutes
    Cook Time 30 minutes
    Total Time 50 minutes
    Servings: 8
    Course: Main Course
    Cuisine: American
    Calories: 450

    Ingredients
      

    • 250 g all-purpose flour sifted
    • 30 g unsweetened cocoa powder natural, not Dutch-processed
    • 1 tsp baking soda
    • ½ tsp salt
    • 2 large eggs large, fresh
    • 250 ml buttermilk
    • 100 ml vegetable oil
    • 1 tbsp white vinegar
    • 2 tsp vanilla extract
    • 2 tsp red food coloring gel preferred for vibrant color

    Equipment

    • Mixing bowls
    • Electric mixer or whisk
    • Cake pan (20cm round)
    • Parchment paper
    • Cooling rack

    Method
     

    1. Preheat your oven to 180°C (350°F). Grease the cake pan and line the bottom with parchment paper.
    2. Sift together the flour, cocoa powder, baking soda, and salt into a large mixing bowl. This creates a light, airy dry mixture.
    3. In a separate bowl, whisk the eggs, buttermilk, vegetable oil, vinegar, and vanilla extract until the mixture is smooth and slightly frothy, filling your kitchen with a warm aroma.
    4. Add the red food coloring to the wet mixture, stirring until the color is evenly distributed, giving the batter a deep crimson hue.
    5. Gradually pour the wet mixture into the dry ingredients, folding gently with a spatula or mixing on low speed until just combined and smooth, avoiding overmixing.
    6. Pour the batter into the prepared cake pan, smoothing the top with a spatula to ensure even baking.
    7. Bake in the preheated oven for about 30 minutes, or until a toothpick inserted into the center comes out clean and the edges start to pull away from the pan.
    8. Remove the cake from the oven and let it cool in the pan for 10 minutes. Then, transfer to a cooling rack and cool completely before frosting.
    9. Once cooled, frost with tangy cream cheese frosting for a perfect finish. Slice to reveal a moist, velvety crumb with a striking red color.

    Notes

    For an extra vibrant color, use gel food coloring. Ensure the cake is fully cooled before frosting to prevent sliding or melting.
    This cake isn’t just a dessert; it’s a statement. Its moist crumb and vibrant hue make it a showstopper at any gathering. Keep it simple, let the colors and flavors speak for themselves, and don’t shy away from experimenting with different frostings or toppings. Every bite should feel like a small rebellion—rich, bold, and unforgettable.

  • Bloody Red Velvet Cake: A Dark, Rich Spin on a Classic

    Bloody Red Velvet Cake: A Dark, Rich Spin on a Classic

    Red velvet cake often feels like a nostalgic throwback, but I love to twist it into something darker and more dramatic. The deep crimson hue isn’t just for show; it’s a canvas for bold flavors and a touch of mystery. Baking this cake is about embracing the chaos of mixing rich cocoa, tangy buttermilk, and a splash of vinegar — a combination that somehow makes everything more alive.

    Why This Cake Never Gets Old

    Every time I bake this, it’s like revisiting a secret recipe I’ve refined over years. The rich, velvety crumb, paired with a tangy cream cheese frosting, always takes me back to childhood celebrations and quiet moments of self-indulgence. It’s a cake that’s as much about the process as it is about the final bite, with the deep red hue reminding me of passion and a little bit of chaos.

    Inside the Red Velvet Realm

    • All-purpose flour: The backbone of the cake, providing structure; I like to sift it for a light crumb.
    • Unsweetened cocoa powder: Adds depth and that signature chocolate hint—go for natural, not Dutch-processed.
    • Buttermilk: Gives moisture and tang, balancing the sweetness—swap with sour milk if needed.
    • Vinegar: Activates baking soda with a zing of acidity—don’t skip this.
    • Vegetable oil: Keeps the cake moist and tender—can substitute with melted coconut oil for extra flavor.
    • Red food coloring: The showstopper—use gel for vibrant color without watering down the batter.
    • Eggs: Bind the batter and aerate—large, fresh eggs work best.

    Tools of the Crimson Trade

    • Mixing bowls: To combine wet and dry ingredients separately.
    • Electric mixer or whisk: To beat the eggs and blend the batter smoothly.
    • Cake pan (20cm round): Shape your cake evenly.
    • Parchment paper: Prevent sticking and easy removal.
    • Cooling rack: Cool the cake evenly and prevent sogginess.

    Step-by-Step to a Deep Crimson Delight

    Step 1: Preheat your oven to 180°C (350°F). Grease a 20cm (8-inch) round cake pan and line the bottom with parchment.

    Step 2: In a large bowl, sift together 250g all-purpose flour, 30g unsweetened cocoa powder, 1 tsp baking soda, and ½ tsp salt.

    Step 3: In another bowl, whisk 2 large eggs, 250ml buttermilk, 100ml vegetable oil, 1 tbsp white vinegar, and 2 tsp vanilla extract until well combined.

    Step 4: Gradually add the wet ingredients to the dry, mixing just until the batter is smooth and velvety, no lumps.

    Cooking Cues & Common Pitfalls

    • The batter should be glossy and smooth, not thick or lumpy.
    • The cake’s edges should just start to pull away from the pan when baked.
    • When poked gently, the center should bounce back, not stay wet or sink.
    • Use a toothpick or cake tester; it should come out clean when the cake is done.

    Troubleshooting the Crimson Path

    • Cake rises then collapses.? If the cake sinks in the middle, check oven temperature—may be too hot. Lower slightly and bake longer.
    • Over-torched edges.? If the edges burn, reduce oven heat or cover edges with foil halfway through baking.
    • Lumpy or dense texture.? For uneven crumb, mix batter just until combined—don’t overmix.
    • Frosting sliding or melting.? If frosting slides off, chill the cake for 30 minutes before frosting.

    Dark Red Velvet Cake

    This rich and dramatic dark red velvet cake blends deep cocoa with tangy buttermilk, creating a velvety crumb with a striking crimson hue. The process involves mixing wet and dry ingredients, baking until golden, and finishing with a tangy cream cheese frosting for a luscious, indulgent dessert with a moist, tender texture and vibrant appearance.
    Prep Time 20 minutes
    Cook Time 30 minutes
    Total Time 50 minutes
    Servings: 8
    Course: Main Course
    Cuisine: American
    Calories: 420

    Ingredients
      

    • 250 g all-purpose flour sifted for a light crumb
    • 30 g unsweetened cocoa powder natural cocoa preferred
    • 1 tsp baking soda
    • 0.5 tsp salt
    • 2 large eggs fresh, at room temperature
    • 250 ml buttermilk or sour milk
    • 100 ml vegetable oil can substitute with melted coconut oil
    • 1 tbsp white vinegar
    • 2 tsp vanilla extract
    • 2 tsp red food coloring gel preferred for vibrancy

    Equipment

    • Mixing bowls
    • Electric mixer or whisk
    • 20cm round cake pan
    • Parchment paper
    • Cooling rack

    Method
     

    1. Preheat your oven to 180°C (350°F). Grease your 20cm round cake pan and line the bottom with parchment paper to prevent sticking.
    2. Sift together the flour, cocoa powder, baking soda, and salt in a large mixing bowl until evenly combined. This ensures a light, airy crumb.
    3. In a separate bowl, whisk the eggs, buttermilk, vegetable oil, vinegar, and vanilla extract until the mixture is smooth and fragrant, about 1-2 minutes.
    4. Gradually pour the wet mixture into the dry ingredients, folding gently with a spatula or beating with an electric mixer on low speed. Mix until the batter is glossy, smooth, and free of lumps, about 2-3 minutes.
    5. Add the red food coloring to the batter and mix until the color is evenly distributed, resulting in a deep crimson hue.
    6. Pour the batter into your prepared cake pan, spreading evenly with a spatula for a flat, level surface.
    7. Bake in the preheated oven for about 30 minutes, or until the top is set and a toothpick inserted in the center comes out clean. Your kitchen will fill with a rich cocoa aroma.
    8. Remove the cake from the oven and let it cool in the pan for 10 minutes, then transfer to a cooling rack to cool completely. The cake should feel moist and tender to the touch.
    9. Once cooled, carefully slice the cake horizontally if layering, or serve as is. Frost with tangy cream cheese frosting for the perfect finishing touch.
    10. Enjoy your vibrant, velvety dark red velvet cake, perfect for celebrations or a decadent treat.
    This cake isn’t just a dessert; it’s a statement. Its moist crumb and vibrant hue make it a showstopper at any gathering. Keep it simple, let the colors and flavors speak for themselves, and don’t shy away from experimenting with different frostings or toppings. Every bite should feel like a small rebellion—rich, bold, and unforgettable.

  • Bloody Red Velvet Cake: A Dark, Rich Spin on a Classic

    Bloody Red Velvet Cake: A Dark, Rich Spin on a Classic

    Red velvet cake often feels like a nostalgic throwback, but I love to twist it into something darker and more dramatic. The deep crimson hue isn’t just for show; it’s a canvas for bold flavors and a touch of mystery. Baking this cake is about embracing the chaos of mixing rich cocoa, tangy buttermilk, and a splash of vinegar — a combination that somehow makes everything more alive.

    Why This Cake Never Gets Old

    Every time I bake this, it’s like revisiting a secret recipe I’ve refined over years. The rich, velvety crumb, paired with a tangy cream cheese frosting, always takes me back to childhood celebrations and quiet moments of self-indulgence. It’s a cake that’s as much about the process as it is about the final bite, with the deep red hue reminding me of passion and a little bit of chaos.

    Inside the Red Velvet Realm

    • All-purpose flour: The backbone of the cake, providing structure; I like to sift it for a light crumb.
    • Unsweetened cocoa powder: Adds depth and that signature chocolate hint—go for natural, not Dutch-processed.
    • Buttermilk: Gives moisture and tang, balancing the sweetness—swap with sour milk if needed.
    • Vinegar: Activates baking soda with a zing of acidity—don’t skip this.
    • Vegetable oil: Keeps the cake moist and tender—can substitute with melted coconut oil for extra flavor.
    • Red food coloring: The showstopper—use gel for vibrant color without watering down the batter.
    • Eggs: Bind the batter and aerate—large, fresh eggs work best.

    Tools of the Crimson Trade

    • Mixing bowls: To combine wet and dry ingredients separately.
    • Electric mixer or whisk: To beat the eggs and blend the batter smoothly.
    • Cake pan (20cm round): Shape your cake evenly.
    • Parchment paper: Prevent sticking and easy removal.
    • Cooling rack: Cool the cake evenly and prevent sogginess.

    Step-by-Step to a Deep Crimson Delight

    Step 1: Preheat your oven to 180°C (350°F). Grease a 20cm (8-inch) round cake pan and line the bottom with parchment.

    Step 2: In a large bowl, sift together 250g all-purpose flour, 30g unsweetened cocoa powder, 1 tsp baking soda, and ½ tsp salt.

    Step 3: In another bowl, whisk 2 large eggs, 250ml buttermilk, 100ml vegetable oil, 1 tbsp white vinegar, and 2 tsp vanilla extract until well combined.

    Step 4: Gradually add the wet ingredients to the dry, mixing just until the batter is smooth and velvety, no lumps.

    Cooking Cues & Common Pitfalls

    • The batter should be glossy and smooth, not thick or lumpy.
    • The cake’s edges should just start to pull away from the pan when baked.
    • When poked gently, the center should bounce back, not stay wet or sink.
    • Use a toothpick or cake tester; it should come out clean when the cake is done.

    Troubleshooting the Crimson Path

    • Cake rises then collapses.? If the cake sinks in the middle, check oven temperature—may be too hot. Lower slightly and bake longer.
    • Over-torched edges.? If the edges burn, reduce oven heat or cover edges with foil halfway through baking.
    • Lumpy or dense texture.? For uneven crumb, mix batter just until combined—don’t overmix.
    • Frosting sliding or melting.? If frosting slides off, chill the cake for 30 minutes before frosting.

    Dark Red Velvet Cake

    This dark red velvet cake features a rich, velvety crumb with a striking crimson hue, achieved through a careful balance of cocoa, buttermilk, and food coloring. The process involves mixing wet and dry ingredients to create a glossy batter, which is then baked until just golden and tender. Topped with tangy cream cheese frosting, it’s a visually stunning and decadently moist dessert with a hint of chocolate complexity.
    Prep Time 20 minutes
    Cook Time 30 minutes
    Total Time 50 minutes
    Servings: 8
    Course: Main Course
    Cuisine: American
    Calories: 450

    Ingredients
      

    • 250 g all-purpose flour sifted for lightness
    • 30 g unsweetened cocoa powder natural, not Dutch-processed
    • 1 tsp baking soda
    • ½ tsp salt
    • 2 large eggs large, fresh
    • 250 ml buttermilk or sour milk substitute
    • 100 ml vegetable oil can substitute with melted coconut oil
    • 1 tbsp white vinegar
    • 2 tsp vanilla extract
    • 2 tsp red food coloring gel preferred for vibrant color

    Equipment

    • Mixing bowls
    • Electric mixer or whisk
    • Cake pan (20cm round)
    • Parchment paper
    • Cooling rack

    Method
     

    1. Preheat your oven to 180°C (350°F). Grease a 20cm round cake pan and line the bottom with parchment paper to prevent sticking.
    2. Sift together the flour, cocoa powder, baking soda, and salt in a large bowl until evenly combined and light in texture.
    3. In another bowl, whisk the eggs, buttermilk, vegetable oil, vinegar, and vanilla extract until the mixture is smooth and slightly frothy.
    4. Add the red food coloring to the wet mixture and stir until the color is evenly distributed, creating a vibrant crimson hue.
    5. Gradually pour the wet ingredients into the dry mixture, folding gently with a spatula or mixing on low speed until just combined and the batter is glossy and smooth—avoid overmixing to keep it light.
    6. Pour the batter into your prepared cake pan, spreading it evenly with a spatula to ensure a flat, smooth surface.
    7. Bake in the preheated oven for about 30 minutes, or until the edges just start to pull away from the pan. Insert a toothpick into the center; if it comes out clean, the cake is ready.
    8. Remove the cake from the oven and let it cool in the pan for 10 minutes, then transfer to a cooling rack to cool completely—this helps prevent sogginess.
    9. Once cooled, the cake is ready to be frosted with tangy cream cheese frosting and decorated as desired for a stunning presentation.
    This cake isn’t just a dessert; it’s a statement. Its moist crumb and vibrant hue make it a showstopper at any gathering. Keep it simple, let the colors and flavors speak for themselves, and don’t shy away from experimenting with different frostings or toppings. Every bite should feel like a small rebellion—rich, bold, and unforgettable.

  • Halloween Bark Recipe: A Spooky Spin on Classic Chocolate

    Halloween Bark Recipe: A Spooky Spin on Classic Chocolate

    Halloween is my favorite excuse to go all out with chocolate and sugar. But this year, I wanted to skip the usual candy bowl and go for something more playful and a little spooky—like this bark that’s as fun to make as it is to eat. It’s a no-fuss project, perfect for getting kids involved or just indulging your own sweet tooth without the fuss.

    Why I keep making this spooky treat

    It’s endlessly customizable, easy to whip up last minute, and always a crowd-pleaser. Plus, it’s a chaos-friendly project with a sweet payoff. Watching the toppings melt into glossy, colorful patches makes me smile every time. It’s become my go-to for quick, festive happiness.

    What’s in your spooky stash?

    • Dark chocolate: It’s my go-to for rich, deep flavor, but milk or white can be swapped in if you prefer a milder taste.: Smooth, shiny, with a slight bitter edge that balances sweet toppings.
    • Candy toppings: Think crushed Oreos or gummy worms—add crunch and color, or keep it simple with sea salt for a salty contrast.: Crunchy, chewy, or sparkly—whatever makes your spooky heart happy.
    • Nuts: Toasted pecans or almonds add a smoky crunch, but skip if allergies are a concern.: Oozy in flavor and texture, they bring a little sophistication.
    • Edible glitter: Because sometimes, you want your treats to shimmer in the dim light.: Sparkling, shimmering, and totally festive.
    • Flavor extracts: A dash of peppermint or orange can turn this into a more personalized treat.: Oozy and fragrant, a little goes a long way.

    Tools of the trade for spooky chocolate

    • Double boiler or microwave: To melt chocolate gently, avoiding burning.
    • Spatula: To spread melted chocolate evenly.
    • Parchment paper: To prevent sticking and make cleanup easy.
    • Knife or breaker: To break the bark into rustic pieces.

    Step-by-step: Making Halloween Bark

    Step 1: Line a baking sheet with parchment paper.

    Step 2: Melt the dark chocolate in a double boiler or microwave, stirring every 30 seconds until smooth.

    Step 3: Pour the melted chocolate onto the prepared sheet, spreading it evenly with a spatula.

    Step 4: Sprinkle on your chosen toppings — think crushed candy, nuts, or edible glitter — while the chocolate is still warm.

    Step 5: Let the chocolate set at room temperature for at least 2 hours, or refrigerate for 30 minutes for quicker results.

    Step 6: Once firm, break into irregular shards with your hands or a knife for that rustic look.

    Key checkpoints: How to tell if your bark is perfect

    • Chocolate is fully melted and smooth, with no lumps.
    • Toppings are well distributed and adhered to the surface.
    • Chocolate has set and snapped cleanly when broken.
    • The finished bark has a glossy sheen and no sticky patches.

    Common Halloween bark slip-ups and how to fix them

    • Overheated chocolate.? Use a gentle heat, or chocolate can seize and turn grainy.
    • Toppings falling off.? Sprinkle toppings while chocolate is still warm for better adherence.
    • Bark sweating or developing condensation.? Refrigerate if quick setting is needed, but keep an eye on condensation.
    • Crumbly or jagged pieces.? Ensure chocolate is fully cooled before breaking for clean edges.

    Halloween Chocolate Bark

    This festive chocolate bark is made by melting dark chocolate and spreading it onto parchment paper, then decorating with colorful toppings like crushed Oreos, gummy worms, nuts, and edible glitter. Once set, it’s broken into rustic shards, offering a glossy, crunchy, and chewy treat perfect for Halloween celebrations. The process is quick, customizable, and yields a visually stunning, sweet snack.
    Prep Time 10 minutes
    Cook Time 15 minutes
    Total Time 25 minutes
    Servings: 8
    Course: Main Course
    Cuisine: Halloween
    Calories: 250

    Ingredients
      

    • 200 grams dark chocolate chopped or in chips
    • 1/2 cup crushed Oreos for topping
    • 1/4 cup gummy worms for topping
    • 1/3 cup toasted pecans optional, chopped
    • 1 tsp edible glitter for shimmer
    • 1/2 tsp peppermint extract optional for flavor

    Equipment

    • Double boiler or microwave
    • Spatula

    Method
     

    1. Line a baking sheet with parchment paper to prepare for the chocolate.
    2. Gently melt the dark chocolate using a double boiler or in a microwave, heating in 30-second intervals and stirring until smooth and glossy.
    3. Pour the melted chocolate onto the prepared parchment, spreading it evenly with a spatula to create a thin, smooth layer.
    4. Sprinkle crushed Oreos, gummy worms, toasted pecans, and edible glitter over the warm chocolate, distributing toppings evenly for a playful look.
    5. If using, add a few drops of peppermint extract onto the toppings for a fragrant, festive touch.
    6. Allow the chocolate to set at room temperature for about 2 hours, or refrigerate for 30 minutes for quicker firming.
    7. Once firm, break the chocolate into rustic shards using your hands or a knife, revealing the colorful toppings embedded in glossy chocolate.
    8. Enjoy your spooky, shiny Halloween bark—perfect for sharing or indulging all on your own!
    This Halloween bark isn’t just about the sweet crunch or the shiny, spooky toppings. It’s about the messy joy of creating something fun and customizable, even if your kitchen’s chaos is peeking out in every corner. Play with flavors, textures, and colors—make it your own. And honestly, it’s simple enough to whip up in a pinch, perfect for last-minute parties or just a quiet night craving something festive.

  • Monster Pretzel Bites: A Chewy, Salty, Cheeky Snack for the Chaos of the Day

    Monster Pretzel Bites: A Chewy, Salty, Cheeky Snack for the Chaos of the Day

    Pretzel bites have always felt like a rebellious snack—small but mighty, chewy and salty, with a glossy, browned crust. But lately, I’ve been obsessed with making them at home, especially with a twist of my own chaos. It’s a messy process, but that’s part of the charm.
    They’re a reminder that simple ingredients—flour, yeast, salt—can turn into something unexpectedly joyful. Plus, they’re perfect for snacking, sharing, or just gobbling down in a moment of need.

    Why These Pretzel Bites Keep Calling My Name

    They’re the perfect mix of chaos and comfort—chewy, salty, a little wild, and endlessly customizable. Every batch feels like a small victory, especially when they come out glossy and golden. Plus, making them at home means I can tweak the salt, add cheese, or even a dash of spice—never boring.

    Inside the Ingredients: What Makes These Pretzel Bites Special

    • Warm milk: Creates a cozy environment for yeast, must be just warm enough—no hotter.
    • Active dry yeast: The magic that makes the dough rise and develop that chewy texture.
    • All-purpose flour: The backbone of the pretzel—gluten-y, reliable, with a hint of wheat.
    • Baking soda: Gives that classic pretzel crust—deep, salty, with a smoky bite.
    • Coarse sea salt: Sprinkled on top for crunch and that unmistakable salty punch.
    • Butter, melted: Adds richness and helps the dough stay tender, even after baking.
    • Sugar: Feeds the yeast, but also balances the salty, yeasty notes.

    Tools of the Trade for Monster Pretzel Mastery

    • Large mixing bowl: For mixing and rising the dough.
    • Dough scraper: To handle sticky dough easily.
    • Baking sheet lined with parchment: For baking the pretzel bites evenly.
    • Kitchen thermometer: To check milk temperature.
    • Slotted spoon: To boil the pretzel bites in baking soda water.

    Crafting the Perfect Monster Pretzel Bites

    Step 1: Start by warming your milk to about 38°C (100°F). It should be just warm enough to feel like a cozy bath for your finger. If it’s too hot, it’ll kill the yeast—wait till it cools slightly.

    Step 2: Dissolve the yeast and sugar into the warm milk. Let it sit for 5 minutes until it’s foamy and bubbling—like a mini volcano of promise.

    Step 3: Mix the flour, salt, and melted butter in a big bowl. Pour in the yeast mixture. Stir until it forms a sticky dough, then knead for about 8 minutes until smooth and elastic.

    Step 4: Shape the dough into a ball, cover it with a damp towel, and let it rise in a warm spot for 1 hour, or until it’s doubled in size.

    Spotting the Finish Line: How to Know Your Pretzel Bites Are Ready

    • Dough should be smooth, slightly sticky, and spring back when poked.
    • Bites turn a deep golden-brown, with a crackly crust that makes a satisfying snap.
    • Baking fills the kitchen with that warm, yeasty aroma—like comfort in the air.

    Oops Moments: Common Pretzel Pitfalls and How to Fix Them

    • Dough is too sticky, hard to handle.? If dough is too sticky, dust with a little more flour and knead lightly.
    • Pretzel bites lack color.? If pretzels are pale, increase oven temp to 220°C (430°F) or bake a few minutes longer.
    • Texture turns rubbery.? If pretzels are tough, don’t overbake, or try a shorter boil time.
    • Baking soda boil is too vigorous.? If baking soda water bubbles over, lower heat or use a larger pot.

    Homemade Pretzel Bites

    These homemade pretzel bites are chewy, salty, and golden with a glossy crust, achieved through boiling in baking soda water before baking. Made from simple ingredients like flour, yeast, and salt, they develop a satisfying snap and a slightly crisp exterior while remaining tender inside. Perfect for snacking or sharing, they can be customized with cheese, spices, or extra salt.
    Prep Time 15 minutes
    Cook Time 15 minutes
    Total Time 2 minutes
    Servings: 8
    Course: Main Course
    Cuisine: American
    Calories: 150

    Ingredients
      

    • 1 cup warm milk about 38°C (100°F), just warm to the touch
    • 2 1/4 teaspoons active dry yeast instant or active dry yeast
    • 1 tablespoon granulated sugar feeds the yeast
    • 3 1/2 cups all-purpose flour plus extra for dusting
    • 1 teaspoon salt
    • 2 tablespoons melted butter
    • 4 cups water
    • 2/3 cup baking soda for boiling water
    • coarse sea salt for sprinkling on top of pretzels

    Equipment

    • Large mixing bowl
    • Dough scraper
    • Baking sheet lined with parchment
    • Kitchen thermometer
    • Slotted spoon

    Method
     

    1. Warm the milk in a small saucepan or microwave until it reaches about 38°C (100°F). It should feel cozy but not hot to the touch.
    2. Pour the warm milk into a large mixing bowl, then sprinkle the yeast and sugar over the surface. Let it sit for 5 minutes until the mixture becomes foamy and bubbling, signaling the yeast is active.
    3. Add the flour, salt, and melted butter to the yeast mixture. Stir with a spoon or dough scraper until a sticky dough forms.
    4. Knead the dough in the bowl or on a floured surface for about 8 minutes until it becomes smooth, elastic, and slightly tacky.
    5. Shape the dough into a ball, cover it with a damp towel, and let it rise in a warm place for 1 hour, or until it doubles in size.
    6. Preheat your oven to 220°C (430°F) and line a baking sheet with parchment paper. Bring water to a boil in a large pot, then add the baking soda.
    7. Once the dough has risen, punch it down gently and turn it out onto a floured surface. Divide it into small portions and shape each into bite-sized pieces.
    8. Using a slotted spoon, carefully lower a handful of pretzel bites into the boiling baking soda water. Boil for about 30 seconds until they puff slightly and become glossy.
    9. Remove the pretzels with the slotted spoon, letting excess water drip off, then transfer them to the prepared baking sheet.
    10. Sprinkle the pretzels generously with coarse sea salt. Repeat the boiling process with remaining pieces.
    11. Bake the pretzel bites in the preheated oven for 12-15 minutes, until they are deep golden brown with a glossy, crackly crust.
    12. Remove from the oven, let cool slightly, then enjoy your chewy, salty, homemade pretzel bites—perfect for snacking and sharing!
    These pretzel bites are a messy, chewy riot—perfect for grabbing with sticky fingers during a movie night or a chaotic snack attack. Feel free to toss in some cheese, garlic, or even a sprinkle of spicy seeds before baking. They’re forgiving, fun, and a little wild—like a good day should be.

  • Black Velvet Cupcakes: A Midnight-Blue Dessert with a Deep, Rich Soul

    Black Velvet Cupcakes: A Midnight-Blue Dessert with a Deep, Rich Soul

    Black velvet cupcakes are a surprise—the dark color and deep cocoa flavor catch you off guard in the best way. They’re a little dramatic, but also comforting, especially when you need something a bit decadent. I love how the color makes them perfect for evening treats, or even fancy brunches with a dark twist. It’s about finding beauty in the moody, the mysterious, the understated.

    Why These Cupcakes Keep Calling Me

    Their deep, smoky flavor and moist crumb make them a go-to for quiet evenings. The color alone feels like a secret, and I love the way they look on a plate—mysterious and inviting. Every time I bake them, I feel a little more in control, turning simple ingredients into something memorable. They remind me that sometimes, less is more—just good cocoa, butter, and a bit of patience.

    Inside the Dark Chocolate and Cocoa

    • Dark cocoa powder: Gives that rich, smoky depth. Use Dutch-processed for a smoother flavor or natural for more acidity.
    • Buttermilk: Adds moistness and a subtle tang. If unavailable, swap with sour cream or yogurt.
    • Butter: Creamy and rich, it’s the base of the moist crumb. Consider using European-style for extra flavor.
    • Granulated sugar: Sweetens and tenderizes, balancing the cocoa’s bitterness.
    • Eggs: Bind everything together, add structure and moisture.
    • Vanilla extract: Enhances the chocolate notes, a splash brightens the overall flavor.
    • All-purpose flour: Provides structure; don’t overmix to keep it tender.

    Tools of the Midnight Kitchen

    • Mixer or whisk: To beat butter and sugar to fluffy perfection.
    • Sifter: To combine dry ingredients smoothly and prevent lumps.
    • Muffin tin and paper liners: To shape and contain the cupcakes.
    • Cooling rack: To cool cupcakes evenly and prevent sogginess.
    • Toothpick or cake tester: To check doneness without damaging the cupcakes.

    Step-by-step to a Deep-Color, Moist Cupcake

    Step 1: Preheat your oven to 175°C (350°F). Line a muffin tin with paper liners.

    Step 2: Mix dry ingredients: flour, cocoa powder, baking soda, salt. Sift to combine.

    Step 3: Cream butter and sugar until pale and fluffy, about 3-4 minutes.

    Step 4: Add eggs one at a time, beating well after each. Mix in vanilla extract.

    Step 5: Alternate adding buttermilk and dry ingredients, starting and ending with dry. Mix until just combined.

    Step 6: Divide batter evenly into liners, filling about 2/3 full.

    Step 7: Bake for 18-20 minutes. Check with a toothpick; it should come out clean.

    Step 8: Let cupcakes cool in the tin for 10 minutes, then transfer to a wire rack.

    Step 9: Finish with your favorite frosting—cream cheese works beautifully.

    Watching for the Perfect Bake and Texture

    • Cupcakes should be risen and slightly domed, with a firm, springy surface.
    • The edges are slightly darker but not burnt; a little crackle on top is good.
    • A toothpick inserted in the center should come out clean or with just a few moist crumbs.

    Common Pitfalls and How to Avoid Them

    • Cold butter or eggs can cause uneven mixing.? Ensure ingredients are at room temperature to avoid batter curdling.
    • Overmixing leads to dense, tough cupcakes.? Don’t overmix once dry ingredients are added.
    • Premature opening causes collapsing or uneven rising.? Bake until just done, don’t open the oven early.
    • Incorrect oven temp can burn or underbake.? Check oven temperature with an oven thermometer.

    Black Velvet Cupcakes

    Black velvet cupcakes are moody, decadent treats with a deep cocoa flavor and moist, tender crumb. Their striking dark color and rich texture make them perfect for evening indulgence or fancy brunches, offering a surprising and sophisticated twist on classic cupcakes.
    Prep Time 15 minutes
    Cook Time 20 minutes
    Total Time 35 minutes
    Servings: 12
    Course: Main Course
    Cuisine: American
    Calories: 250

    Ingredients
      

    • 1 3/4 cups all-purpose flour
    • 1/2 cup dark cocoa powder Dutch-processed preferred
    • 1 teaspoon baking soda baking soda
    • 1/2 teaspoon salt salt
    • 1/2 cup unsalted butter room temperature
    • 1 cup granulated sugar
    • 2 large eggs room temperature
    • 1 teaspoon vanilla extract vanilla extract
    • 3/4 cup buttermilk or sour cream/yogurt substitute

    Equipment

    • Mixer or whisk
    • Sifter
    • Muffin tin and paper liners
    • Cooling rack
    • Toothpick or cake tester

    Method
     

    1. Preheat your oven to 175°C (350°F) and line your muffin tin with paper liners. This sets the stage for even baking and easy cleanup.
    2. Sift together the flour, cocoa powder, baking soda, and salt into a large bowl. This ensures a smooth, lump-free batter with a deep chocolate flavor.
    3. In a separate bowl, beat the butter and sugar with a mixer or whisk until the mixture is pale, fluffy, and fragrant—about 3-4 minutes. This creates a light base for the cupcakes.
    4. Add eggs one at a time, beating well after each addition. Then, mix in the vanilla extract until combined. The batter will look smooth and slightly glossy.
    5. Alternate adding the buttermilk and dry ingredients to the creamed mixture, starting and ending with the dry. Mix until just combined—be careful not to overmix, as this keeps the cupcakes tender.
    6. Divide the batter evenly among the cupcake liners, filling each about two-thirds full. You should see a rich dark batter with a velvety texture.
    7. Bake for 18-20 minutes, or until the cupcakes have risen and a toothpick inserted into the center comes out clean. The tops should be slightly cracked and fragrant.
    8. Allow the cupcakes to cool in the tin for about 10 minutes, then transfer them to a wire rack. This helps them set and prevents sogginess.
    9. Once cooled, frost with your favorite rich cream cheese frosting or a dark chocolate ganache for an extra decadent finish. The deep cocoa flavor shines through every bite.
    10. Enjoy these moist, dramatic cupcakes that look as mysterious as they taste, perfect for special occasions or a quiet evening treat.
    These cupcakes aren’t just pretty; they hold a quiet, smoky richness that’s perfect for late-night gatherings or quiet moments. They’re easy enough to whip up on a whim but special enough to make a statement. Once cooled, a smear of cream cheese frosting turns them into a little midnight indulgence. Feel free to sprinkle some edible gold dust or add a dash of espresso powder for a personal touch.