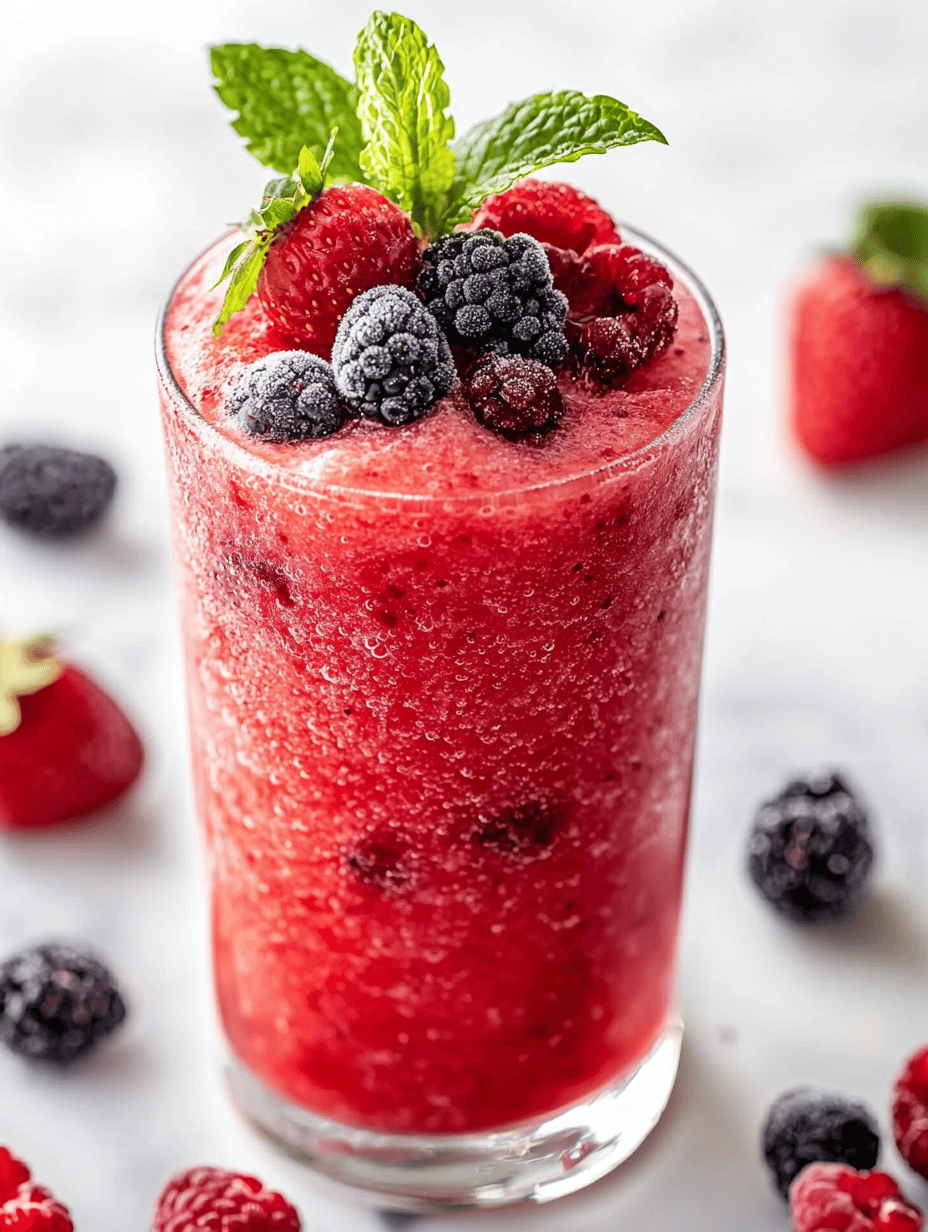
Category: Beverages

  • Bloody But Celebratory: A Halloween Bloody Mary with a Savage Twist

    Bloody But Celebratory: A Halloween Bloody Mary with a Savage Twist

    As the leaves turn crisp and the air smells like pumpkin spice, this Bloody Mary becomes the perfect libation for your haunted gatherings. It’s bold, it’s cheeky, and it’s a nod to everyone who loves a little horror in their happy hour.

    Pumpkin Spice Bloody Mary

    This cocktail blends vodka with tomato juice and seasonal pumpkin spice flavors, creating a savory, spicy beverage. The mixture is shaken until well combined, then poured over ice for a vibrant, frothy final appearance with a hint of warmth and earthiness from the spices.
    Prep Time 5 minutes
    Total Time 5 minutes
    Servings: 1
    Course: Main Course
    Cuisine: American
    Calories: 120

    Ingredients
      

    • 4 oz tomato juice preferably chilled
    • 1.5 oz vodka or to taste
    • 0.5 tsp pumpkin spice preferably homemade or a mix of cinnamon, nutmeg, allspice
    • 1 dash Worcestershire sauce for depth of flavor
    • 0.5 oz lemon juice freshly squeezed
    • to taste hot sauce optional for heat

    Equipment

    • Cocktail shaker
    • Strainer
    • Tall glass

    Method
     

    1. Add the tomato juice, vodka, pumpkin spice, Worcestershire sauce, and lemon juice into the cocktail shaker.
    2. Securely close the shaker and shake vigorously for about 10-15 seconds until the mixture is well combined and slightly frothy.
    3. Fill a tall glass with ice, then strain the mixture into the glass, pouring it over the ice for a chilled, vibrant appearance.
    4. Garnish with a lemon wedge or a sprinkle of extra pumpkin spice if desired for an appealing finish.
    5. Serve immediately and enjoy your festive pumpkin spice Bloody Mary with its bold flavors and colorful presentation.
    Whether you’re hosting a party or just treating yourself, this cocktail urges you to embrace the chaos and have fun with your spirits. Cheers to a holiday that’s all about the thrill of the spooky, and a drink that refuses to be just ordinary.

  • The Secret Ingredient That Turns Oreo Slushies into Winter Wonderland

    The Secret Ingredient That Turns Oreo Slushies into Winter Wonderland

    Ever thought an ordinary snack like an Oreo slushie could take you on a nostalgic trip down memory lane? When the winter wind bites, a chilled treat suddenly feels like a warm hug — if that hug was topped with crushed Oreos. It’s a simple joy that packs a punch of childhood comfort and refreshment in one icy sip.

    This recipe isn’t just about mixing ice and cookies. It’s about creating a chilly escape you can whip up at home, no fancy equipment needed. The magic lies in the balance of creamy and crunchy, with a hint of vanilla whispering through every spoonful.

    Oreo Slushie

    An Oreo slushie is a cold, creamy beverage made by blending crushed Oreo cookies with ice and milk until smooth. The final texture is thick and icy, with crunchy bits of cookie throughout, creating a refreshing treat reminiscent of childhood snacks.
    Prep Time 5 minutes
    Total Time 5 minutes
    Servings: 2
    Course: Main Course
    Cuisine: None
    Calories: 200

    Ingredients
      

    • 8 cookies Oreos roughly crushed
    • 1 1/2 cups milk cold
    • 2 cups ice

    Equipment

    • Blender
    • Measuring cup

    Method
     

    1. Place the Oreos in a blender and pulse a few times to roughly crush them into smaller pieces.
      8 cookies Oreos
    2. Add the cold milk to the blender with the crushed Oreos.
      8 cookies Oreos
    3. Add the ice cubes to the blender.
      8 cookies Oreos
    4. Blend on high speed until the mixture is thick, smooth, and slushy, about 30-60 seconds.
    5. Stop the blender and check the consistency; if it’s too thick, add a splash more milk and blend briefly to combine.
    6. Pour the Oreo slushie into glasses, allowing the icy, creamy mixture to settle slightly.
    As the seasons shift, your Oreo slushie offers a little burst of happiness on the coldest days. It’s quick, it’s nostalgic, and it’s endlessly customizable. Sometimes, all you need is a bowl of icy sweetness to remind you of simpler times.

    So next time you crave a treat that’s both indulgent and effortless, reach for this recipe. It’s perfect for cozy nights in or unexpected guests. And honestly, it might just become your go-to cold snack whenever you need a quick escape from the ordinary.

  • Bloody But Celebratory: A Halloween Bloody Mary with a Savage Twist

    Bloody But Celebratory: A Halloween Bloody Mary with a Savage Twist

    As the leaves turn crisp and the air smells like pumpkin spice, this Bloody Mary becomes the perfect libation for your haunted gatherings. It’s bold, it’s cheeky, and it’s a nod to everyone who loves a little horror in their happy hour.

    Pumpkin Spice Bloody Mary

    This cocktail blends vodka with tomato juice and seasonal pumpkin spice flavors, creating a savory, spicy beverage. The mixture is shaken until well combined, then poured over ice for a vibrant, frothy final appearance with a hint of warmth and earthiness from the spices.
    Prep Time 5 minutes
    Total Time 5 minutes
    Servings: 1
    Course: Main Course
    Cuisine: American
    Calories: 120

    Ingredients
      

    • 4 oz tomato juice preferably chilled
    • 1.5 oz vodka or to taste
    • 0.5 tsp pumpkin spice preferably homemade or a mix of cinnamon, nutmeg, allspice
    • 1 dash Worcestershire sauce for depth of flavor
    • 0.5 oz lemon juice freshly squeezed
    • to taste hot sauce optional for heat

    Equipment

    • Cocktail shaker
    • Strainer
    • Tall glass

    Method
     

    1. Add the tomato juice, vodka, pumpkin spice, Worcestershire sauce, and lemon juice into the cocktail shaker.
    2. Securely close the shaker and shake vigorously for about 10-15 seconds until the mixture is well combined and slightly frothy.
    3. Fill a tall glass with ice, then strain the mixture into the glass, pouring it over the ice for a chilled, vibrant appearance.
    4. Garnish with a lemon wedge or a sprinkle of extra pumpkin spice if desired for an appealing finish.
    5. Serve immediately and enjoy your festive pumpkin spice Bloody Mary with its bold flavors and colorful presentation.
    Whether you’re hosting a party or just treating yourself, this cocktail urges you to embrace the chaos and have fun with your spirits. Cheers to a holiday that’s all about the thrill of the spooky, and a drink that refuses to be just ordinary.

  • Chill Out: The Art of Crafting Unique Vodka Slushies for Summer Sipping

    Chill Out: The Art of Crafting Unique Vodka Slushies for Summer Sipping

    Imagine turning your freezer into a mini laboratory of icy confections, where vodka becomes the secret ingredient to elevate a simple slushie into an adult playground of flavors. This approach isn’t about just freezing fruit and adding spirits; it’s about balancing clarity, chill, and a punch of flavor that makes each sip a cool escape. The best part? Creating a vodka slushie that surprises your taste buds without turning into a boozy snowpile.

    Crafting these slushies requires a delicate dance of patience and a little bit of chaos—freezing, blending, and perfecting. What makes this recipe special is how it crafts nostalgia into a cocktail-like delight, perfect for summer gatherings, lazy weekends, or just because you crave something refreshingly different. It’s about transforming ordinary frozen fruit into a vibrant, spirited toast to hot days.

    Vodka Fruit Slushie

    This vodka fruit slushie is a frozen beverage made by blending fruit with spirits to create a smooth, icy texture. The main ingredients include frozen fruit and vodka, resulting in a vibrant, refreshing drink with a firm, slush-like consistency. It offers a colorful, icy appearance perfect for summer gatherings or a cool treat.
    Prep Time 10 minutes
    Total Time 10 minutes
    Servings: 4
    Course: Main Course
    Cuisine: globally-inspired
    Calories: 150

    Ingredients
      

    • 4 cups frozen mixed fruit such as berries, mango, pineapple
    • 1 cup vodka use your favorite brand
    • 0.5 cup simple syrup optional, for added sweetness

    Equipment

    • Freezer
    • Blender
    • Measuring cups and spoons

    Method
     

    1. Measure out the frozen fruit and place it in a blender.
    2. Pour the vodka over the fruit, ensuring everything is well covered for even blending.
    3. If desired, add a splash of simple syrup to enhance sweetness.
    4. Secure the lid on the blender and start blending on low speed, gradually increasing to high until the mixture is smooth and icy, with a slush-like consistency.
    5. Check the texture—if it’s too thick, add a splash of water or more vodka and give it a quick blend to loosen it up.
    6. Once the mixture is smooth and scoopable, pour it into chilled glasses, creating a vibrant, icy appearance.
    7. Optionally, garnish with fresh fruit slices or a sprig of mint for a colorful finishing touch.

    Notes

    For best results, use very ripe, frozen fruit for vibrant flavor and color. Adjust the amount of vodka to suit your desired alcohol strength.
    So, next time you want to impress friends or just treat yourself, pull out your blender and give this vodka slushie recipe a try. The combination of icy texture with a burst of fruit flavor and a kick of alcohol makes it endlessly versatile. Plus, it’s a simple, no-fuss way to enjoy a cocktail without the fuss.

    This frozen marvel isn’t just a treat; it’s a small celebration of summer’s simple joys. Whether served in a fancy glass or a plastic cup, it’s sure to spark smiles and spontaneous toasts. Relax and enjoy the icy rush—these slushies are here to cool down those summer days, one chilled sip at a time.

  • Chill Out with the Most Unexpected Chocolate Slushie Twist

    Chill Out with the Most Unexpected Chocolate Slushie Twist

    Imagine biting into a chocolate bar on a hot day, then freezing that moment into a icy beverage. That’s the magic of this chocolate slushie, but with a twist that only true dessert adventurers will appreciate. I stumbled upon this idea when I wanted something rich but refreshingly different, and it turned into a childhood-flavored chaos.

    This isn’t your average icy treat. It’s a nostalgic dive into the chaos of childhood summers, rebooted with a splash of sophistication. Maybe it’s the creaminess, maybe the crunch of chocolate bits in every sip, or the way it crackles when you drink—it’s unexpectedly playful. Perfect for when you need a cool escape from the usual.

    ## WHY I LOVE THIS RECIPE?
    – It reminds me of my summers at grandma’s, where chocolate never ran out.
    – The simplicity lets me experiment without ruining the fun.
    – It’s a relief to have an easy, crowd-pleasing dessert quick enough for last-minute gatherings.
    – I love how the flavors evolve as it melts, turning richer and more velvety.

    Chocolate Slushie with Chocolate Bits

    This chocolate slushie is a frozen, icy beverage made by blending rich chocolate ice cream or milk with crushed ice. The mixture results in a creamy, textured drink with chocolate bits throughout, topped with a crackling, velvety surface that resembles a childhood treat turned refreshingly cool.
    Prep Time 10 minutes
    Total Time 10 minutes
    Servings: 2
    Course: Main Course
    Cuisine: Dessert
    Calories: 250

    Ingredients
      

    • 2 cups chocolate ice cream or milk use chocolate ice cream for a richer flavor or milk for a lighter version
    • 1 cup crushed ice adjust for desired thickness
    • 1/4 cup chopped chocolate bits for texture and visual appeal

    Equipment

    • Blender
    • Measuring Cups
    • Spoon
    • Serving Glasses

    Method
     

    1. Place the chocolate ice cream or milk into the blender, creating a smooth base for the slushie.
    2. Add the crushed ice to the blender, then secure the lid tightly.
    3. Blend the mixture on high speed until the ice is broken down and the mixture becomes thick and slushy, about 30-45 seconds. You should see the texture turn creamy with icy bits dispersed evenly.
    4. Add the chopped chocolate bits into the blender and pulse a few times just to incorporate them evenly without crushing them completely, so they remain crunchy.
    5. Pour the thickened, chocolatey slushie into chilled glasses, filling them nearly to the top.
    6. Serve immediately with a straw or spoon, enjoying the crunchy bits and velvety ice. Feel free to garnish with extra chocolate shavings if desired.
    Whether you’re cooling off after a marathon of summer chores or just craving that elusive chocolate fix, this slushie hits the mark. It’s a playful way to bring a little chaos into your dessert routine, with minimal fuss and maximum flavor. Plus, it’s endlessly customizable—more chocolate, a splash of coffee, or even a swirl of caramel.

    As the weather warms up, having a stash of this slushie in the freezer becomes a sweet survival tactic. It’s a quick scoop of joy when the day feels too long or simply in need of a sweet escape. No matter the season, this icy treat is ready to surprise and delight.

  • The Surprising Charm of the Clear Sprite Slushie

    The Surprising Charm of the Clear Sprite Slushie

    Imagine a summer evening where the air hums with the scent of fresh lemons and the promise of something chilled and fizzy. Instead of reaching for a typical soda, I discovered the joy of transforming Sprite into a vibrant, icy treat that’s almost too fun to sip. It’s a nostalgic burst of childhood with an adult twist, perfect for backyard gatherings or simply cooling down on a hot day.

    What makes this Sprite slushie stand out isn’t just its simplicity but its ability to elevate a common soda into a spectacle of texture and flavor. The icy crunch mixed with the zing of citrus creates a sensory moment you don’t want to miss. Plus, it’s so quick to make, it’s perfect for impromptu parties or a spontaneous treat to beat the heat.

    Sprite Slushie

    The Sprite slushie is a frozen beverage made by blending chilled Sprite with ice to create a crunchy, icy texture. The key ingredients are sparkling lemon-lime soda and crushed ice, resulting in a bright, fizzy, and refreshing treat with a semi-thick, granular appearance. It’s perfect for hot days and casual gatherings, offering a playful twist on traditional frozen drinks.
    Prep Time 5 minutes
    Total Time 5 minutes
    Servings: 2
    Course: Main Course
    Cuisine: American
    Calories: 150

    Ingredients
      

    • 1 liter chilled Sprite Well chilled for best blending
    • 2 cups ice cubes Crushed or whole before blending

    Equipment

    • Blender
    • Measuring Cups

    Method
     

    1. Place the ice cubes into the blender.
    2. Pour the chilled Sprite over the ice in the blender.
    3. Blend on high speed until the mixture is slushy and smooth, with a granular, icy texture that looks opaque and frosty.
    4. Stop blending and check the consistency; it should be thick and icy but scoopable.
    5. Scoop the Sprite slushie into glasses, allowing the icy froth to mound slightly over the rim.
    6. Serve immediately with a straw or small spoon for a refreshing, fizzy icy treat.

    Notes

    For an even cooler experience, freeze the Sprite in a shallow dish overnight before blending.

    Taking that quick step from ordinary soda to icy delight reminds us that some of the best comforts can come from the simplest ingredients. This Sprite slushie is a reminder to embrace playful, easy, and refreshing pleasures, especially when the sun blazes down.

    Now, with just a bag of ice and a bottle of Sprite, you can turn any moment into a cool escape. No matter the season, a icy glass of this slushie offers a crisp, fizzy retreat—light, lively, and utterly satisfying.

  • Frozen Blueberry Bliss: The Secret to a No-Mess Summer Slushie

    Frozen Blueberry Bliss: The Secret to a No-Mess Summer Slushie

    Imagine turning on your blender and unleashing a burst of cold, sweet blueberry aroma that instantly transports you to a sun-drenched berry patch. This blueberry slushie isn’t just a frozen treat; it’s a playful escape from the blazing heat with a twist of unexpected tartness that tickles your taste buds.

    What makes this recipe special isn’t just its vibrant color or the burst of flavor—it’s how effortlessly it comes together. No complicated ingredients, no lengthy prep; just ripe blueberries, a splash of lemon, and a handful of ice. Perfect for those moments when your sweet tooth calls and you want a quick, refreshing fix.

    Blueberry Slushie

    A blueberry slushie is a frozen beverage made by blending ripe blueberries with ice and a touch of lemon juice to create a vibrant, Refreshing drink. It has a smooth, icy texture with bursts of tartness and sweetness, served in a glass with a chilled appearance.
    Prep Time 5 minutes
    Total Time 5 minutes
    Servings: 2
    Course: Main Course
    Cuisine: Global
    Calories: 80

    Ingredients
      

    • 1 cup fresh blueberries ripe for sweetness
    • 1/2 lemon lemon juice freshly squeezed
    • 1 cup ice crushed or cubed

    Equipment

    • Blender
    • Measuring cups and spoons

    Method
     

    1. Add fresh blueberries, lemon juice, and ice to your blender.
    2. Secure the lid tightly and blend on high speed until the mixture is smooth and icy, about 30-40 seconds. You should see a vibrant purple slush with tiny frozen bits.
    3. Stop the blender and check the consistency; if it’s too thick, add a splash more lemon juice or a little water and blend again briefly.
    4. Pour the blueberry slushie into chilled glasses, and notice the bright, icy appearance combined with flecks of deep purple.
    5. Garnish with fresh blueberries or a lemon wedge if desired for an inviting presentation.
    6. Serve immediately with a straw for a cooling, refreshing treat.
    This blueberry slushie is more than a simple frozen snack; it’s a moment of cool bliss in your busy day. No matter the season, it offers a consistent burst of berry freshness that’s both satisfying and energizing.

    So, the next time you crave something quick, colorful, and full of flavor, let this slushie be your go-to. It’s a reminder that sometimes, the simplest ingredients create the most memorable delights, especially when served icy and loud in a glass.

  • Peach Slushie: The Frozen Summer Escape You Didn’t Know You Needed

    Peach Slushie: The Frozen Summer Escape You Didn’t Know You Needed

    One of my favorite childhood memories is sneaking into the kitchen during the C&O summer months, hunting for ripe peaches and trying to replicate the sweet, icy drinks I saw my parents enjoy. That nostalgia fuels my obsession with perfecting simple, fruit-forward frozen treats that instantly transport my mind to lazy afternoons in the sun. Today’s peach slushie isn’t just a drink—it’s a portal to those carefree days.

    What makes this peach slushie different? It’s all about the texture—the way the icy peaches melt on your tongue, releasing bursts of juicy flavor with every sip. Using just a handful of ingredients, you can craft a frozen delight that’s sweet, tangy, and refreshingly cool, perfect for beating the summer heat or elevating your brunch game. This recipe celebrates the pure, unadulterated joy of biting into a ripe, luscious peach—frozen, but full of life.

    Peach Slushie

    The peach slushie is a frozen beverage made by blending ripe peaches with ice and a touch of sweetener, resulting in a smooth, icy drink with a vibrant orange hue. Its soft, crushed-ice texture melts in the mouth, releasing juicy, fruit-forward flavors perfect for hot summer days.
    Prep Time 10 minutes
    Total Time 10 minutes
    Servings: 2
    Course: Main Course
    Cuisine: Summer
    Calories: 120

    Ingredients
      

    • 4 providing ½ cup ripe peaches peeled and pitted
    • 1 cup ice cubes preferably crushed or small pieces
    • 2 tablespoons honey or agave syrup adjust to taste
    • ½ cup water or lemon-lime soda for a lighter, fizzy touch

    Equipment

    • Blender
    • Knife

    Method
     

    1. Slice the ripe peaches into smaller chunks, making it easier for the blender to process.
    2. Add the peach slices, ice cubes, honey, and water (or soda) into the blender jar.
    3. Secure the lid on the blender and blend on high speed until the mixture is smooth, icy, and frothy—about 30-45 seconds. You should see a vibrant orange color and a consistency similar to thick slush.
    4. Stop the blender and check the texture—if it’s too thick, add a splash more water or soda and blend briefly to thin it out.
    5. Pour the chilled peach slushie into glasses, using a spoon to guide it if necessary.
    6. Optional: garnish with a peach slice or a sprig of mint for a colorful, fragrant finish.
    7. Serve immediately to enjoy the icy, juicy refreshment at its best.

    As the seasons shift, a peach slushie offers a sweet, chilled reprieve from the heat, with the bonus of reminding us of summer’s simple pleasures. It’s perfect for spontaneous gatherings or quiet afternoons by the window, watching the world slow down. So next time you find yourself craving something cold and fruity, reach for those peaches and let your blender do the magic.

    Creating this slushie is quick, forgiving, and always a hit. It’s a reminder that some of the best treats are rooted in ingredients that are just waiting to be rediscovered. Stay cool, savor the moment, and enjoy the burst of sunshine with every sip of this frozen peach delight.

  • Unusual Blue Raspberry Slushie: A Nostalgic Chill with a Twist

    Unusual Blue Raspberry Slushie: A Nostalgic Chill with a Twist

    Exploring the vibrant world of frozen treats often takes us down familiar paths, but today I want to share a slice of childhood nostalgia with an unexpected twist. The blue raspberry slushie isn’t just a favorite; it’s a sensory adventure wrapped in shimmering blue, bursting with a tart and sweet flavor that feels like capturing a summer sunset in a glass.

    This recipe goes beyond the typical by incorporating a hint of lime and a dash of mint, elevating it from simple refreshment to an exhilarating palate-pleaser. As the weather shifts, this icy delight becomes not just a treat but a celebration of the fleeting, sparkling moments of warm days and cool breezes.

    Blue Raspberry Lime Mint Slushie

    This blue raspberry slushie is a frozen beverage that combines tart and sweet flavors with a shimmering blue hue. Blended with lime juice and fresh mint, it offers a refreshing, icy texture that melts smoothly in the mouth and evokes a summer sunset. The final result is a vibrant, icy drink with a bright, flavorful profile.
    Prep Time 10 minutes
    Total Time 10 minutes
    Servings: 2
    Course: Main Course
    Cuisine: beverage
    Calories: 120

    Ingredients
      

    • 2 cups frozen blue raspberry fruit
    • 1 cup ice cubes
    • 1/2 cup lime juice freshly squeezed
    • 1 tbsp honey or simple syrup optional for added sweetness
    • 8 fresh mint leaves mint roughly chopped

    Equipment

    • Blender
    • Measuring cups and spoons

    Method
     

    1. Add the frozen blue raspberry fruit, ice cubes, lime juice, honey (if using), and chopped mint leaves to the blender.
    2. Secure the lid and blend on high speed until the mixture is smooth and ice is fully crushed, about 30-40 seconds. You’ll see the mixture turn a vibrant blue with tiny ice shards.
    3. Stop the blender and check the consistency; it should be thick, icy, and scoopable. If needed, add a splash more lime juice or a little water and blend briefly to loosen.
    4. Pour the slushie into chilled glasses, ensuring an even, vibrant blue color with a slightly frosty top.
    5. Garnish with additional mint leaves or a lime wedge for a colorful finishing touch.
    6. Serve immediately with a straw or spoon and enjoy the refreshing burst of tart and sweet flavor in every sip.

    When you craft this blue raspberry slushie, you’re reliving a piece of carefree summer afternoons, but with a new zing of lime and mint freshness. It’s perfect for spontaneous get-togethers or a solo escape into sweet, icy relief on a hot day.

    Enjoy the bright shimmer of blue and the crisp, tart finish that makes this recipe stand out. It’s a simple pleasure that breathes new life into a childhood favorite, turning it into a refreshing ode to season’s change and playful moments.

  • Spooky Spirit: The Haunted Halloween Monster Mash Punch

    Spooky Spirit: The Haunted Halloween Monster Mash Punch

    Knowing that Halloween is just around the corner, I love to go beyond the ordinary and craft something that stirs the senses and sparks nostalgia. This Monster Mash Punch is my secret weapon to turn a simple gathering into a ghostly celebration, with vibrant colors and playful effects.

    Imagine the aroma of sweet citrus mingling with the zing of chilled seltzer as the punch shimmers under dim lights. It’s a drink that doesn’t just quench thirst—it creates a theatrical display, perfect for mingling with costumed friends and family. Plus, it’s easy enough to prepare in a frenzy of Halloween prep.

    WHY I LOVE THIS RECIPE?

    • It’s chaotic, fun, and perfect for a party full of kids and adults alike.
    • The bright hues and bubbling effects add a magic touch I look forward to every year.
    • I love how it brings a dose of childhood nostalgia with its fruity flavors and bubbly fizz.
    • It’s surprisingly simple, letting me enjoy the party rather than slave away in the kitchen.

    AVOID MY DISASTER (You’re Welcome)

    • FORGOT to chill the sodas? The punch became lukewarm and flat—keep everything cold beforehand.
    • DUMPED too many gummy worms? The punch turned opaque; add a little more juice to restore clarity.
    • OVER-TORCHED the sugar rim? It turned bitter—use a gentle blowtorch or skip altogether.
    • FORGOT to add the eyes? The spooky effect is lost—keep a stash of edible googly eyes handy.

    QUICK FIXES THAT SAVE YOUR DAY

    • When the punch looks dull, splash in extra brightly colored juice or soda for zing.
    • Patch flavor by stirring in a dollop of vanilla ice cream if it turns too tart.
    • Shield the drink with a clear plastic cover if sudden rain threatens your setup.
    • When the fizzy disappears, stir in fresh soda and watch it bubble back to life.
    • When in doubt, add a pinch of spooky-colored edible glitter for a shimmer that wows.

    Monster Mash Punch

    A vibrant and bubbly Halloween-themed punch made with a mix of fruit juices, soda, and playful garnishes. The drink features shimmering colors, fizzy carbonation, and spooky decorations, creating a fun and theatrical beverage. Its bright appearance and effervescent texture make it a centerpiece for festive gatherings.
    Prep Time 15 minutes
    Cook Time 5 minutes
    Total Time 20 minutes
    Servings: 8
    Course: Main Course
    Cuisine: Halloween
    Calories: 120

    Ingredients
      

    • 4 cups orange juice chilled
    • 2 cups pineapple juice chilled
    • 1 cup lemon-lime soda well chilled
    • 1 cup club soda for extra fizz, chilled
    • 1 cup grape juice for color enhancement
    • Gummy worms gummy worms for decoration and spooky effect
    • Edible googly eyes edible googly eyes for garnish
    • Ice cubes ice cubes to keep the punch chilled and prevent melting too quickly
    • Optional edible glitter for shimmer and spooky effect

    Equipment

    • Large punch bowl
    • Long spoon or ladle

    Method
     

    1. Begin by pouring the chilled orange juice and pineapple juice into a large punch bowl, creating a vibrant orange-yellow base. Stir gently with a long spoon to combine the flavors and distribute the colors evenly.
    2. Add the grape juice to the mixture to deepen the color and add a slight fruity aroma. Mix again to incorporate thoroughly.
    3. Gently pour in the lemon-lime soda followed by the club soda to introduce bubbles and fizz. Stir carefully to preserve the carbonation and create a lively, bubbling effect.
    4. Add a generous handful of ice cubes to keep the punch chilled and to enhance the refreshing texture.
    5. Float edible googly eyes on the surface to give the punch a spooky, animated look. Carefully place gummy worms around the edges or partially submerged for a playful, eerie effect.
    6. If desired, sprinkle a pinch of edible glitter over the surface to add shimmer and a mystical glow, especially under dim lighting.
    7. Using a long spoon or ladle, gently stir the punch just enough to distribute the decorations without disturbing the fizzy bubbles.
    8. Serve immediately in glasses garnished with additional gummy worms or eyeballs if desired.

    Notes

    Keep all ingredients chilled beforehand for maximum fizz and freshness. Adjust the amount of gummy worms and eyeballs for preferred spookiness. For extra visual impact, serve in a clear, decorative punch bowl under dim lighting.
    This Halloween Monster Mash Punch is more than a drink; it’s a centerpiece of spooky fun and chaos. Its playful look and burst of fruity flavors make it a memorable addition to any haunted gathering. Amidst the swirling mists and flickering lights, this punch helps set the perfect mood for unsettling yet delightful festivities.

    As the night winds down, the glow of the punch bowl and the happy chaos it inspires linger in the air. It’s one of those recipes that turns good times into great stories, year after year. And honestly, isn’t that what a truly festive occasion should be about?