Category: Appetizers

  • Spooky Specter: The Spider Cheese Ball for Halloween WOWs

    Spooky Specter: The Spider Cheese Ball for Halloween WOWs

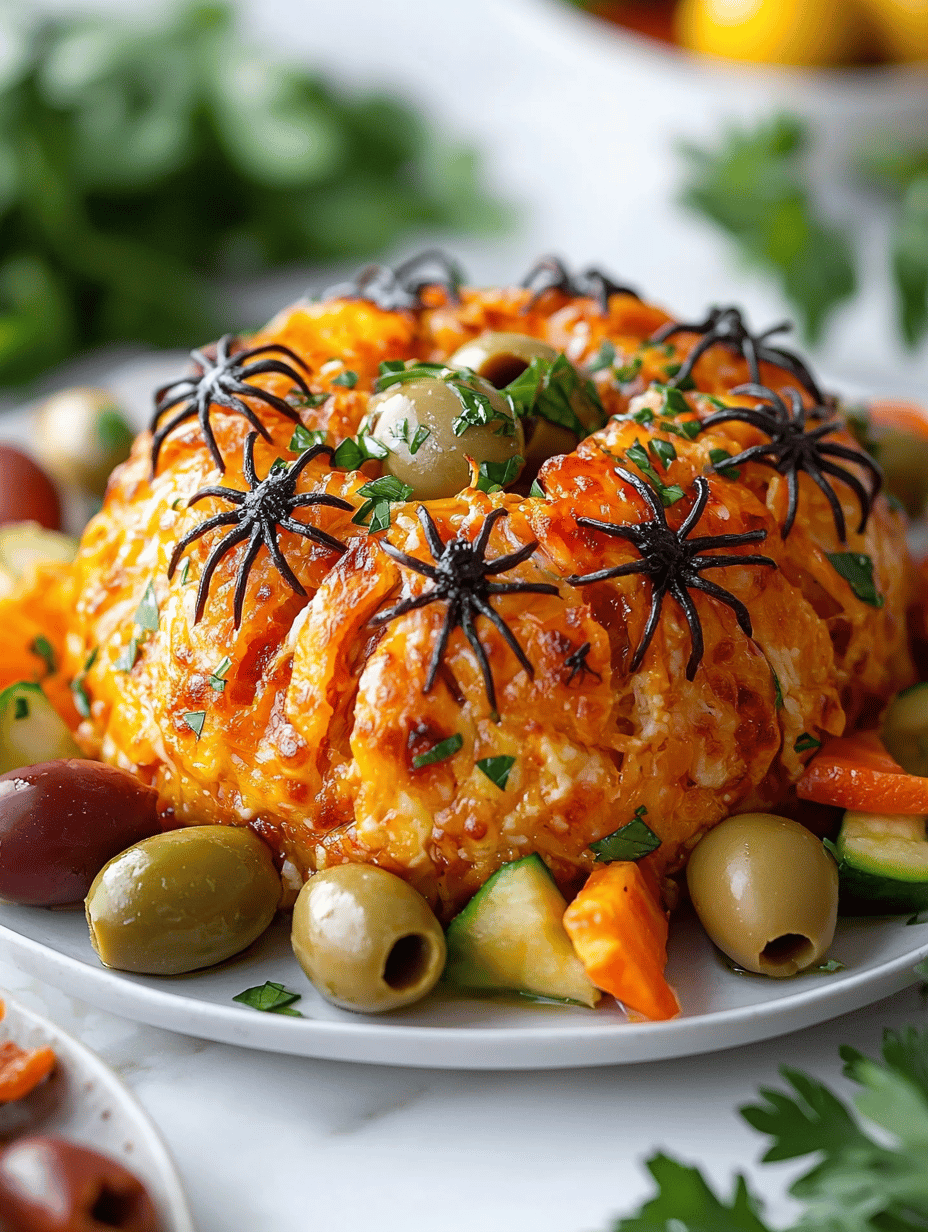
    As the air turns crisper and shadows grow longer, Halloween calls for treats that delight the senses and spark joy. This Spider Cheese Ball isn’t just a dip; it’s a centerpiece that whispers spooky tales before your guests even dig in. The way the gooey cheese pairs with crunchy crackers and those creepy crawly spider legs makes every bite a playful adventure.

    Turning a classic cheese ball into a Halloween spectacle taps into a bit of childhood nostalgia and a dash of chaos. It’s surprisingly simple but brings a whole lot of fun—especially when the kids squeal at the sight of it. Plus, it serves as a conversation starter, turning your snack table into a haunted wonderland.

    Spider Cheese Ball

    The Spider Cheese Ball is a creamy, crumb-coated cheese mixture shaped into a ball and decorated with crunchy spider leg pretzels, creating a spooky, eye-catching centerpiece. The cheese is blended until smooth, then chilled to firm up before being decorated for serving. Its final appearance resembles a spider with legs radiating from the center, combining soft texture with a crunchy exterior.
    Prep Time 20 minutes
    Total Time 20 minutes
    Servings: 8
    Course: Main Course
    Cuisine: American
    Calories: 210

    Ingredients
      

    • 16 oz cream cheese, softened
    • 1 cup shredded cheddar cheese
    • 1/2 cup chopped green onions
    • 1 tbsp Worcestershire sauce
    • 1/2 tsp garlic powder
    • 1 package crackers or crushed pretzels for coating
    • 12 pretzel sticks pretzel sticks (for spider legs) whole or broken in half
    • extra crackers for serving

    Equipment

    • Mixing bowl
    • Rubber spatula
    • Plastic wrap
    • Serving platter

    Method
     

    1. In a large mixing bowl, combine softened cream cheese, shredded cheddar, chopped green onions, Worcestershire sauce, and garlic powder. Mix with a rubber spatula until the mixture is smooth, creamy, and well blended.
    2. Use your hands or a spatula to shape the mixture into a round ball, pressing gently to compact it. Wrap the cheese ball tightly in plastic wrap and refrigerate for at least 30 minutes to firm up.
    3. Unwrap the chilled cheese ball and place it on a serving platter. Pour crushed crackers or pretzels over the surface to give it a crunchy, crumb-coated exterior. Gently press the coating onto the surface if needed.
    4. Arrange pretzel sticks evenly around the cheese ball’s perimeter to resemble spider legs, inserting them gently into the surface. You can break some pretzel sticks in half for shorter legs if desired.
    5. Optionally, add small food-safe decorations or extra crackers to enhance the spooky look. Chill the entire assembly for an additional 15 minutes to set the pretzel legs.
    6. Serve the Spider Cheese Ball with crackers or sliced bread on a festive platter. Bring it out as a fun, spooky centerpiece for your Halloween party.

    Notes

    Ensure the cheese mixture is well chilled before shaping and decorating for easier handling. Use sturdy pretzels for spider legs to prevent breaking when inserting.
    Whether you’re throwing a last-minute party or want a fun twist to your usual cheese platter, this Spider Cheese Ball adds that perfect spooky touch. It’s a showstopper that’s easy to assemble, yet creates big wow moments.

    This recipe celebrates the magic of Halloween—when playful creativity gets to shine. It’s an edible decoration that makes everyone smile and brings a bit of spooky whimsy to your table. And honestly, it’s the kind of dish that makes you look forward to every haunting season.

  • Spooky Bats and Green Goodness: Halloween Guacamole with Creepy Tortilla Chips

    Spooky Bats and Green Goodness: Halloween Guacamole with Creepy Tortilla Chips

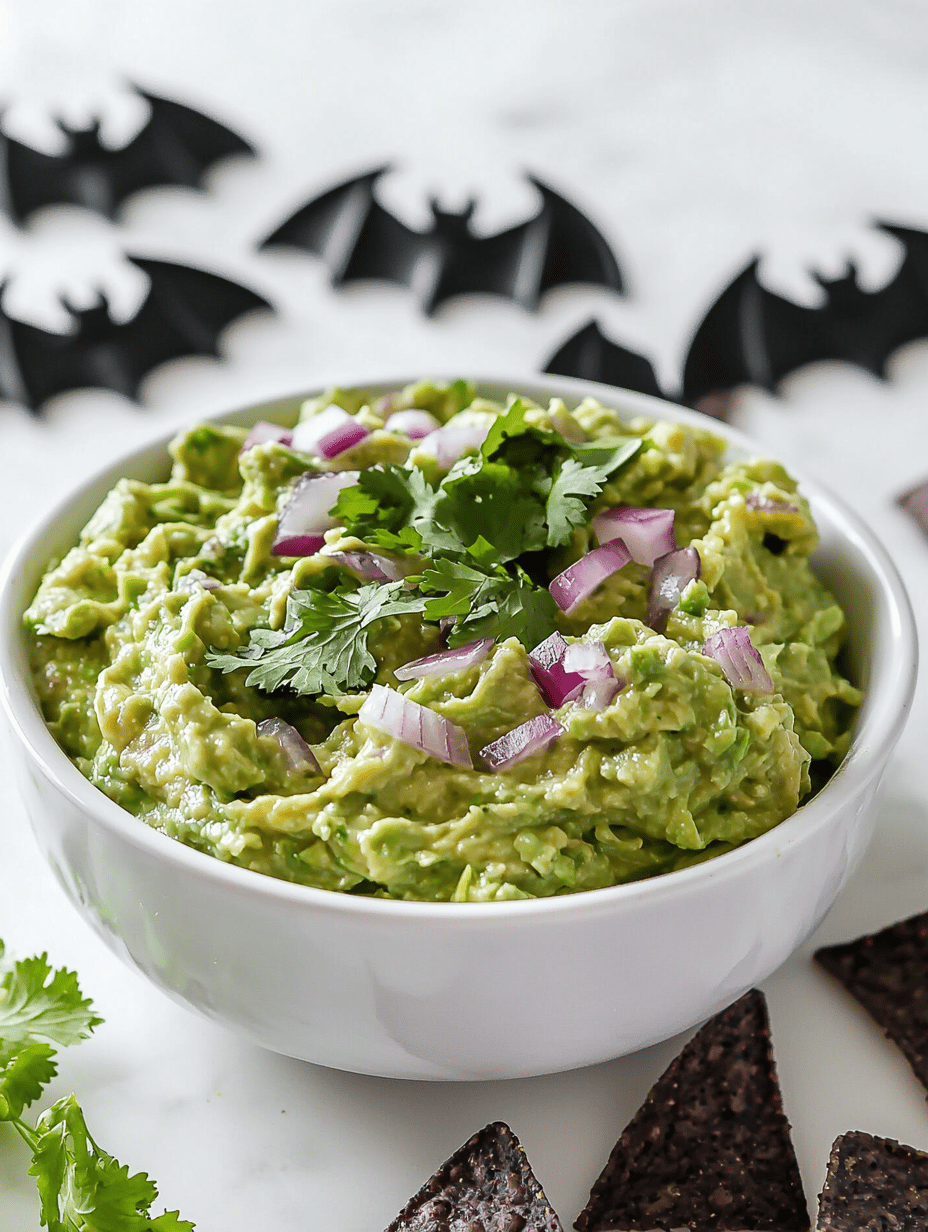
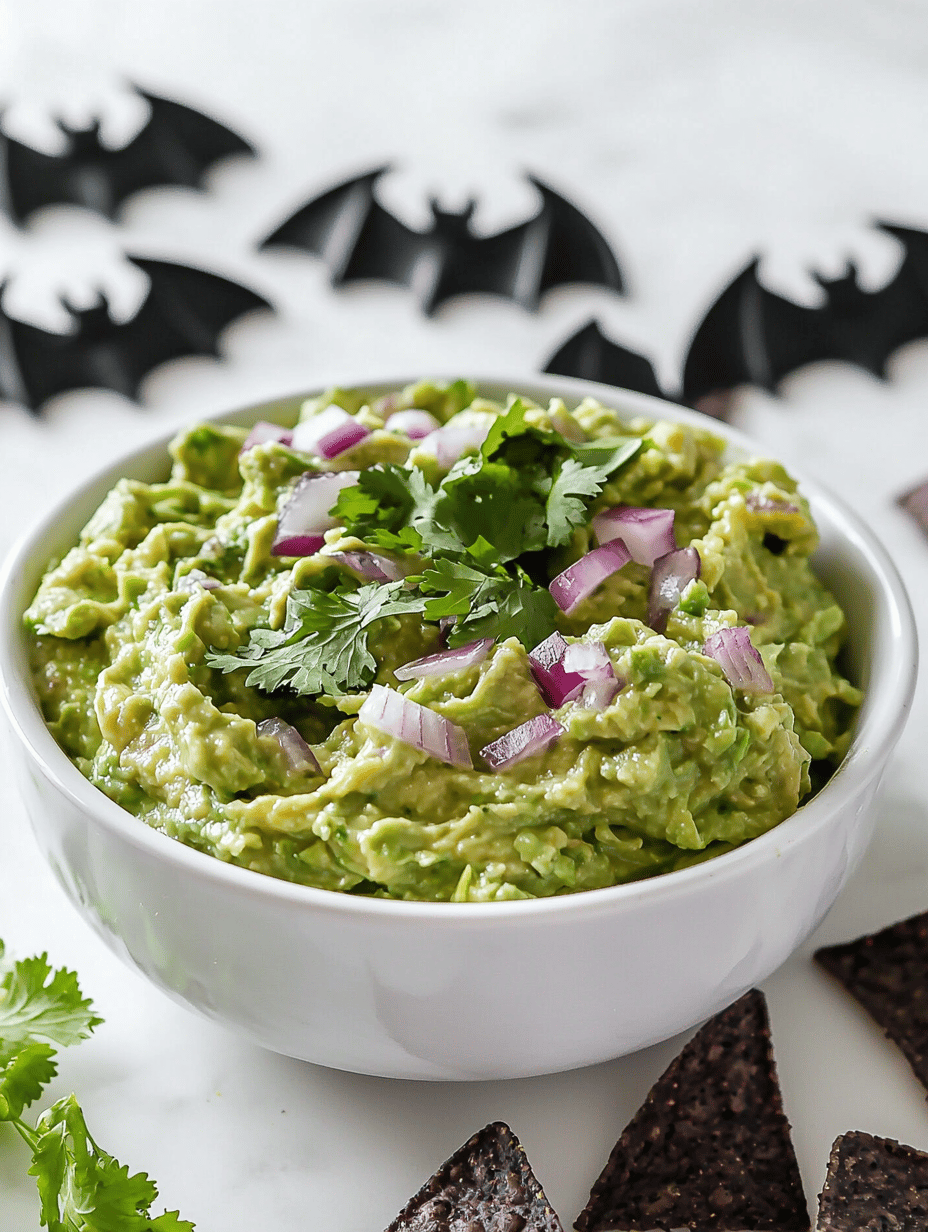
    Halloween is the perfect excuse to get a little whimsical with your snacks. Imagine a vibrant, smooth guacamole crowned with bat-shaped tortilla chips, ready to terrify and delight your guests. This recipe turns simple ingredients into a fun, party-ready centerpiece that sparks smiles and tastings alike.

    But this isn’t just about looks. The fresh avocado mash offers a lush, creamy bite contrasted with the crunch and cheesy flavor of the chips. The bats add a playful chaos, transforming an ordinary dip into a memorable celebration of all things spooky and savory.

    Festive Halloween Guacamole with Bat-Shaped Tortilla Chips

    This dish features a creamy mashed avocado base served as a vibrant dip, topped with playful bat-shaped tortilla chips. The smooth guacamole contrasts with the crunchy, cheesy chips, creating a colorful and textural centerpiece perfect for Halloween parties.
    Prep Time 10 minutes
    Cook Time 10 minutes
    Total Time 20 minutes
    Servings: 6
    Course: Main Course
    Cuisine: festive
    Calories: 220

    Ingredients
      

    • 3 ripe avocados halved, pitted
    • 1 lime juiced
    • 1/2 teaspoon salt
    • 1/4 cup chopped cilantro optional
    • 1 cup shredded cheddar cheese
    • 6 corn tortillas

    Equipment

    • Mixing bowl
    • Fork or potato masher
    • Baking sheet
    • Small cookie cutters (bat shape)

    Method
     

    1. Slice the avocados in half, remove the pits, and scoop the flesh into a mixing bowl. Use a fork or potato masher to mash until smooth and creamy.
    2. Pour fresh lime juice over the mashed avocado and sprinkle with salt. Mix well to combine, helping to brighten the flavor and prevent browning.
    3. Stir in chopped cilantro for added freshness and color, mixing until evenly distributed within the guacamole.
    4. Preheat the oven to 375°F (190°C). Slice the tortillas into small wedges or cut out bat shapes using small cookie cutters placed on unrolled tortillas.
    5. Arrange the cut tortilla shapes on a baking sheet in a single layer. Sprinkle shredded cheddar cheese over each chip for a cheesy, crispy topping.
    6. Bake in the preheated oven until chips are golden brown and crispy, about 8-10 minutes. Keep a close eye to prevent burning.
    7. Once baked and cooled slightly, use small bat-shaped cookie cutters to cut out bat shapes from the baked tortilla chips, or carefully arrange the chips into bat silhouettes if cutouts aren’t used.
    8. Transfer the creamy guacamole into a serving bowl, smoothing the top for an even surface.
    9. Arrange the bat-shaped tortilla chips around the guacamole for a playful, spooky display that invites dipping and snacking.
    10. Serve immediately, allowing guests to scoop up the vibrant, creamy guacamole with the crunchy, cheesy bat-shaped chips.

    Notes

    For extra spooky effect, use food coloring or black sesame seeds to add details to the bat shapes. You can also customize the guacamole with additional toppings like chopped tomatoes or onion.
    As the night falls and the lights dim, let this guacamole serve as the perfect hauntingly delicious treat. Its bold color and quirky shapes make it an instant conversation starter in any Halloween gathering.

    Relish in the joy of creating something both spooky and tasty, embracing the chaos and creativity of the season. This dish reminds us that a little playful chaos in the kitchen can turn into the sweetest memories.

  • Spook-tacular Ghost Veggie Platter for Halloween

    Spook-tacular Ghost Veggie Platter for Halloween

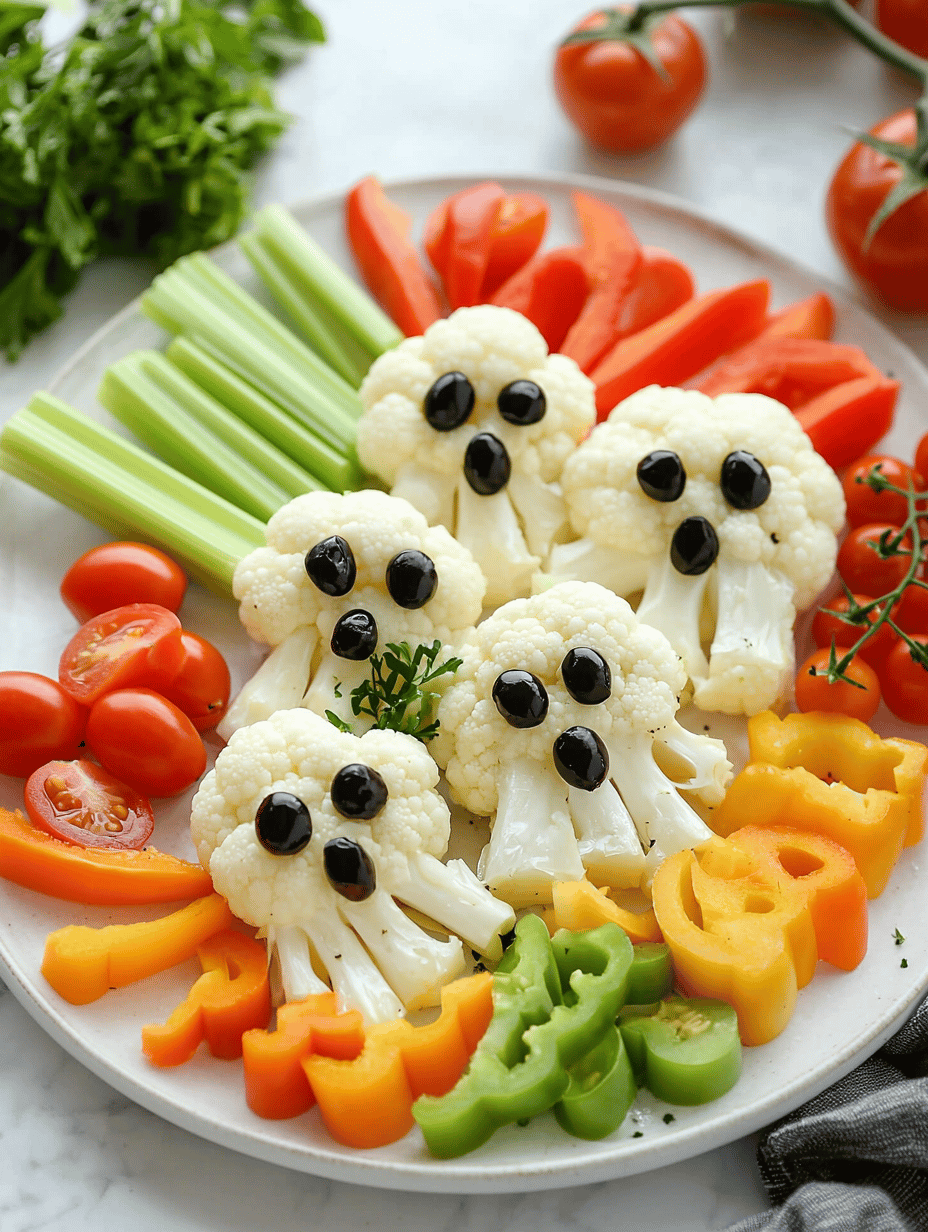
    Every October, I start craving more than just candy and pumpkin spice. I want to wow guests with something unexpected — a veggie platter that looks like it belongs in a haunted house. These playful ghosts are a perfect way to bring a dash of eerie fun to your party table.

    What makes this platter special isn’t just its spooky charm but how quick and easy it is to assemble. It uses simple vegetables, a few pantry staples, and a little creative flair. The result is a conversation-starting centerpiece that’s as healthy as it is adorable.

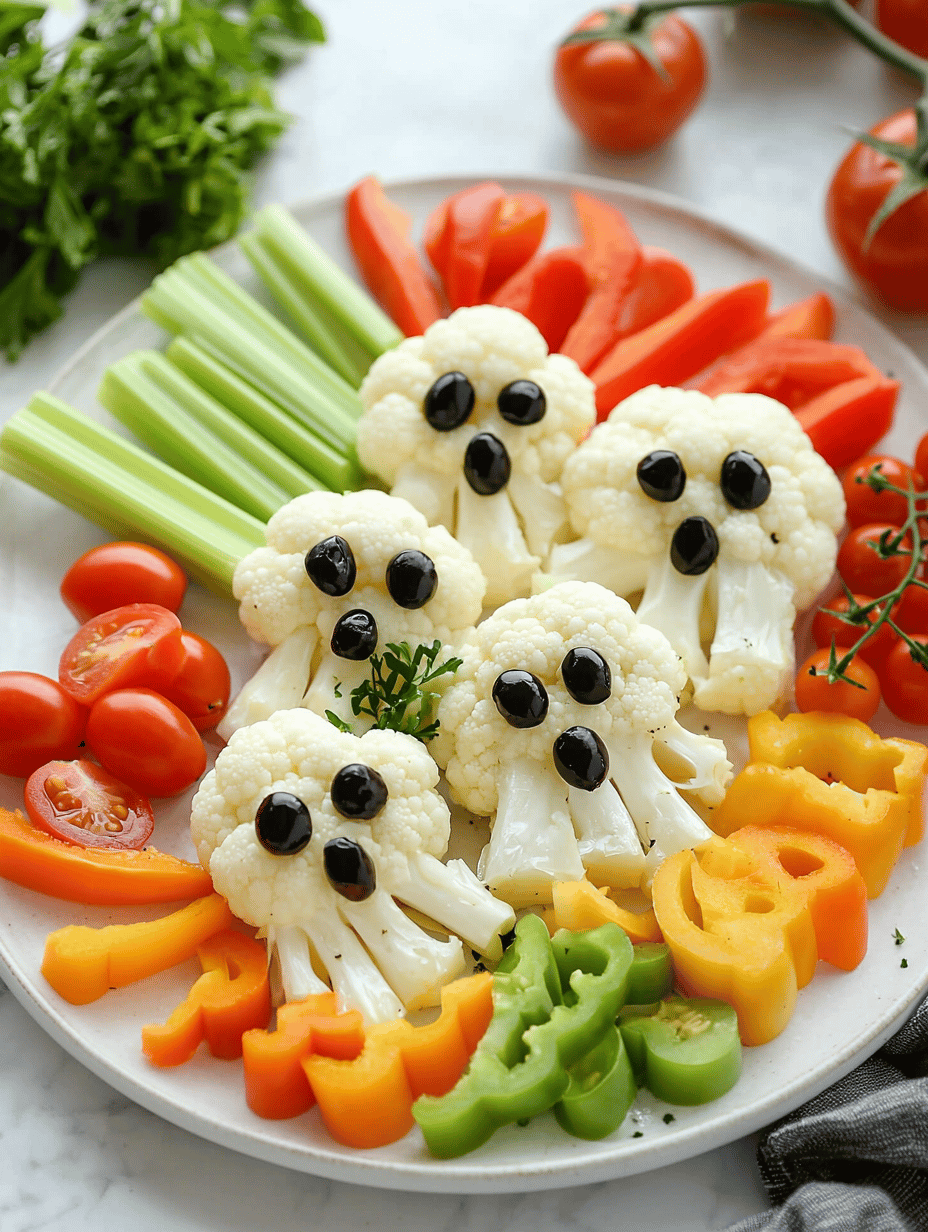
    Spooky Ghost Veggie Platter

    This veggie platter features fresh vegetables arranged to resemble hanging ghosts, with the use of creamy dips and simple carving techniques. The final presentation showcases playful, white ghost figures with black details for eyes and mouths, creating an eerie yet healthy centerpiece. The dish combines crunchy raw vegetables with playful decorative elements for an eye-catching display.
    Prep Time 15 minutes
    Total Time 15 minutes
    Servings: 8
    Course: Main Course
    Cuisine: Halloween
    Calories: 50

    Ingredients
      

    • 2 cups Cauliflower florets white vegetable base for
    • 1 large Celery stalks for ghost bodies and hanging elements
    • 1 large Cucumbers for carving and shapes
    • 1/2 cup Hummus or ranch dip for the ghost’s head and facial features

    Equipment

    • Carving knife
    • Serving platter
    • Small piping bags or plastic sandwich bags
    • Black and edible white markers or food coloring pens

    Method
     

    1. Arrange the cauliflower florets on your serving platter to form the ghost bodies, spacing them evenly for a balanced display.
    2. Cut the celery stalks into small, irregular lengths to resemble ghost arms or hanging ties, and tuck some behind the cauliflower for a spooky effect.
    3. Slice cucumbers into thin rounds or elongated shapes to serve as ghosts’ heads or facial features, and carve small details for eyes and mouths.
    4. Use a small spoon to place a dollop of hummus or ranch dip onto each cauliflower to create the ghost’s head, giving a smooth, white surface.
    5. Apply black edible marker or food coloring with a fine tip to add eyes and mouths onto the cucumber slices or cauliflower heads, giving each ghost personality.
    6. Decorate the tips of some cauliflower florets or cucumber slices with tiny dollops of white decorating marker to create facial details, like smiles or surprised expressions.
    7. Stand the cauliflower ‘ghosts’ upright on the platter, using celery or cucumber pieces to secure them in place, creating a floating, eerie effect.
    8. Add longer celery stalks hanging down orbits to enhance the spooky hanging ghost illusion, arranging them to sway naturally for a creepy touch.
    9. Arrange any remaining vegetables around the ghosts to fill in the display, creating a fun and colorful Halloween scene.
    10. Serve the spooky ghost veggie platter immediately, allowing guests to enjoy both the playful presentation and the crisp, fresh vegetables.

    Notes

    For added fun, use edible markers to customize each ghost’s face. Be sure to use food-safe markers and work on a clean surface for best results.

    This Halloween ghost veggie platter is more than just cute. It’s a fun way to make healthy eating part of the spooky festivities. Watching it come together sparks a little mischievous pride in me each year.

    Plus, the simplicity means I can spend more time enjoying the chaos of the party and less time stressing about the perfect presentation. It’s a whimsical touch that makes my table memorable — a highlight amidst all the candy and costumes.

  • Spine-Chilling Delight: Halloween Eyeball Caprese Bites

    Spine-Chilling Delight: Halloween Eyeball Caprese Bites

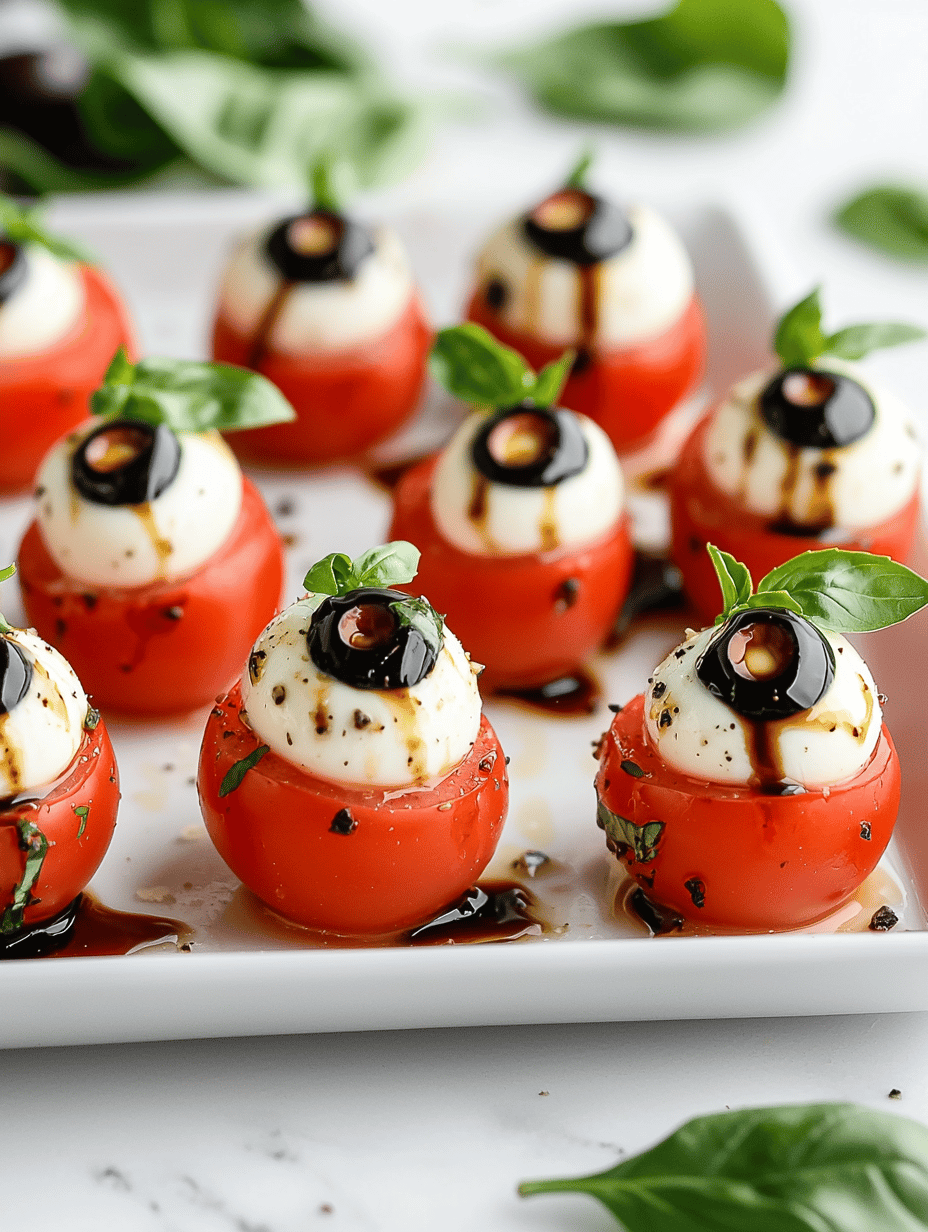
    Halloween is not just about spooky costumes and haunted houses; it’s also about clever, creepy food that sparks conversation. These Eyeball Caprese Bites turn a simple appetizer into a playful, monstrous treat that’s as fun to make as it is to eat. The combination of fresh mozzarella and cherry tomatoes, topped with a daring projection of basil and black olive “pupils,” creates a surreal, grotesque effect.

    When I first saw the idea, I loved how this dish combines the elegance of a classic Caprese with a dash of horror. It’s perfect for parties and adds an unexpected twist to your annual spooky spread. Plus, it’s surprisingly quick to assemble, so no late-night chaos needed to impress your guests.

    Eyeball Caprese Bites

    These Eyeball Caprese Bites are playful appetizers made by assembling fresh mozzarella balls and cherry tomatoes, then decorating them with basil and black olive pupils to resemble spooky eyeballs. They combine the creamy texture of mozzarella with juicy tomatoes and crunchy basil, creating a fun, bite-sized presentation suitable for Halloween parties.
    Prep Time 10 minutes
    Total Time 10 minutes
    Servings: 12
    Course: Main Course
    Cuisine: Halloween
    Calories: 50

    Ingredients
      

    • 12 piece fresh mozzarella balls about the size of a cherry
    • 12 piece cherry tomatoes preferably red
    • 12 leaves fresh basil leaves small-sized
    • 12 pieces black olives pitted, for pupils
    • to taste olive oil for drizzling
    • to taste salt optional, for seasoning

    Equipment

    • Small skewers or toothpicks
    • Knife
    • Cutting board

    Method
     

    1. Skim the basil leaves and set aside; these will be used for the ‘eyeball’ detail.
    2. Take each cherry tomato and wash thoroughly. Place a cherry tomato next to a mozzarella ball for assembly.
    3. Using a small skewer or toothpick, spear a mozzarella ball followed by a cherry tomato, assembling them into a mini skewered bite.
    4. Repeat with all mozzarella balls and cherry tomatoes until you have 12 assembled bites.
    5. Place each skewer on a serving platter. Top each mozzarella with a small basil leaf to resemble an eyeball’s sclera.
    6. Using a small piece of black olive, attach a tiny pupil in the center of the basil leaf to create the creepy eyeball effect.
    7. Optional: Drizzle a small amount of olive oil over the assembled eyeballs for shine and flavor. Add a pinch of salt if desired.
    8. Serve immediately as a fun, spooky appetizer that’s visually striking and delicious.
    These eyeball bites add just the right amount of whimsy and fright to your Halloween table. They bring the kind of giggles and shudders that make festivities memorable.

    Enjoy the process of creating these tiny monsters and see horror meet culinary art in the most delightful way. They’re a burst of seasonal fun that’s sure to keep everyone guessing what spooky dish is coming next.