Author: HarperEvans

  • Vivid Halloween Candy Corn Parfaits: A Nostalgic Twist with a Chewy Surprise

    Vivid Halloween Candy Corn Parfaits: A Nostalgic Twist with a Chewy Surprise

    Halloween baking often sticks to familiar themes, but I wanted to flip the script with something unexpectedly delicious. These Candy Corn Parfaits mix the classic seasonal colors with a surprise chewy layer that sparks childhood memories. The result is a playful, festive dessert that’s as eye-catching as it is deeply satisfying.

    What makes this recipe stand out is the textural contrast—the fluffy cream, crunchy cookies, and that unexpected chewiness. It’s perfect for those who crave a bit of chaos in their dessert table, while still feeling comforted by familiar flavors. Plus, it’s surprisingly easy to assemble, making it an irresistible project for busy spooky nights.

    Candy Corn Parfaits

    Candy Corn Parfaits are layered desserts that combine fluffy whipped cream, crunchy cookies, and chewy candy corn in vibrant, festive colors. The dessert features distinct textural contrasts and a visual appeal reminiscent of Halloween candy, finished with a playful stacking of ingredients. It is assembled in individual glasses, creating a colorful and satisfying treat.
    Prep Time 15 minutes
    Total Time 15 minutes
    Servings: 4
    Course: Main Course
    Cuisine: American
    Calories: 150

    Ingredients
      

    • 1 cup whipped cream preferably chilled
    • 1/2 cup crushed sugar cookies for crunch and flavor
    • 1 cup candy corn for color and chewiness

    Equipment

    • Mixing bowls
    • Whisk or hand mixer
    • Serving glasses or jars
    • Spatula

    Method
     

    1. Begin by gently folding the crushed sugar cookies into the whipped cream until just combined, maintaining its fluffy texture.
    2. Spoon a layer of the whipped cream mixture into the bottom of each glass, filling about one-third of the space and creating a smooth, even surface.
    3. Add a generous handful of candy corn on top of the first layer, spreading them out evenly for a colorful, chewy layer.
    4. Repeat the process: add another layer of whipped cream over the candy corn, smoothing the surface with the spatula.
    5. Top the parfaits with a final scattering of candy corn, making sure they are visually vibrant and inviting.
    6. Place the parfaits in the refrigerator for about 10 minutes to set slightly, then serve immediately for the best texture and visual appeal.

    Notes

    For added flair, briefly chill the whipped cream before folding in the cookies to enhance its fluffiness. Feel free to add a sprig of mint or extra candy corn on top before serving for a festive touch.

    These parfaits are a fun way to indulge your sweet tooth without feeling overwhelmed. Their layered colors and textures make them a real showstopper, perfect for Halloween parties or a cozy night in. The best part? You can customize the ingredients to make each spoonful uniquely yours.

    As the season shifts, these desserts serve as a delightful reminder of childhood innocence mixed with festive fun. They bring a burst of joy to the table, enlivening even the simplest gatherings. In the end, it’s all about adding a touch of playful nostalgia to your fall celebrations.

  • Spooky Elegance: Halloween Eyeball Caprese Bites

    Spooky Elegance: Halloween Eyeball Caprese Bites

    As Halloween night approaches, I love turning simple ingredients into eerie, delightful finger foods. These Eyeball Caprese Bites transform fresh mozzarella into tiny, creepy eyeballs that look straight out of a spooky film. The combination of creamy cheese, ripe cherry tomatoes, and fresh basil creates a burst of flavor with a haunting twist.

    This recipe isn’t just about the look—it’s about capturing that thrill of playful chaos in the kitchen. The vibrant red of the tomatoes paired with the white mozzarella makes for a striking, festive appetizer. It’s perfect for parties or just spooking your family at home with edible art.

    Eyeball Caprese Bites

    These Eyeball Caprese Bites are bite-sized appetizers that feature creamy fresh mozzarella topped with cherry tomato halves and a small basil leaf to mimic creepy eyeballs. The assembly involves skewering and decorating the ingredients, resulting in a visually striking and flavorful snack. They have a soft, moist texture with vibrant, haunting appearance ideal for Halloween parties.
    Prep Time 15 minutes
    Total Time 15 minutes
    Servings: 12
    Course: Main Course
    Cuisine: Fusion
    Calories: 50

    Ingredients
      

    • 12 pieces fresh mozzarella balls small, bite-sized
    • 12 pieces cherry tomatoes halved
    • 12 leaves fresh basil small leaves for eyeball pupils

    Equipment

    • Toothpicks or small skewers
    • Knife
    • Cutting board

    Method
     

    1. Arrange your fresh mozzarella balls, halved cherry tomatoes, and basil leaves on your workspace for easy assembly.
    2. Insert a toothpick or small skewer through a mozzarella ball, piercing through the center.
    3. Slide a halved cherry tomato onto the toothpick, resting against the mozzarella to resemble an eyeball with red sclera.
    4. Place a small basil leaf on top of the cherry tomato to mimic a creepy eyeball’s pupil, pinning it in place with the toothpick.
    5. Repeat this process with the remaining ingredients until all are assembled, creating a collection of eerie eyeballs.

    Notes

    Optional: You can add a small dab of pesto or olive tapenade on top of the basil for extra flavor and a more sinister look.

    Making these eyeball bites feels like a mini magic trick—transforming ingredients into creepy yet delicious decor. They remind me how fun and flexible holiday food can be, especially when you throw in a touch of horror. Plus, they vanish quickly, the moment they hit the platter.

    This recipe is a gentle reminder that Halloween is a time for playful creativity and surprising flavors. Nothing beats the joy of sharing a spooky snack that’s as fun to make as it is to eat. Enjoy your spooky feast, and let the eerie, mouthwatering chaos begin!

  • Autumn’s Hidden Treasure: Creamy Fall Pumpkin Soup

    Autumn’s Hidden Treasure: Creamy Fall Pumpkin Soup

    As the leaves turn fiery red and gold, I find myself craving something warm and unexpected. This isn’t just any pumpkin soup—it’s a velvety, slightly spicy blend that captures the cozy chaos of fall. A whisper of sage, a splash of coconut milk, and a hint of nutmeg turn simple pumpkin into a nostalgic, soul-soothing experience.

    This recipe is my secret weapon for those chilly evenings when a bowl feels like a warm hug. I love how the rich creaminess pairs with the earthy pumpkin and a touch of sweetness, creating a comforting aroma that fills the room with fall magic. It’s perfect for lazy weekends or quick weekday dinners with a little twist of seasonal charm.

    ## WHY I LOVE THIS RECIPE?
    – I love how effortlessly it evokes crisp autumn mornings on a cozy kitchen counter.
    – The spices make me nostalgic for grandma’s holiday dinners, but with a modern flair.
    – It’s a straightforward yet impressive dish, perfect for sharing with friends.
    – This soup feels like a warm blanket in a bowl after a long day.
    – It’s versatile: add roasted autumn vegetables or a swirl of creme fraîche for extra richness.

    ## AVOID MY DISASTER (You’re Welcome)
    – FORGOT to stir in the cream and ended up with a curdled mess—rescue with an immersion blender.
    – DUMPED too much nutmeg in—quickly dilute with more stock and a dash of honey.
    – OVER-TORCHED the pumpkin—scrape the bottom and add a splash of broth to loosen.
    – MISSED the seasoning step—sprinkle salt and pepper at the end while steaming smell fills your kitchen.

    ## QUICK FIXES THAT SAVE YOUR DAY
    – Splash in a bit of water to loosen burnt pumpkin sauce.
    – Patch with a spoonful of yogurt if the soup tastes too earthy.
    – Shield from overcooking by removing from heat early and adding fresh herbs.
    – When spice levels are off, stir in honey or maple syrup.
    – If the soup is too thin, simmer uncovered to thicken or add a touch of cream.

    The approach to fall flavors with this soup is rooted in simplicity and warmth. As the season shifts, it’s comforting to lean into the nostalgic scents of cinnamon, nutmeg, and roasted pumpkin, all blending into a dish that feels like a quiet celebration of the harvest.

    This creamy pumpkin soup isn’t just a seasonal staple; it’s a reminder to slow down and savor the quiet, cozy moments that autumn offers. Its rich, velvety texture makes every spoonful a small escape into the essence of fall, perfect for unwinding after a busy day.

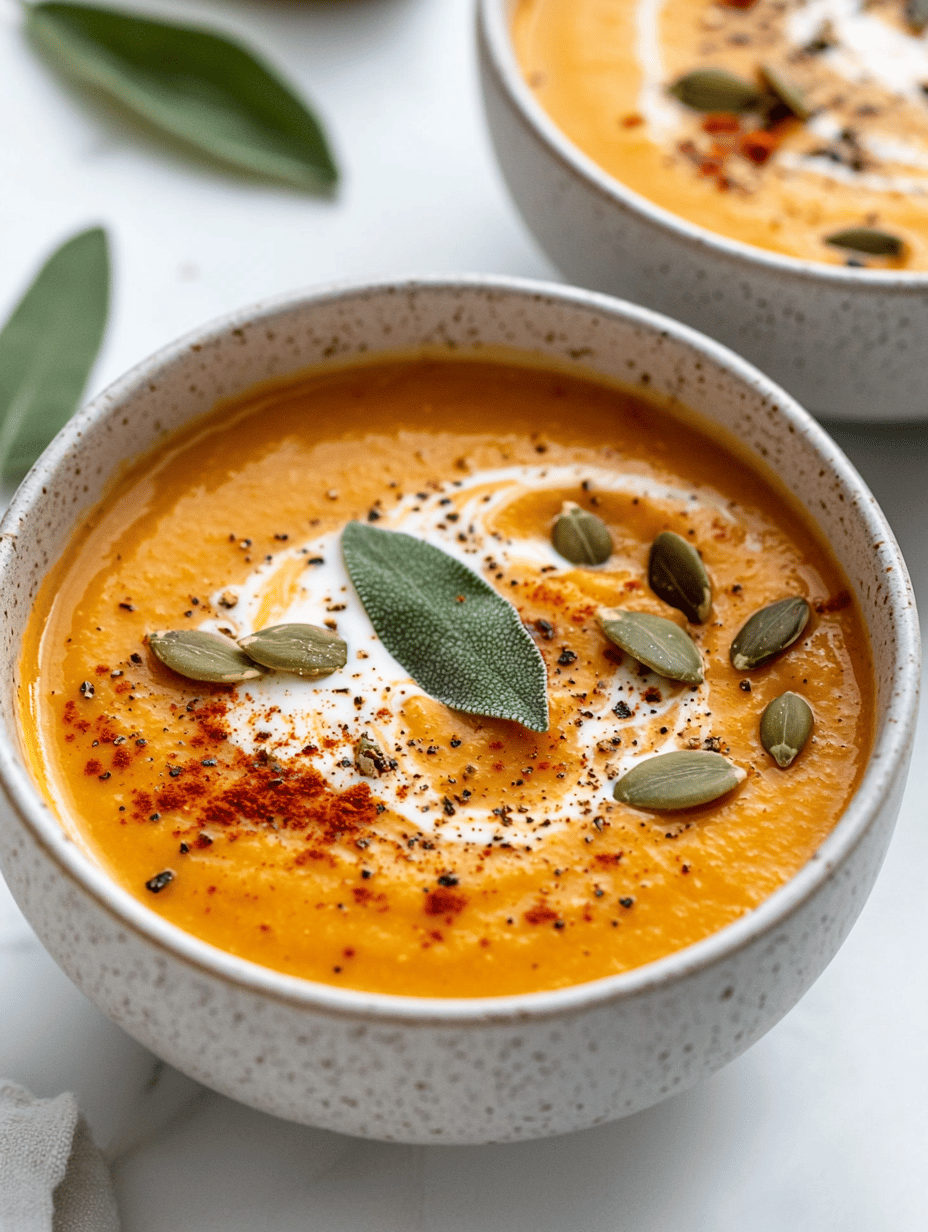
    Velvety Spicy Pumpkin Soup

    This pumpkin soup features a smooth, creamy texture with a slightly spicy kick, achieved by blending cooked pumpkin with coconut milk and warming spices. The final dish has a vibrant orange color and a silky consistency, garnished with herbs for a cozy fall presentation.
    Prep Time 10 minutes
    Cook Time 30 minutes
    Total Time 40 minutes
    Servings: 4
    Course: Main Course
    Cuisine: comfort food, Fall
    Calories: 180

    Ingredients
      

    • 1 medium pumpkin peeled, seeded, and cubed
    • 1 cup coconut milk full-fat for creaminess
    • 1 small onion chopped
    • 2 cloves garlic minced
    • 1 teaspoon ground nutmeg
    • 1 teaspoon dried sage crushed
    • 2 tablespoons olive oil
    • to taste salt
    • to taste black pepper

    Equipment

    • Large pot
    • Immersion blender
    • Measuring Cups
    • Chef’s knife
    • Cutting board

    Method
     

    1. Heat the olive oil in a large pot over medium heat until shimmering. Add the chopped onion and cook, stirring occasionally, until translucent and fragrant, about 5 minutes.
    2. Add the minced garlic and cook for another minute until fragrant, being careful not to burn it.
    3. Stir in the cubed pumpkin, ground nutmeg, and crushed sage, cooking for about 2-3 minutes to coat the pumpkin with spices and promote a fragrant aroma.
    4. Pour in enough water or vegetable broth to cover the pumpkin and bring to a gentle boil. Reduce the heat and simmer until the pumpkin is soft and easily pierced, about 15-20 minutes.
    5. Remove the pot from heat and use an immersion blender to puree the cooked mixture until smooth and creamy.
    6. Stir in the coconut milk to add richness and a hint of sweetness. Season with salt and black pepper to taste.
    7. Warm the soup over low heat just until heated through—do not boil, to preserve the coconut milk’s creaminess—and adjust seasoning as needed.
    8. Serve the velvety soup in bowls, garnished with a sprinkle of fresh herbs or additional sage if desired, and enjoy the cozy flavors.

    Notes

    For an extra touch, top with a drizzle of coconut cream or a dash of crushed red pepper for heat. Leftovers can be stored in the refrigerator for up to 3 days and reheated gently.
    This soup marks the heart of fall—simple, warm, and full of memories. It’s a dish I turn to when I want comfort without fuss, celebrating the beauty of seasonal ingredients.

    Cooking this soup is a small act of mindfulness, a moment to appreciate the changing scenery outside and the rich, warm flavors filling my kitchen. Whether served at a casual weeknight dinner or during a weekend gathering, it brings a sense of grounded joy and gratitude. And as I sip the last spoonful, I find myself already looking forward to the next bowl.

  • The Secret Charm of Orchard-Fresh Salsa

    The Secret Charm of Orchard-Fresh Salsa

    Imagine a salsa so vibrant that it captures the essence of late summer orchards and garden wilds. It’s not just about tomatoes and peppers; it’s about the stories they tell when combined with citrus zest and a whisper of herbs. This recipe transforms simple, fresh ingredients into a loud, joyful burst of flavor that calls to mind lazy afternoons and lively family gatherings.

    I’ve always loved the way salsa can elevate a meal or stand alone as a snack that sparks conversation. But this particular recipe offers a fresh perspective: it’s about staying true to seasonal produce and amplifying their natural brightness. Every chop releases a fragrant scent that makes you crave the first crunchy bite.

    Fresh Summer Salsa

    This salsa is made by combining chopped ripe tomatoes, zesty citrus, and aromatic herbs, then mixing them into a vibrant, chunky condiment. The final dish has a fresh, colorful appearance with a slightly chunky texture, perfect for serving as a dip or topping.
    Prep Time 15 minutes
    Total Time 15 minutes
    Servings: 4
    Course: Main Course
    Cuisine: American
    Calories: 25

    Ingredients
      

    • 4 cups ripe tomatoes deseeded and chopped
    • 1 medium red bell pepper seeded and finely chopped
    • 1 small red onion peeled and minced
    • 2 cloves garlic minced
    • 1 large citrus zest from lemon or lime
    • 2 tablespoons fresh lemon or lime juice
    • 1/4 cup chopped fresh cilantro
    • 1 teaspoon salt to taste
    • 1/2 teaspoon black pepper freshly ground

    Equipment

    • Chef’s knife
    • Cutting board
    • Mixing bowl
    • Spoon

    Method
     

    1. Chop the ripe tomatoes into small, even pieces and place them in a mixing bowl, releasing their fragrant scent. Add finely chopped red bell pepper, minced red onion, and the minced garlic to the bowl.
    2. Use a microplane or fine grater to zest lemon or lime over the mixture, then squeeze in the citrus juice for brightness. Stir gently to combine all the fresh ingredients and release their vibrant aromas.
    3. Chop the fresh cilantro finely and sprinkle it over the salsa, then add salt and freshly ground black pepper. Mix everything thoroughly until well combined and the salsa looks colorful and inviting.
    4. Let the salsa sit for about 10 minutes at room temperature, allowing the flavors to meld and the texture to soften slightly.
    5. Give the salsa a final gentle stir, taste for seasoning, and then transfer to a serving bowl. The salsa should be chunky, vibrant, and slightly juicy, ready to serve fresh.

    Notes

    For extra flavor, add a pinch of smoked paprika or a splash of hot sauce. Serve immediately or chill for 30 minutes for more intense flavors.
    Whipping up this fresh salsa is a reminder that good things often come together with just a bit of chopping and a splash of lime. It’s perfect for summer days or when you want a quick, homemade dip that sings with freshness.

    This recipe is more than just a condiment; it’s a way to celebrate nature’s bounty and reconnect with simple, vibrant flavors. Whenever I make it, I feel a little more grounded, a little more grateful for the season’s gifts, and always eager to share it with friends and family.

  • Frozen Fury: The Gatorade Slushie Revolution

    Frozen Fury: The Gatorade Slushie Revolution

    When summer heat turns up the dial, I reach for something unexpected—my homemade Gatorade slushie. It’s a quick fix for the classic thirst and a nostalgic throwback to childhood sidelines. Blending icy coolness with tangy electrolyte boost makes it my go-to outdoor refreshment.

    This recipe turns a sports beverage into a dessert that’s both satisfying and functional. Instead of plain ice or sugary drinks, I toss in assorted flavors of Gatorade and freeze. The result is a vibrant, slushy explosion of flavor that keeps me energized during long outdoor adventures.

    WHY I LOVE THIS RECIPE?

    • It combines my love for icy treats with the need for electrolytes during summer hikes.
    • The bright colors and flavors spark joy every time I make it.
    • It’s super simple to customize with different Gatorade flavors and add-ins.
    • Making it feels like a fun science experiment with friends or family.
    • It’s a nostalgic nod to sports days and family picnics of the past.

    AVOID MY DISASTER (You’re Welcome)

    • FORGOT to freeze the Gatorade overnight? It will be too soupy—freeze for a few hours first.
    • DUMPED all the Gatorade in one container, then realized it was too thick—add a splash of water, then re-freeze.
    • OVER-TORCHED the mixture when trying to speed up freezing—use a lower setting or smaller container next time.
    • MISSED adding lemon juice? It dulls the flavors; squeeze fresh before freezing for a zesty kick.

    QUICK FIXES THAT SAVE YOUR DAY

    • When slush is too icy: splash in a little hot water, stir, then re-freeze for a smoother texture.
    • Shield the mixture with a plastic wrap if ice crystals form unevenly on top.
    • When flavor’s dull: add a few drops of lime or lemon juice and stir well.
    • When you forget to blend: quick stir with a fork or spoon while serving.
    • If mixture refuses to freeze: work in a smaller container or a metal tray, speed up the process.

    Gatorade Slushie

    This Gatorade slushie is a frozen beverage made by blending chilled electrolyte drinks and then freezing until solid. It transforms a sports drink into a colorful, icy treat with a vibrant, granular texture. The final product is a refreshing, crunchy slushie perfect for hot days and outdoor adventures.
    Prep Time 10 minutes
    Cook Time 4 hours
    Total Time 4 hours 10 minutes
    Servings: 4
    Course: Main Course
    Cuisine: American
    Calories: 80

    Ingredients
      

    • 2 quarts Gatorade (assorted flavors) preferably chilled overnight for best results
    • 1 tablespoon lemon juice freshly squeezed for zest

    Equipment

    • Freezer
    • Blender

    Method
     

    1. Pour the chilled Gatorade into a large, shallow container and place it in the freezer.
    2. Freeze the Gatorade for at least 4 hours or until it’s firm enough to scoop, stirring occasionally to prevent ice crystals from forming unevenly.
    3. Once frozen solid, transfer the Gatorade chunks to a blender and pulse until finely crushed, resembling coarse snow or granular ice.
    4. Add the lemon juice to the crushed Gatorade in the blender and blend briefly until evenly combined.
    5. Scoop the mixture back into the shallow container or an available freezer-safe dish, spreading it out evenly.
    6. Return the dish to the freezer and freeze for another 2 to 3 hours until the slushie reaches the desired icy, crunchy texture.
    7. Before serving, scrape the surface with a fork to break up any icy crystals and make it fluffy and scoopable.
    8. Serve immediately in glasses or cups, garnished with a slice of lemon or a colorful straw if desired.

    Notes

    For a smoother texture, work in smaller batches or blend longer. Feel free to experiment with different Gatorade flavors for unique color and flavor combinations.

    This simple slushie takes me back to carefree summer afternoons, where icy treats and bright colors ruled. Now, it’s also a practical way to stay refreshed and replenished during my outdoor escapades.

    With only a few ingredients and minimal effort, this Gatorade slushie turns hydration into a fun ritual. It’s perfect for hot days when you need both a cool refresher and a quick dose of energy. Honestly, I find myself craving that icy tang long after the heat subsides.

  • The Hidden Art of a Perfect Chili: A Quiet Food Revolution

    The Hidden Art of a Perfect Chili: A Quiet Food Revolution

    Many chili recipes boast of spice levels and hearty textures, but I believe the real magic lies in the subtle balance of flavors that often go unnoticed. As someone who’s spent endless afternoons trying to perfect that comforting yet complex bowl, I’ve discovered that the devil is in the details. This recipe is not just about filling but about respecting each ingredient’s voice in the symphony.

    Cooking chili is akin to conducting a slow dance—each step needs patience and appreciation for the layers, from smoky paprika to the gentle warmth of cumin. I’ve crafted this version over countless kitchens and my favorite old cast-iron pot always demands respect. It’s a recipe that whispers stories of lazy Sundays and lively family gatherings alike.

    Classic Hearty Chili

    This chili recipe combines ground meat, beans, and tomatoes simmered with spices to create a thick, flavorful stew. The dish features a balanced mix of smoky, spicy, and savory elements, resulting in a comforting, rustic texture with a rich sauce coating each ingredient. It’s ideal for slow cooking to develop deep flavors and tender textures.
    Prep Time 15 minutes
    Cook Time 45 minutes
    Total Time 1 hour
    Servings: 4
    Course: Main Course
    Cuisine: American
    Calories: 350

    Ingredients
      

    • 1 lb ground beef or turkey or any preferred ground meat
    • 1 large yellow onion diced
    • 3 cloves garlic minced
    • 1 tbsp smoked paprika
    • 1 tsp cumin
    • 1 can (14 oz) diced tomatoes
    • 1 can (15 oz) black beans drained and rinsed
    • 1 cup vegetable broth
    • 1 tbsp olive oil
    • to taste salt and black pepper

    Equipment

    • Large Dutch oven or heavy-bottomed pot
    • Wooden spoon or heatproof spatula

    Method
     

    1. Heat the olive oil in a large heavy-bottomed pot over medium heat until shimmering. Add the diced onion and cook, stirring occasionally, until softened and translucent, about 5 minutes.
    2. Add the minced garlic and cook for another 30 seconds until fragrant, stirring constantly to prevent burning.
    3. Stir in the ground meat, breaking it apart with a spoon, and cook until browned all over, about 8 minutes. Drain any excess fat if necessary.
    4. Sprinkle in the smoked paprika and cumin, stirring well to coat the meat and aromatics evenly. Let them cook for a minute until fragrant and coated with spices.
    5. Add the diced tomatoes with their juices and stir to combine, letting the mixture simmer gently and develop flavor for about 5 minutes.
    6. Pour in the vegetable broth and bring the mixture to a gentle boil, then reduce the heat to low and cover partially. Let it simmer for 20 minutes to deepen the flavors.
    7. Stir in the drained black beans and cook uncovered for an additional 5 minutes, allowing the chili to thicken slightly and the flavors to meld.
    8. Taste the chili and season with salt and black pepper as needed, stirring well to distribute the seasonings evenly.
    9. Remove from heat once the chili has thickened to your liking and is bubbling with rich aromas.
    10. Serve the chili hot in bowls, garnished with your favorite toppings if desired, and enjoy its hearty, layered textures.
    This chili isn’t just a dish; it’s an experience that invites cherished moments and nostalgic aromas to fill your home. It’s perfect for cozy evenings when a bowl can warm your hands and your heart. Sometimes, the simplest recipes hold the greatest stories, simmered slowly, tasted thoughtfully.

    As the flavors meld and the scent of spices fills your space, you’ll realize this isn’t just about eating. It’s about rediscovering the joy in slow cooking and the comfort of something truly homemade. Whatever your week has lacked, this dish will bring a bit of warmth and a pinch of joy.

  • Blue Raspberry Slushie: The Cold Concoction You Never Knew You Needed

    Blue Raspberry Slushie: The Cold Concoction You Never Knew You Needed

    Imagine standing on a hot sidewalk, the sun beating down, and suddenly a twinge of nostalgia hits you. That vibrant blue hue of a blue raspberry slushie isn’t just eye-catching—it’s a sensory invitation. Today, I’ll guide you through making a DIY version that bursts with summer flavor, guilt-free and refreshingly cool.

    This recipe dives into the cheerful chaos of childhood favorites with a modern twist that suits grown-up taste buds. You’ll notice how the tartness mingles with just enough sweetness, creating a balance that’s both lively and soothing. Just a few minutes, a handful of ingredients, and you’ll have a frozen treat perfect for any heatwave or spontaneous summer party.

    Blue Raspberry Slushie

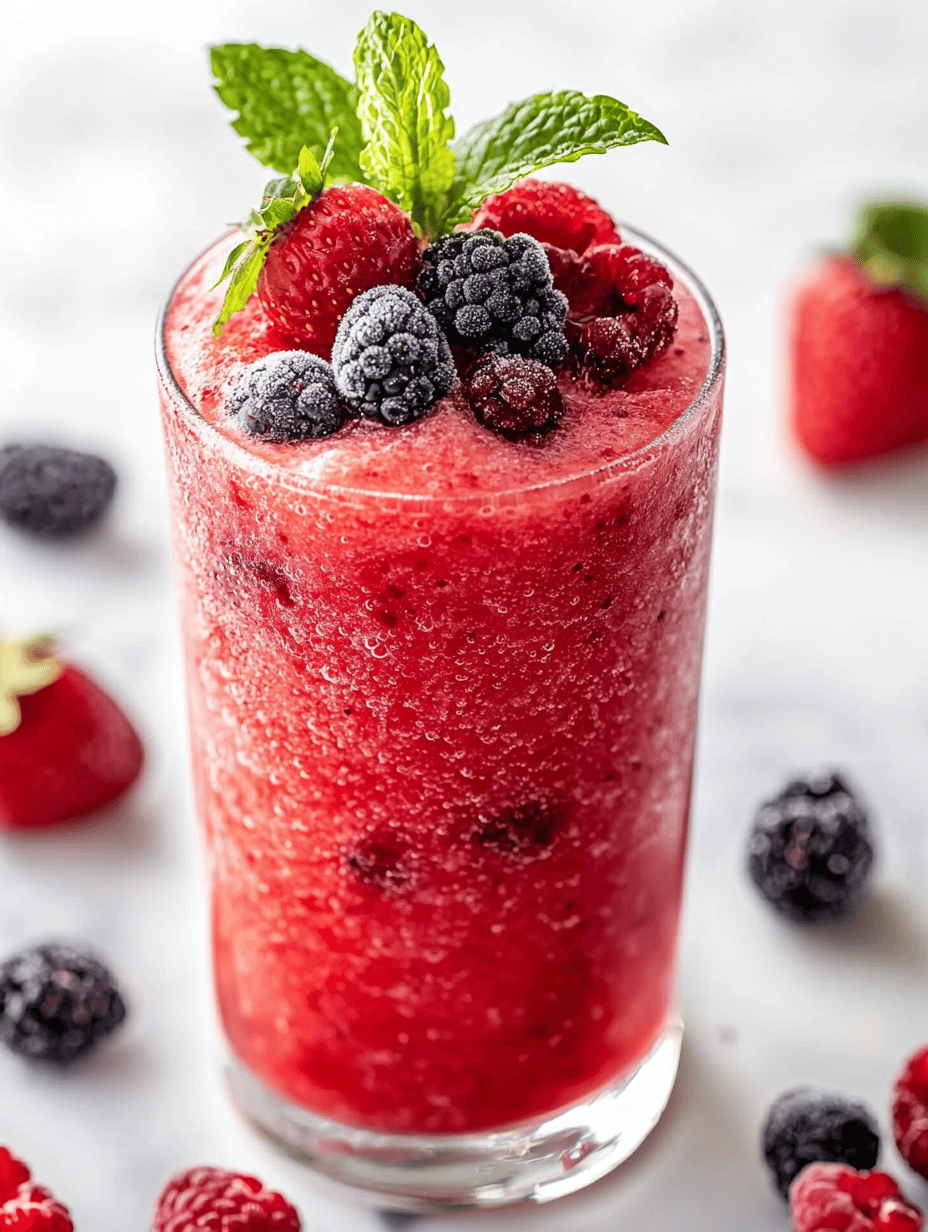
    This blue raspberry slushie is a frozen beverage made by blending frozen blue raspberry fruit or flavored ice with sweetener and lemon juice. It has a bright, icy texture with vibrant blue color, offering a tart and sweet flavor profile that’s both refreshing and visually eye-catching.
    Prep Time 10 minutes
    Total Time 10 minutes
    Servings: 2
    Course: Main Course
    Cuisine: American
    Calories: 120

    Ingredients
      

    • 2 cups frozen blue raspberry fruit or flavored ice or frozen blue raspberry concentrate
    • 2 tbsp granulated sugar adjust to taste
    • 1 tbsp lemon juice freshly squeezed for brightness
    • 1/2 cup water

    Equipment

    • Blender
    • Measuring cups and spoons

    Method
     

    1. Combine the water and sugar in a small saucepan over medium heat, stirring until the sugar dissolves completely and the syrup is clear. Remove from heat and let it cool slightly.
    2. Pour the cooled syrup into your blender, then add the frozen blue raspberry fruit or flavored ice along with the lemon juice.
    3. Blend on high until the mixture is smooth and icy, with a slushy consistency that looks thick and vibrant blue.
    4. Check the texture—if it’s too thick, add a splash of water and blend briefly to loosen. If it’s too liquid, add a few more frozen berries and blend again until desired consistency is reached.
    5. Pour the slushie into chilled glasses, allowing the bright blue beverage to mound attractively with icy peaks.
    6. Serve immediately with a colorful straw or a garnish of fresh berries for visual pop and added fun.

    Notes

    For an extra burst of flavor, add a few drops of blue raspberry extract. To make it dairy-free, skip creamy add-ins and stick to frozen fruits.

    Crafting this blue raspberry slushie at home transforms a simple snack into a small adventure. It’s more than just a cold drink—it’s your instant escape, wrapped in icy sweetness. During these warm days, a sip offers a cool burst of joy, a reminder of carefree afternoons.

    As summer winds unwind, this frosty delight keeps spirits high even when the heat tries to slow you down. No matter the occasion, this recipe ensures a quick blast of fun with every icy sip.

  • Spooky Sweetness: Halloween Graveyard Pudding Cups

    Spooky Sweetness: Halloween Graveyard Pudding Cups

    As October’s chill settles in, I love how desserts can transform into mini spooky landscapes. These Halloween Graveyard Pudding Cups do just that, turning a simple treat into a tiny eerie scene. The smell of rich chocolate mingling with the crunch of crushed cookies makes my kitchen feel alive with festive chaos.

    Crafting these requires just a few ingredients, but the visual impact is fantastic. Kids and adults alike are drawn to the eerie tombstones and the pretend dirt, making them perfect for any Halloween gathering. Let’s dive into creating a spooky, delicious centerpiece that’s as fun to make as it is to eat.

    Halloween Graveyard Pudding Cups

    These Halloween Graveyard Pudding Cups are layered desserts featuring rich chocolate pudding topped with crushed cookies to resemble dirt. Decorated with tombstone-shaped cookies and candy cobwebs, they create a spooky miniature landscape with a creamy, crunchy texture. The assembled cups resemble a disturbed graveyard, perfect for festive Halloween celebrations.
    Prep Time 15 minutes
    Cook Time 10 minutes
    Total Time 25 minutes
    Servings: 4
    Course: Main Course
    Cuisine: Halloween
    Calories: 250

    Ingredients
      

    • 2 cups milk for pudding
    • 1/4 cup unsweetened cocoa powder to add chocolate flavor
    • 1/2 cup powdered sugar for sweetness
    • 1 teaspoon vanilla extract
    • 1 package instant chocolate pudding mix prepared according to package instructions
    • 1 1/2 cups crushed chocolate cookies for dirt and texture
    • 4 large cookie tombstones store-bought or homemade, cut into tombstone shapes
    • Optional candy cobwebs or spider decorations for extra spooky effect

    Equipment

    • Mixing bowls
    • Whisk
    • Measuring cups and spoons
    • Serving cups or jars
    • Spoon or spatula
    • Baking sheet
    • Parchment paper

    Method
     

    1. Whisk together the milk, cocoa powder, powdered sugar, and vanilla in a large bowl until smooth and slightly thickened.
    2. Add the instant chocolate pudding mix to the mixture and whisk vigorously for about 2 minutes until well combined and beginning to thicken.
    3. Spoon or pipe the chocolate pudding into individual cups or jars, filling each about two-thirds full.
    4. Gently top the pudding layers with crushed cookies to resemble loose dirt and create a rough, uneven surface for the graveyard scene.
    5. Place cookie tombstones into the crushed cookie surface, sticking them upright to resemble gravestones.
    6. Decorate the scene by adding candy cobwebs or small spider decorations on and around the tombstones for a spooky effect.
    7. Repeat layering and decorating in remaining cups for a full set of spooky graveyard scenes, then chill in the refrigerator for at least 15 minutes before serving.

    Notes

    For easier assembly, prepare the pudding in advance and have everything set up before layering. Using store-bought tombstone cookies simplifies the process, but you can also cut out shapes from sturdy cookies or graham crackers. Chill the assembled cups to help set the decorations and improve flavor.

    These graveyard pudding cups are a perfect way to bring a touch of spooky fun to your dessert table. Their quirky, chaotic look is matched by the irresistible taste of chocolate and vanilla layers.

    Enjoy the process of decorating and the delight on everyone’s faces as they discover the little edible graveyard. With minimal effort and maximum spookiness, these cups will become a highlight of your Halloween festivities.

  • Unconventional Fall Casserole You Haven’t Tried Yet

    Unconventional Fall Casserole You Haven’t Tried Yet

    Fall always whispers comfort, but my obsession is how casseroles transform humble ingredients into cozy masterpieces. I love experimenting with fall vegetables that often go unnoticed—think parsnips, kohlrabi, or even sweet potatoes that aren’t roasted but baked into something new. This recipe is a brave twist, spotlighting those overlooked gems.

    In the midst of pumpkin spice everything, I crave a dish that surprises my palate while still embracing the season’s warmth. There’s joy in layering flavors and textures—crisp topping, tender veggies, gooey cheese—that come together in a casserole that feels both nostalgic and exciting. It’s the kind of dish that turns a busy weeknight into a special occasion.

    Fall Vegetable Casserole with Crispy Topping

    This casserole features a blend of fall vegetables such as parsnips, kohlrabi, and sweet potatoes baked until tender, with a crunchy breadcrumb and cheese topping. The dish combines layered textures—soft vegetables beneath a crisp crust—creating a comforting, hearty presentation perfect for the season.
    Prep Time 20 minutes
    Cook Time 40 minutes
    Total Time 1 hour
    Servings: 4
    Course: Main Course
    Cuisine: comfort food
    Calories: 320

    Ingredients
      

    • 2 cups parsnips, peeled and sliced preferably uniform slices for even cooking
    • 2 cups kohlrabi, peeled and cubed
    • 2 cups sweet potatoes, peeled and cubed
    • 2 tablespoons olive oil for roasting vegetables
    • 1 cup shredded cheese cheddar or Gruyère work well
    • 1 cup bread crumbs preferably panko for crunch
    • 2 tablespoons butter, melted
    • 1 teaspoon fresh thyme, chopped

    Equipment

    • Chef’s knife
    • Cutting board
    • Large mixing bowl
    • Baking Dish
    • Small bowl
    • Grater
    • Oven

    Method
     

    1. Preheat your oven to 375°F (190°C) and lightly grease a baking dish.
    2. Combine sliced parsnips, cubed kohlrabi, and sweet potatoes in a large bowl. Drizzle with olive oil, season with salt, pepper, and chopped thyme, then toss to coat evenly.
    3. Spread the seasoned vegetables evenly in the prepared baking dish, creating a layered base.
    4. Bake the vegetables uncovered for about 25-30 minutes, or until they are tender and slightly browned around the edges.
    5. While the vegetables bake, prepare the crispy topping by mixing bread crumbs with melted butter and chopped thyme in a small bowl.
    6. Sprinkle the shredded cheese evenly over the roasted vegetables, then spread the buttered bread crumb mixture on top.
    7. Return the dish to the oven and bake for an additional 10-15 minutes, until the topping is golden brown and crispy, and the cheese is melted and bubbly.
    8. Remove from the oven and let it rest for a few minutes. Serve warm to enjoy the soft vegetables contrasted with the crunchy topping.
    As the crisp air settles in, this casserole becomes my go-to comfort food with a twist. It’s perfect for potlucks or cozy family dinners when everyone craves something familiar yet unexpected. Trust me, those little extra veggies tucked inside will have everyone asking for seconds.

    This recipe captures the essence of fall—the earthy smells, the vibrant colors, and the comforting textures. It’s a reminder that you can reinvent classics with just a few unusual ingredients, making every meal an adventure. And honestly, that’s what makes spilling hot gravy all over the plate somehow worth it.

  • Spooky Delicious: Halloween Mummy Meatballs for All Ages

    Spooky Delicious: Halloween Mummy Meatballs for All Ages

    Halloween is the perfect time for playful bites that bring out both nostalgia and creativity. These Mummy Meatballs transform a simple comfort food into a spooky centerpiece that delights kids and adults alike. The aroma of seasoned beef mingling with crispy cheese strips is as festive as it is irresistible.

    I love how these meatballs combine a familiar dish with just enough whimsy to surprise your guests. Wrapping them in ghostly strips of cheese makes each bite a tiny horror movie scene—delicious and fun. Plus, they bake quickly, leaving you free to focus on other spooky festivities.

    Halloween Mummy Meatballs

    These meatballs are made from seasoned ground beef mixed with herbs and breadcrumbs, shaped into small balls, baked until golden brown, and then wrapped in strips of cheese to resemble mummies. The final dish features juicy, tender meatballs with crispy cheese bandages that create a playful Halloween presentation.
    Prep Time 20 minutes
    Cook Time 25 minutes
    Total Time 45 minutes
    Servings: 4
    Course: Main Course
    Cuisine: American
    Calories: 280

    Ingredients
      

    • 1 1/2 pounds ground beef 80% lean
    • 1/2 cup breadcrumbs
    • 1 large egg
    • 2 cloves garlic minced
    • 1 tablespoon fresh parsley chopped
    • to taste salt and pepper
    • 8 ounces cheddar cheese sliced into thin strips
    • optional baking spray or oil

    Equipment

    • Baking sheet
    • Mixing bowls
    • Cooking spoon
    • Baking parchment or silicone mat

    Method
     

    1. Preheat your oven to 400°F (200°C). Line a baking sheet with parchment paper or a silicone baking mat for easy cleanup.
    2. In a large mixing bowl, combine the ground beef, breadcrumbs, egg, minced garlic, chopped parsley, and a pinch of salt and pepper. Mix everything together gently until well incorporated, being careful not to overmix.
    3. Use your hands to shape the mixture into small, uniform meatballs about 1 to 1.5 inches in diameter. Place them evenly spaced on the prepared baking sheet.
    4. Bake the meatballs in the preheated oven for about 20-25 minutes, or until they are browned and cooked through. You should hear a gentle sizzle and see the meatballs develop a firm texture.
    5. Remove the cooked meatballs from the oven and let them cool slightly so they are easy to handle.
    6. Take thin slices of cheese and carefully wrap each meatball in strips to resemble a mummy, leaving small gaps for ‘eyes’ or just overlapping for a bandaged effect. Ensure the cheese sticks well and covers most of each meatball.

    Notes

    You can add small olive or peppercorn pieces on top of the cheese to mimic eyes for extra spooky effect.
    This recipe is a seasonal favorite that brings a little chaos to the dinner table with minimal fuss. It’s perfect for parties, potlucks, or a fun family dinner that sparks laughter and delight.

    As autumn air fills your kitchen, these Mummy Meatballs are sure to be a hit. Their cheesy, savory aroma is a warm reminder that holiday treats don’t have to be complicated to be memorable.